Are you transitioning from a Windows SysAdmin to a DevOps Engineer and want to continue using your PowerShell skills? One of the ways you can do this is to configure Jenkins to use PowerShell.
Overview
When you create a Jenkins job, you can run Linux Shell or Windows bash commands to automate tasks. However, running PowerShell commands is not included by default.
Fortunately, there is a way to set up PowerShell to display as an option in your Jenkins jobs. This guide covers the steps to run PowerShell commands as part of your Jenkins build steps.
Follow the steps below to start using PowerShell in your Jenkins job automation:
Step 1: Install the Jenkins PowerShell Plugin
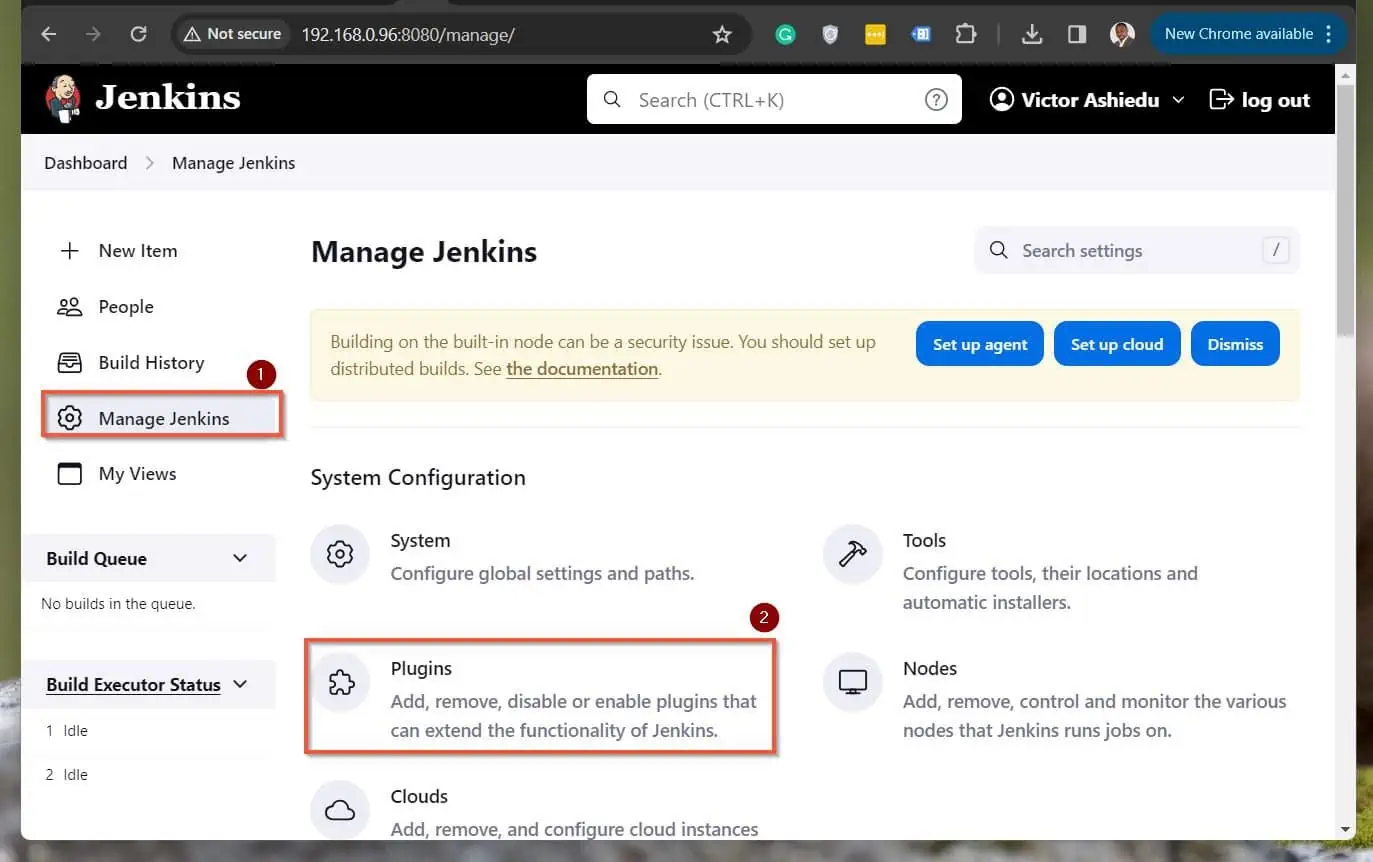
- Login to your Jenkins server and click Manage Jenkins => Plugins
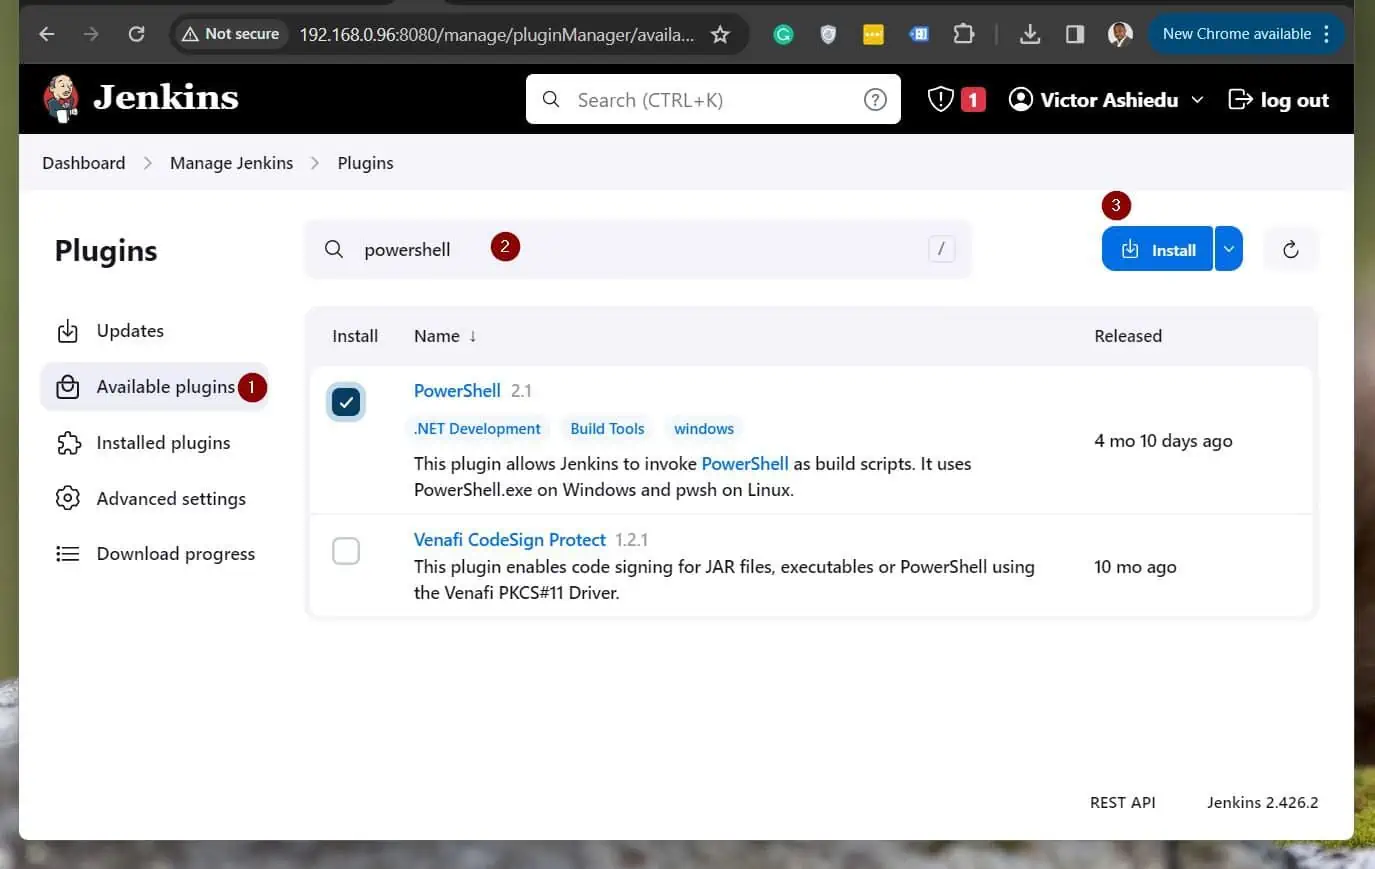
- To install the Jenkins PowerShell plugin, click the “Available plugins” node on the left pane. Then, type “powershell” on the search bar, finally, check the box next to the PowerShell plugin and click “install.”
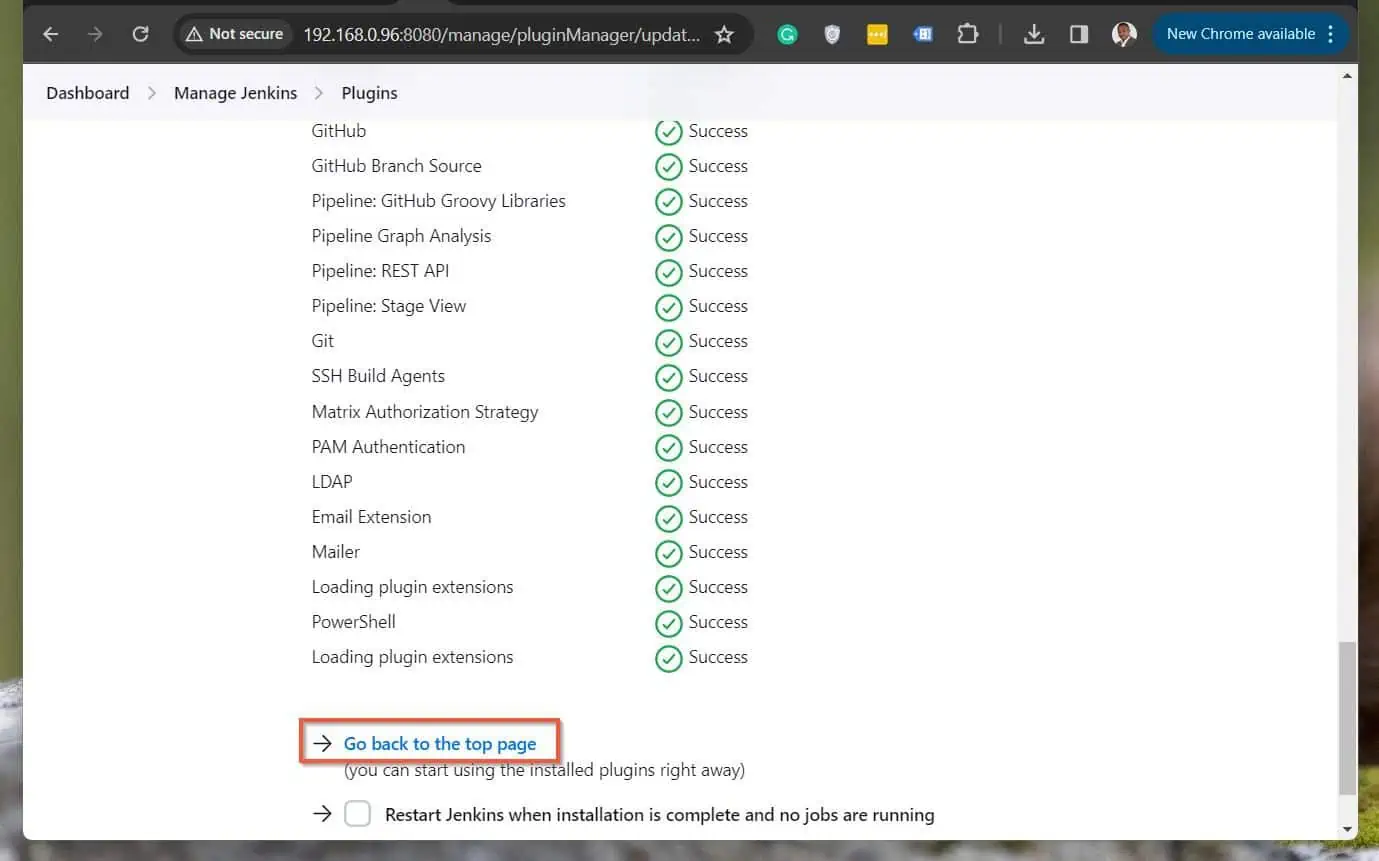
- Finally, wait for the plugin to install, scroll down, and click “Go back to the top page.”
Step 2: Test Jenkins PowerShell Plugin
After completing the first step in configuring Jenkins to use PowerShell, let’s test it. To accomplish this, we would create a Jenkins FreeStyle job and add a PowerShell command.
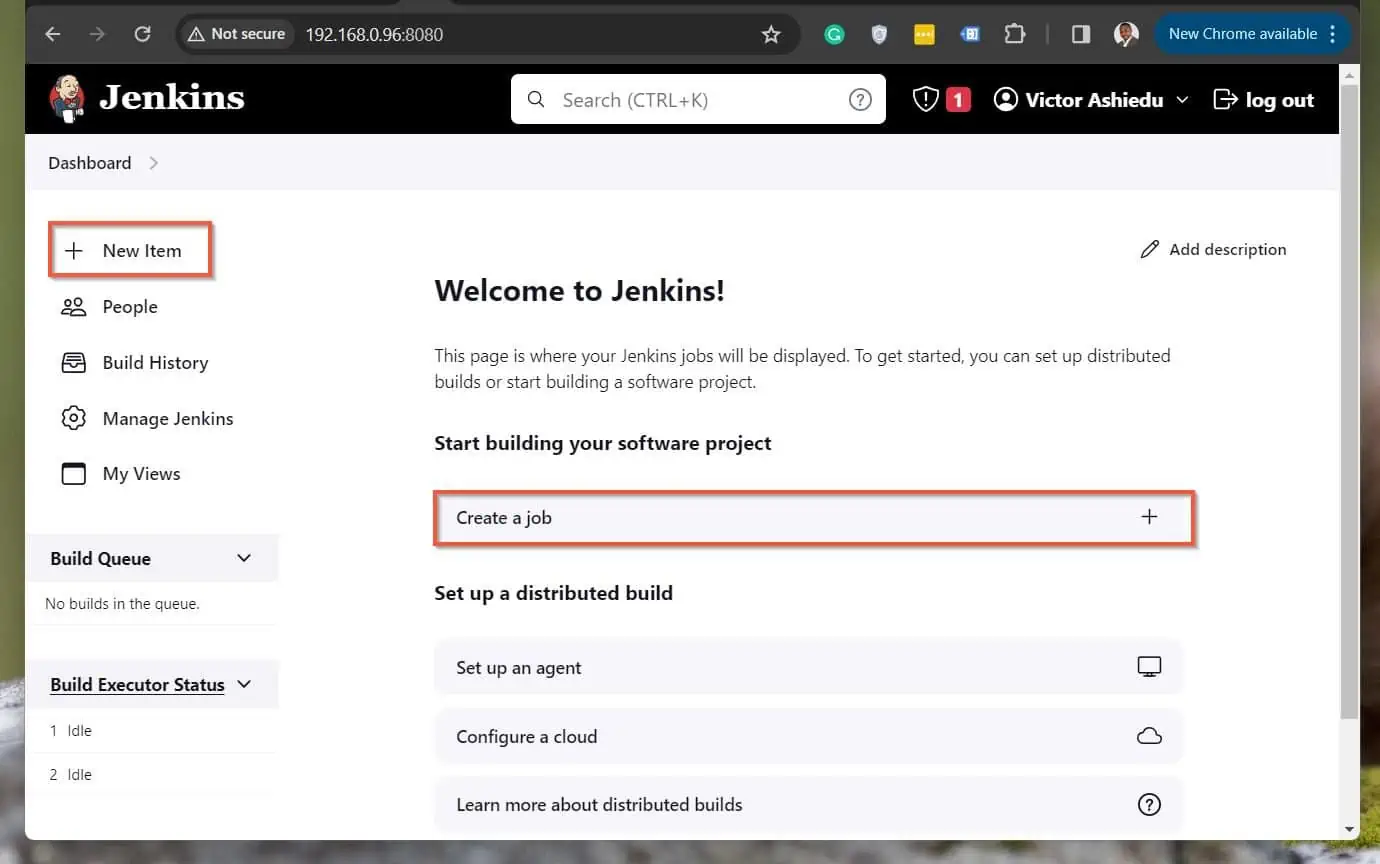
- To create a FreeStyle project, from the Jenkins Dashboard, click “+ New item” or “Create a job +”.
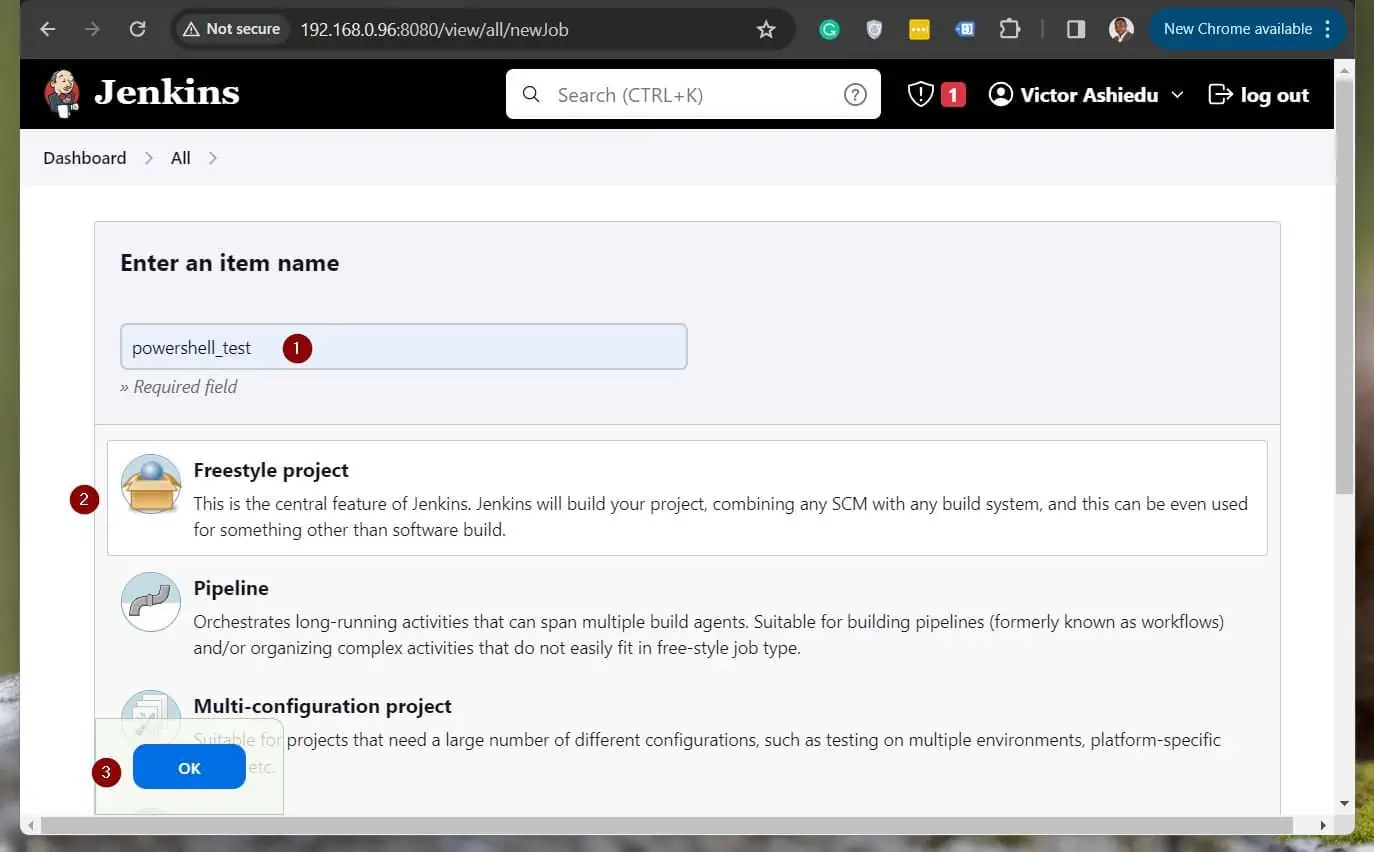
- After that, give the Jenkins job a name, select Freestyle project, and click OK. Jenkins will create the job and open it for editing.
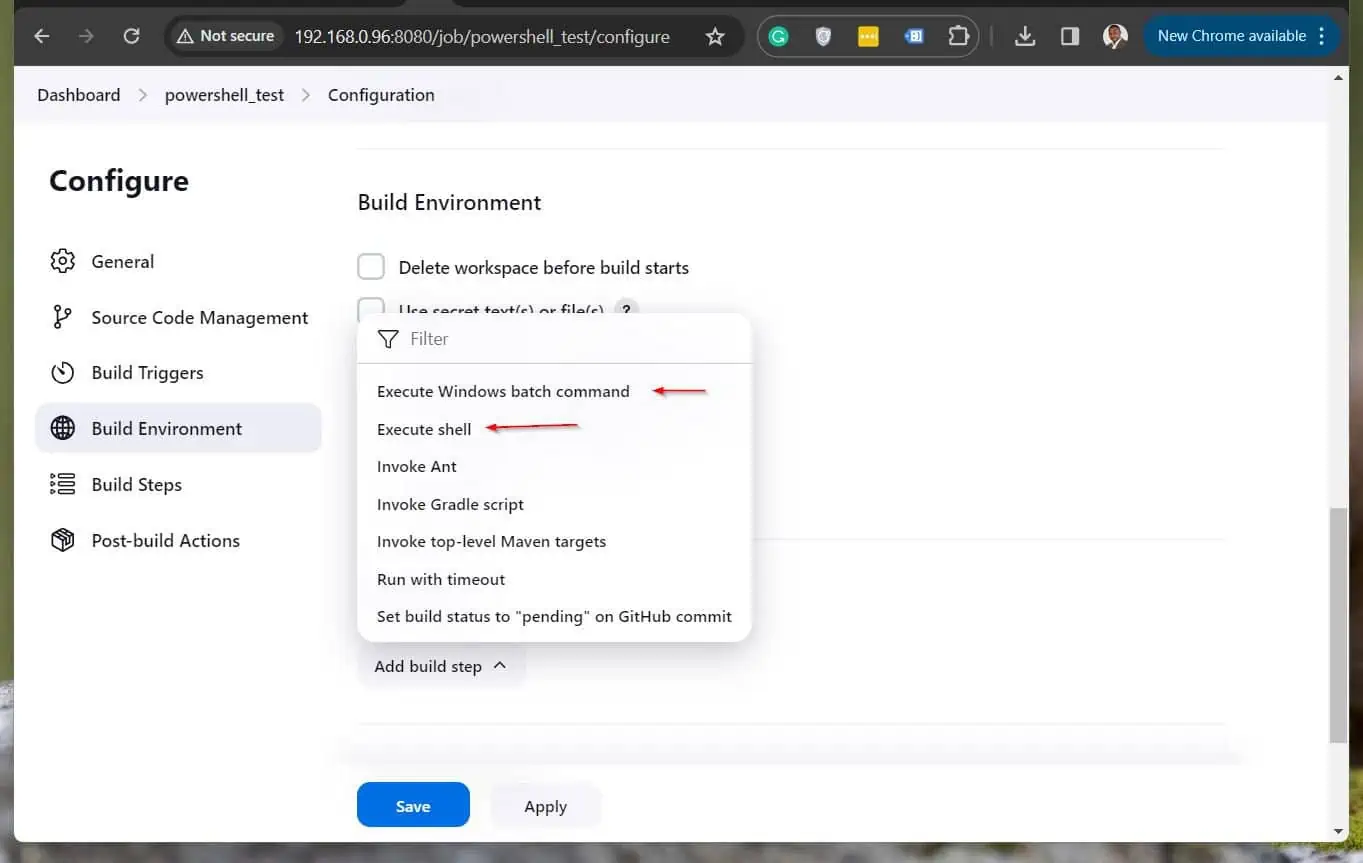
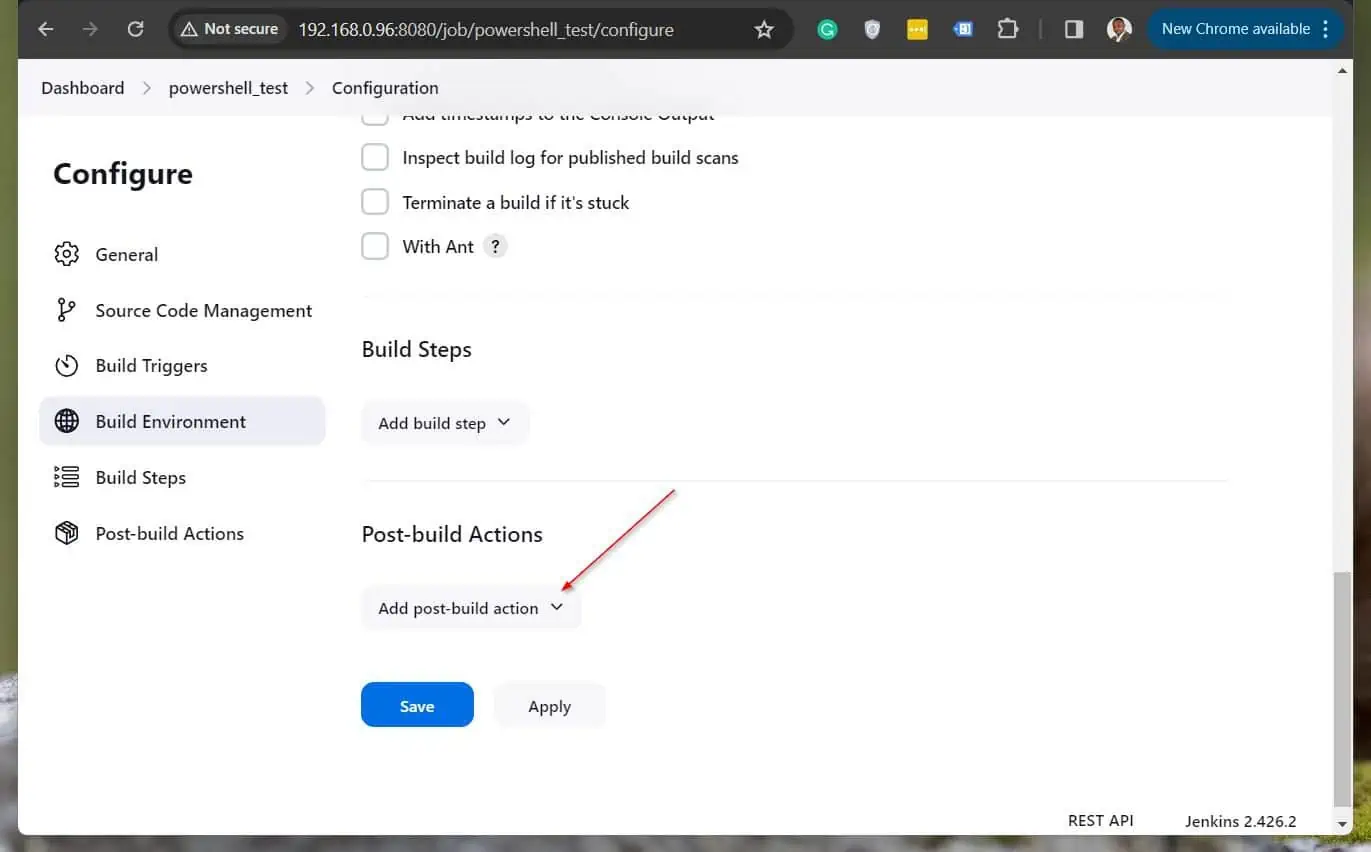
- Scroll down to the “Build Steps” section of the job and click the “Add build step” drop-down.
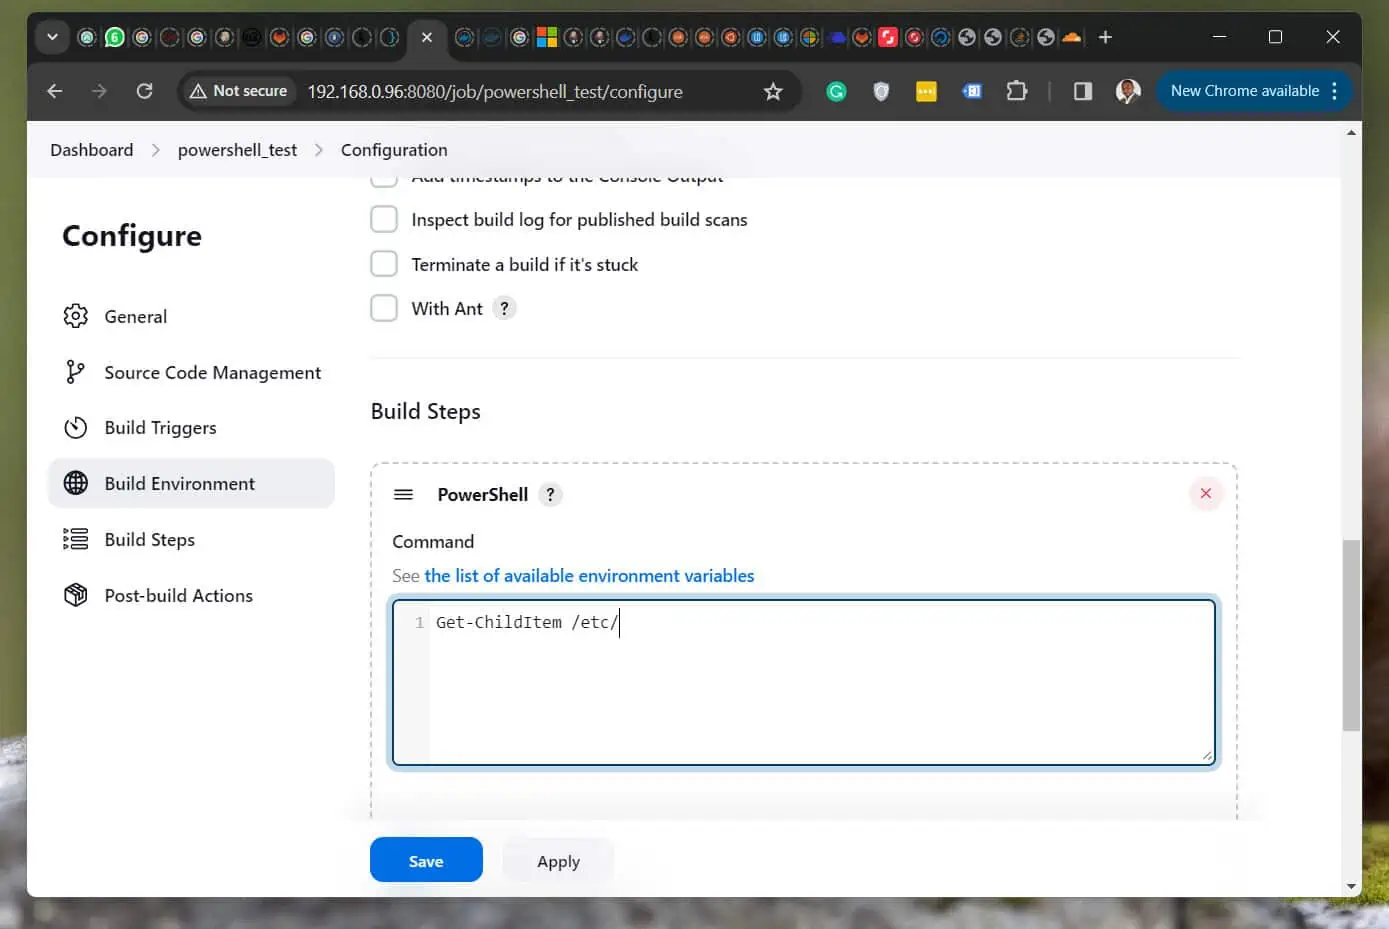
- As the screenshot below confirms, PowerShell is now available as an option! Select it.
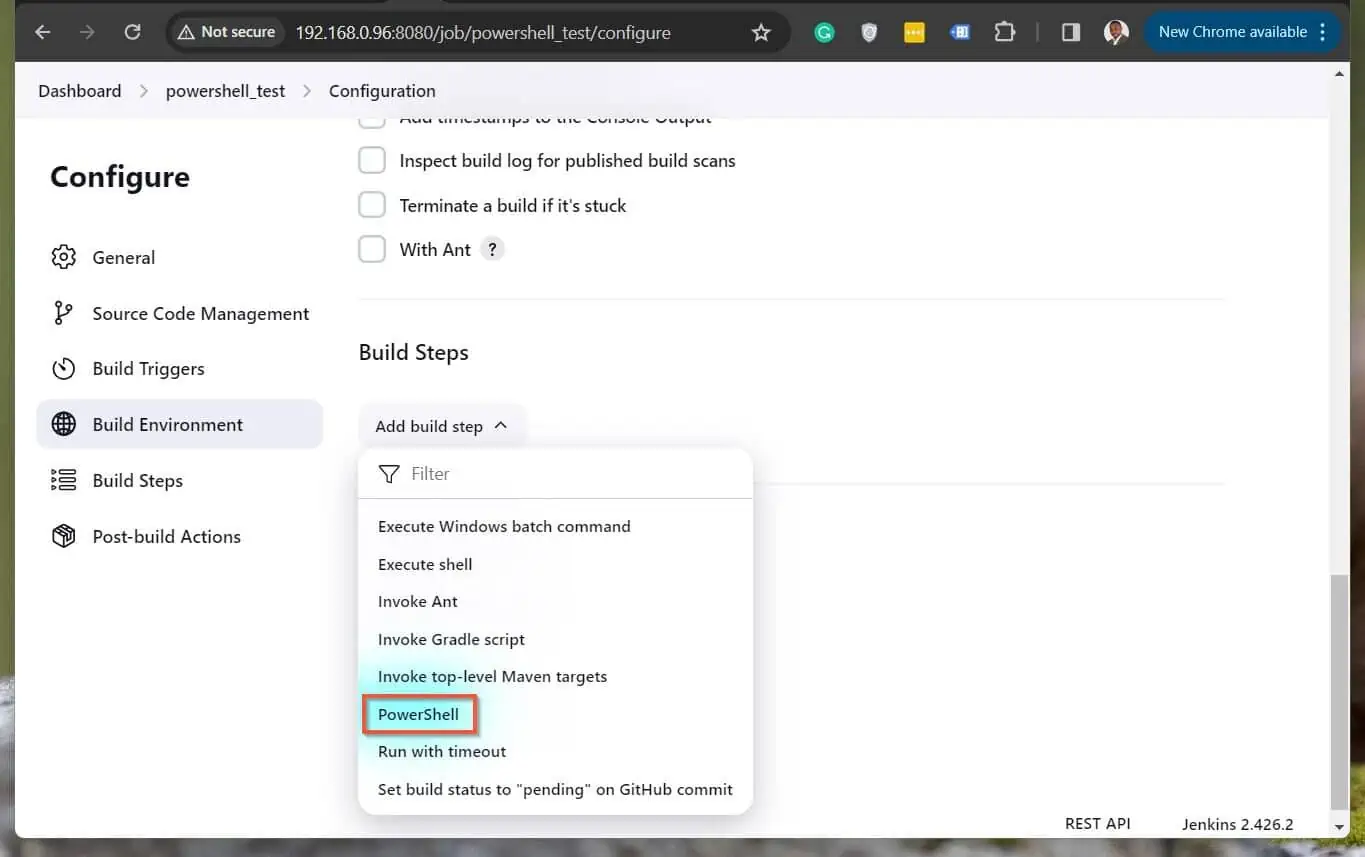
- Finally, on the PowerShell field, enter a simple command – Get-ChildItem /etc/ – and click the Save button.
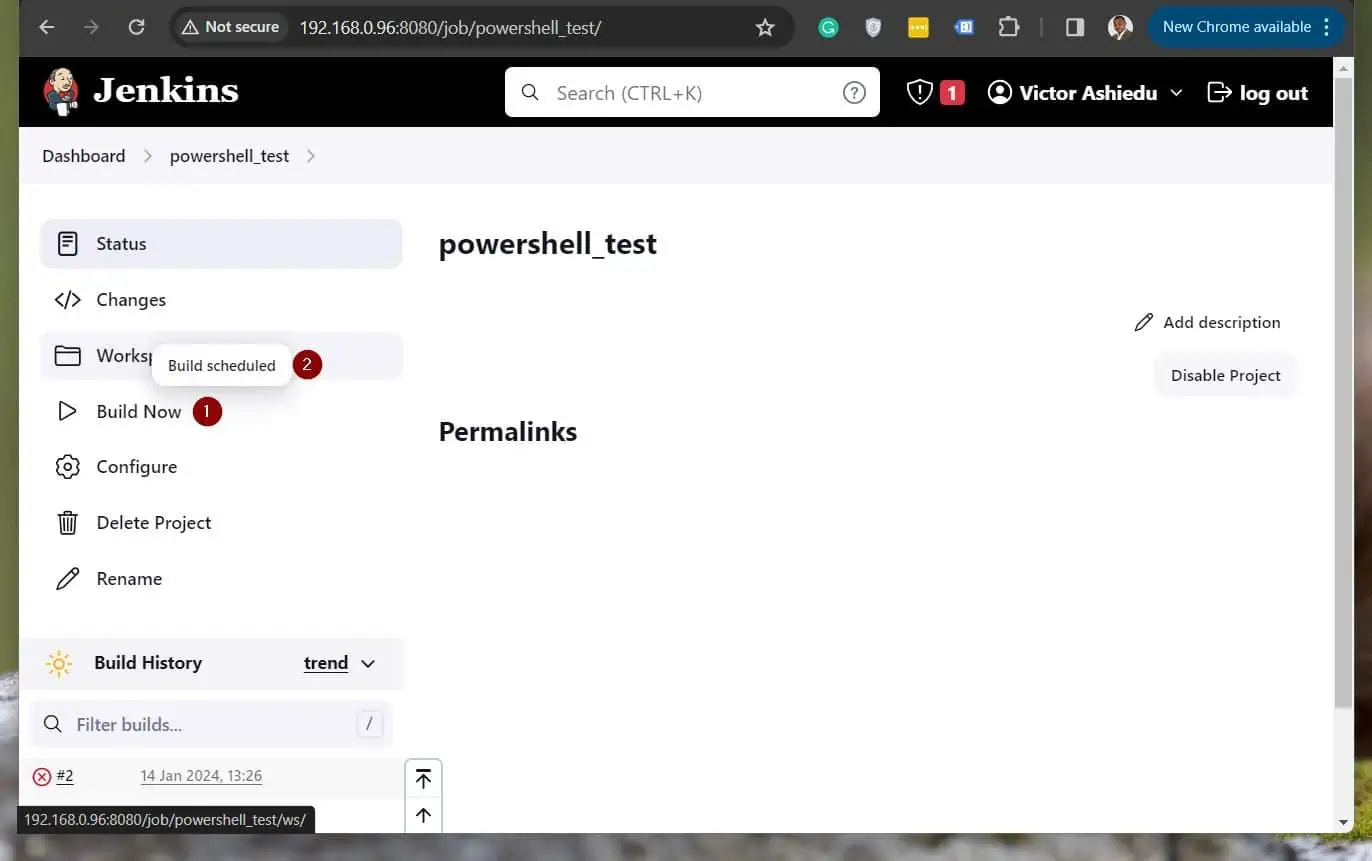
6. Back on the Jenkins project, click the “Build Now” button, then select “Build scheduled.”
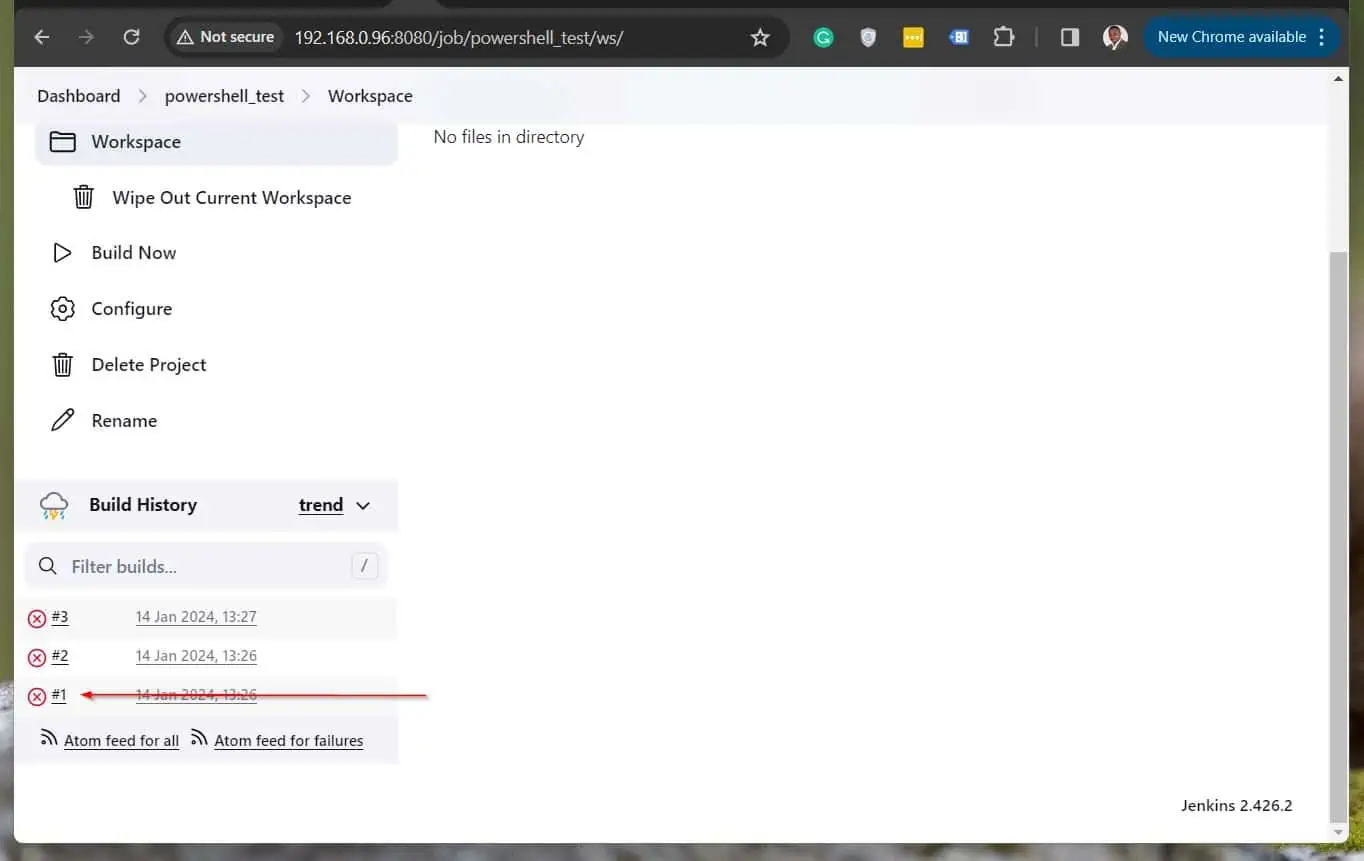
The build will fail. To see the build details, scroll down to “Build History” and click one of the jobs.
Looking at the job’s build console output reveals why it failed. The job was trying to run the PowerShell (pwsh) command but PowerShell is NOT installed on the Jenkins server.
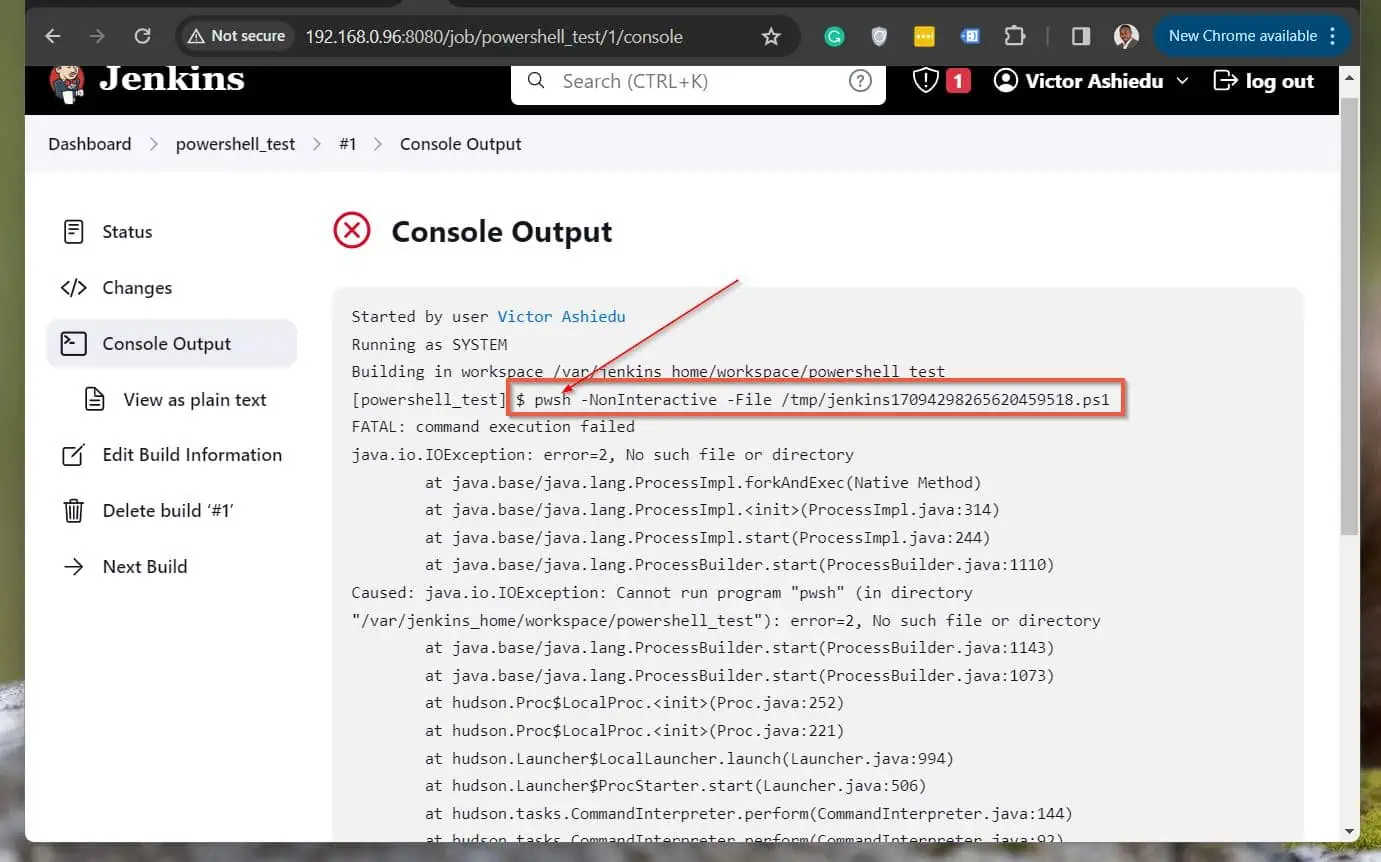
This is why the job failed. To fix this problem, we need to install PowerShell on the Jenkins server.
The next section explains the steps to accomplish this.
Step 3: Install PowerShell on Your Jenkins Server
The final step to set up Jenkins to use PowerShell is to install PowerShell on the Jenkins host server.
If Jenkins is running directly on the Ubuntu server, you must install PowerShell on the server. However, if you started Jenkins as a Docker Container, you must install PowerShell on the container.
In my case, my Jenkins server is running as a Docker container, so I’ll install PowerShell on the container. Here is the step-by-step walkthrough:
- Log in to the Jenkins Docker container as root by running the “Docker exec” command below:
sudo docker ps #returns the container ID
sudo docker exec -u 0 -it 977a52341f9a bash #logs into the container as root
The “-u 0” parameter signs you in as root. On the other hand, the “-it” parameter signs you in “interactively.”
The string, 977a52341f9a is my Jenkins container’s ID while adding “bash” to the end opens the BASH prompt. Here is the output of the command.

The part of the screenshot I labeled (1) shows that I’m signed in to my Docker container – 977a52341f9a is my container’s ID. Meanwhile, the # sign indicates that I’m signed in as root.
- To install PowerShell, we must first determine the Linux Distro running on the Docker container. To get this information, execute the command below:
cat /etc/os-release
The command confirms that my container is running the Debian Linux Distro.

This information will help me determine the Microsoft script to install PowerShell. Therefore, since my container’s Distro is Dabien, I will use the Installing on Debian script.
Here is the modified script – I removed “sudo” as we do not require that on a container – we signed in as root!
###################################
# Prerequisites

# Update the list of packages
apt-get update

# Install pre-requisite packages.
apt-get install -y wget

# Download the PowerShell package file
wget https://github.com/PowerShell/PowerShell/releases/download/v7.4.0/powershell_7.4.0-1.deb_amd64.deb

###################################
# Install the PowerShell package
dpkg -i powershell_7.4.0-1.deb_amd64.deb

# Resolve missing dependencies and finish the install (if necessary)
apt-get install -f

# Delete the downloaded package file
rm powershell_7.4.0-1.deb_amd64.deb

# Start PowerShell
pwsh
Before you proceed, run the “apt update” command to update the package manager.
Then, copy the above script, paste it into your container’s console, and click Enter.
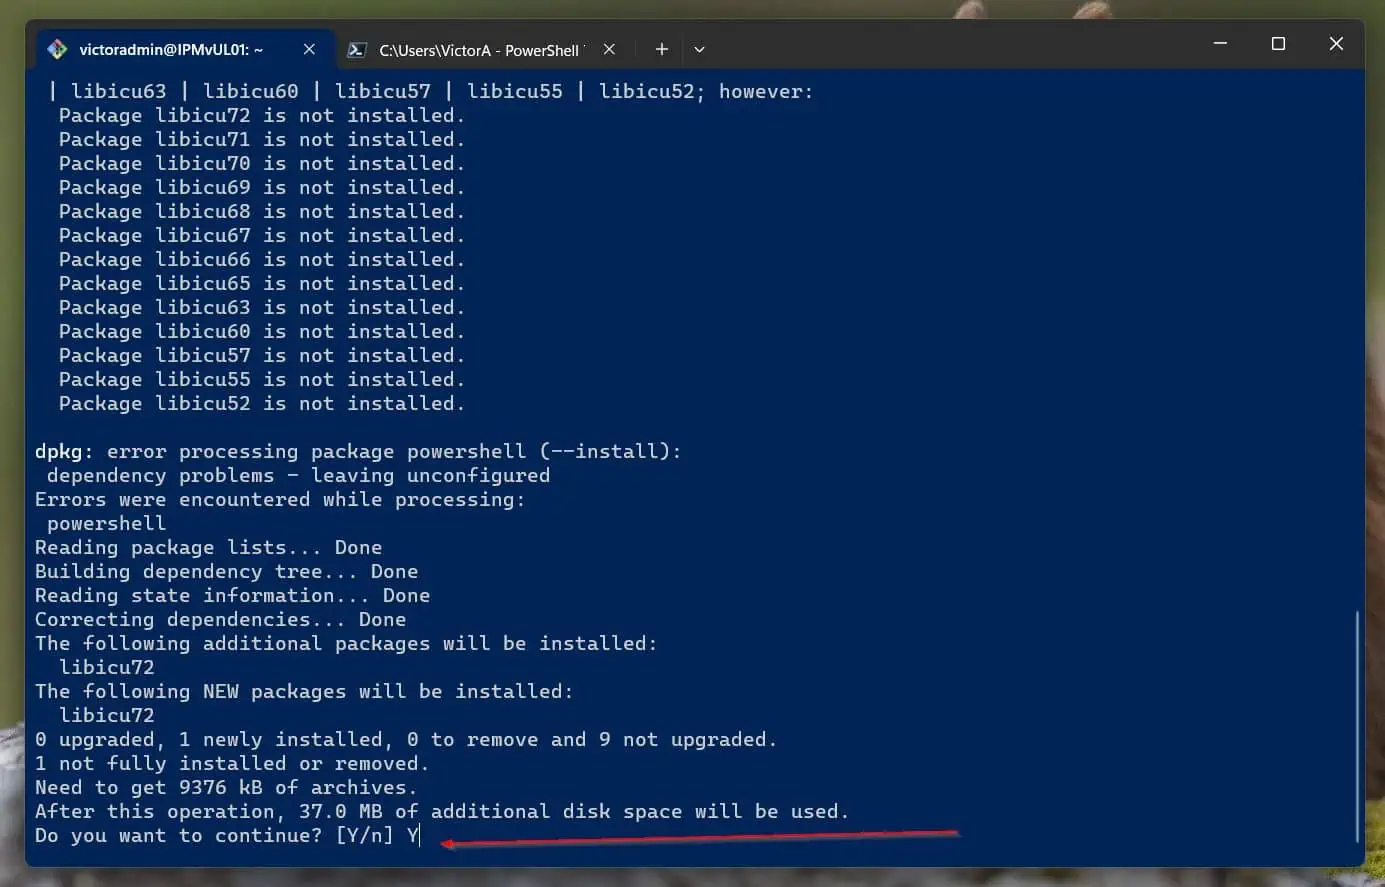
When you run the command, you’ll be prompted to confirm the installation. Type Y and hit the enter key.
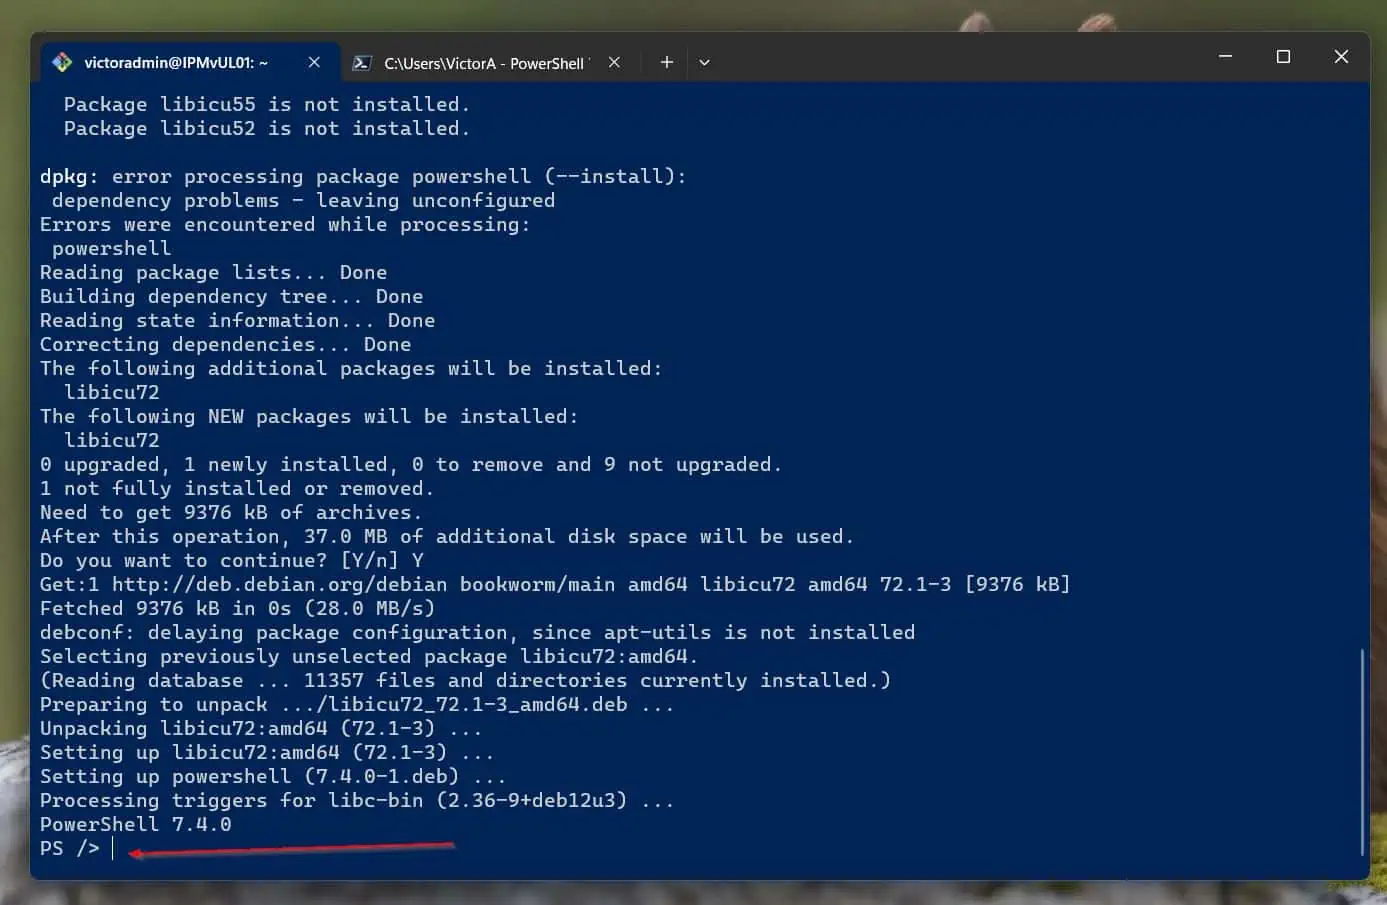
When the script finishes running it opens the PowerShell console, confirming that we have successfully installed PowerShell on our Docker container.
- To exit PowerShell and return to the container’s shell, execute the “exit” command. Additionally, to exit the container, execute “exit” again.
Step 4: Rebuild the Jenkins Job and Test
Now that we have installed PowerShell on the Jenkins server (the Docker container in my example), we can rebuild the job and see if it runs successfully.
- Log in to the Jenkins server via the browser and open the PowerShell project.
- After that, click the “Build Now” button, then select “Build scheduled.”
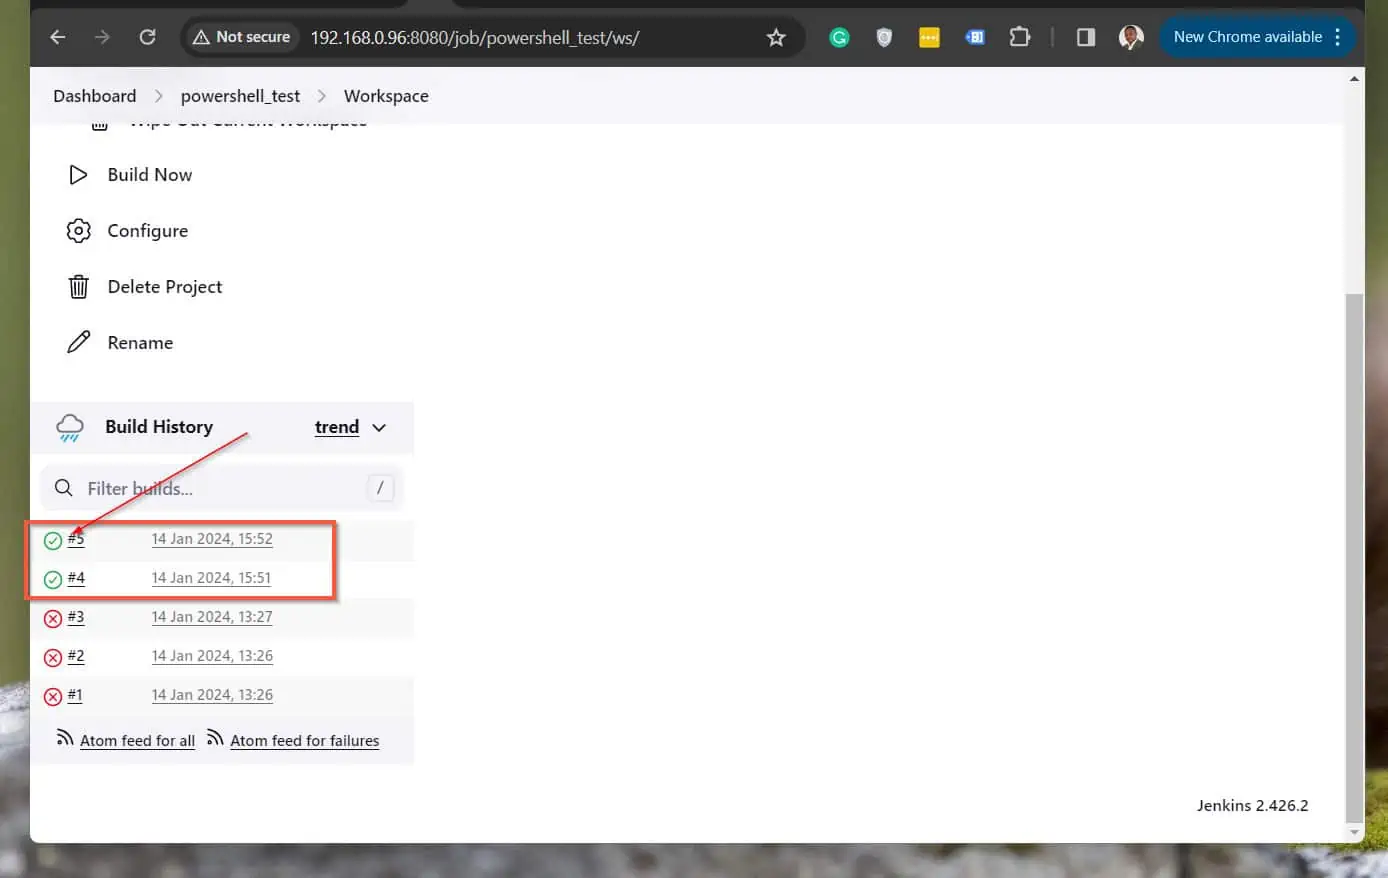
- When the build job finishes running, scroll down to the “Build History” section. The build should now be successful. Click on the last build job.
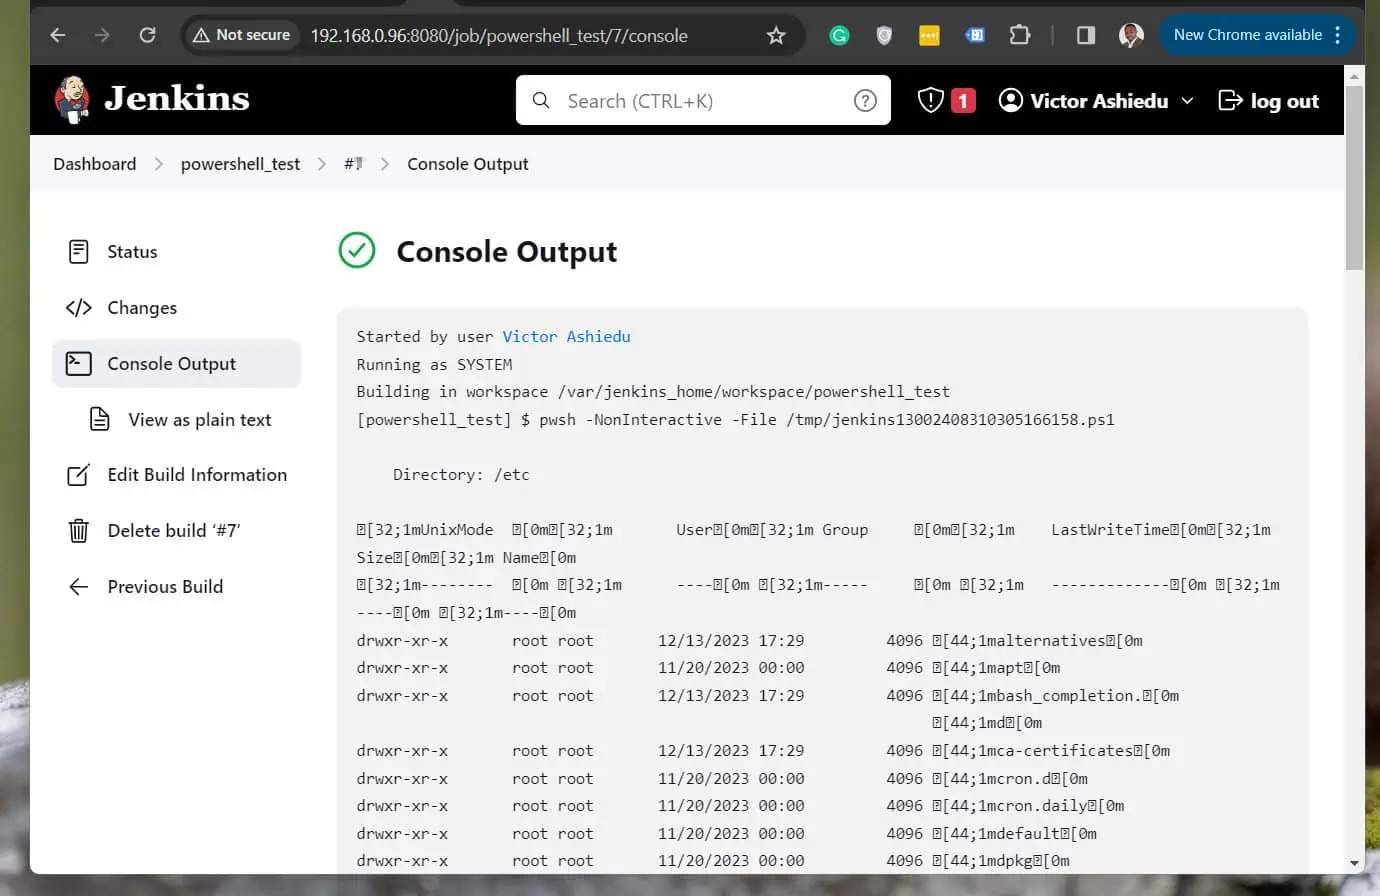
- Finally, click on “Console Output”
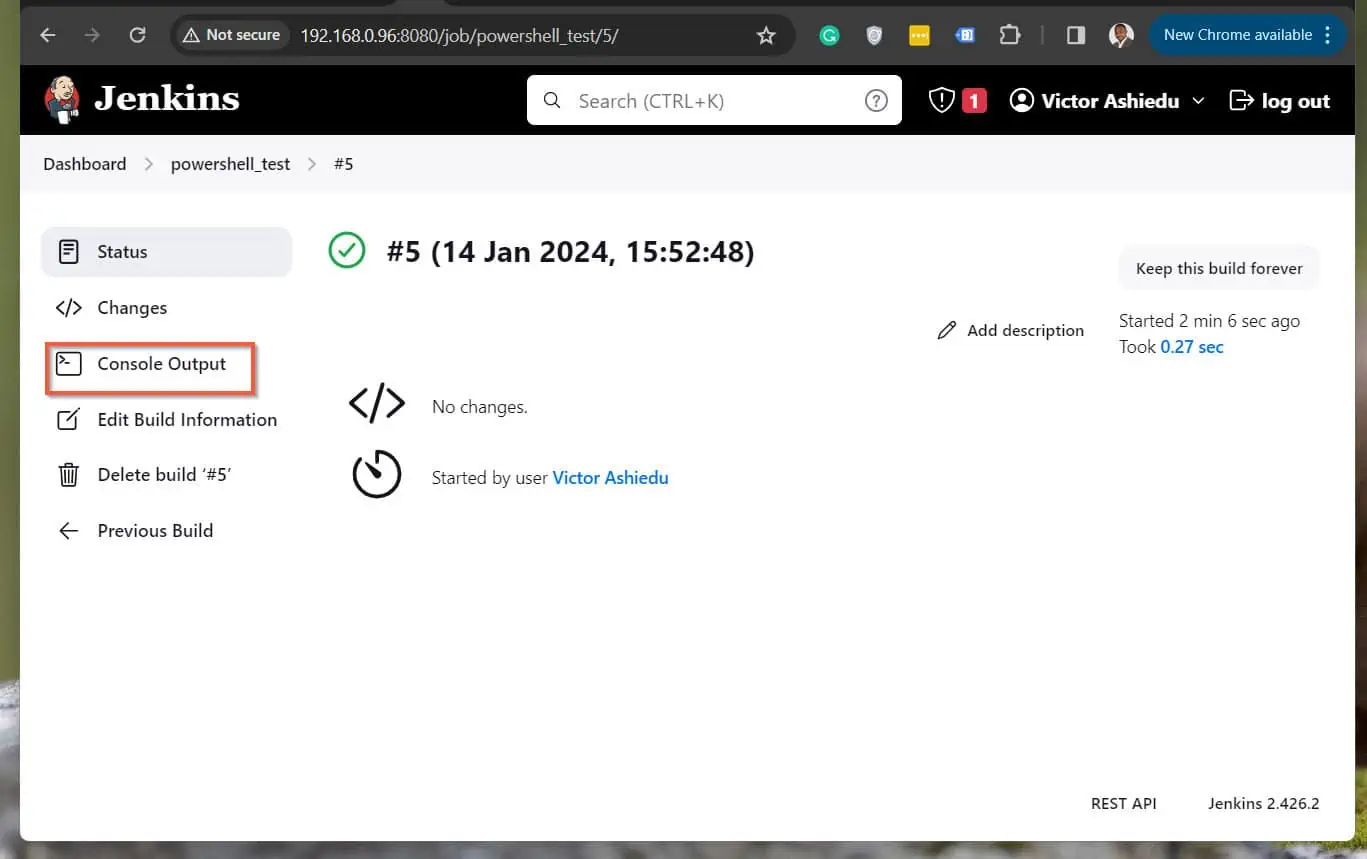
The details of the build jobs confirmed that the “Get-ChildItem” command ran successfully!
Conclusion
Although the command we used for this demo is simple, it confirms that after setting up Jenkins to use PowerShell, you can automate Jenkins jobs using PowerShell commands.
We hope you improved your DevOps skills one notch by reading this guide. We would love to hear your thoughts.
Use the Comments form at the end of this page to share your thoughts or ask questions about this topic or any DevOps question.
Alternatively, you can respond to the “Was this page helpful?” question below.