Ever wanted to take full ownership of a folder on your Windows 11 PC? This guide teaches you how to take ownership of a folder in Windows 11.
Option 1: Take Ownership of Folder From Folder Security Properties
The first and easiest way to take ownership of folders in Windows 11 is from the folder’s security properties. The steps below show you how to achieve that aim.
- Go to a folder you wish to take ownership of and right-click it. Then, click on Show more options at the bottom of the menu that appears.
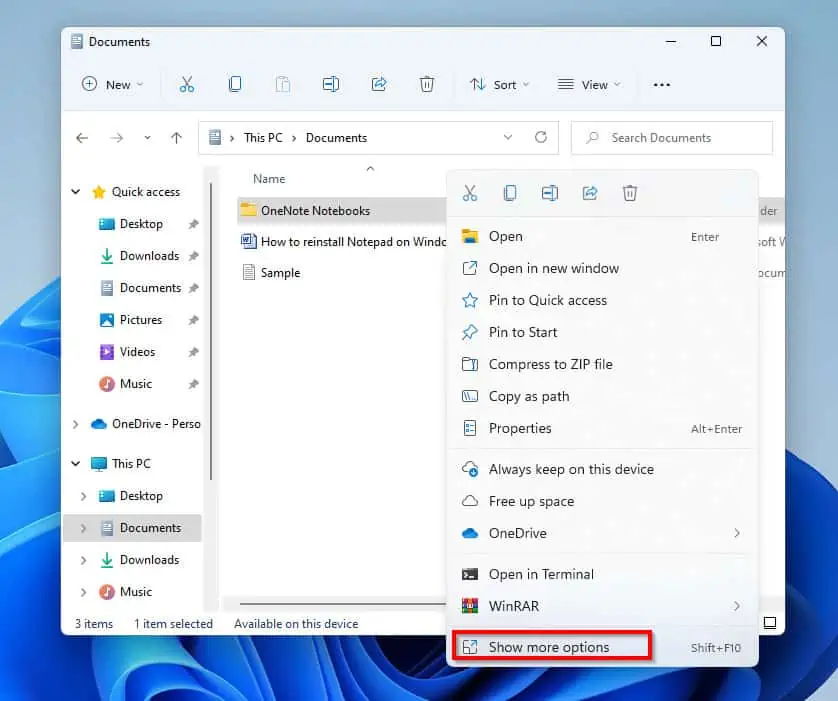
- After clicking on Show more options, an expanded menu will appear. At the bottom of this expanded menu, click on Properties.
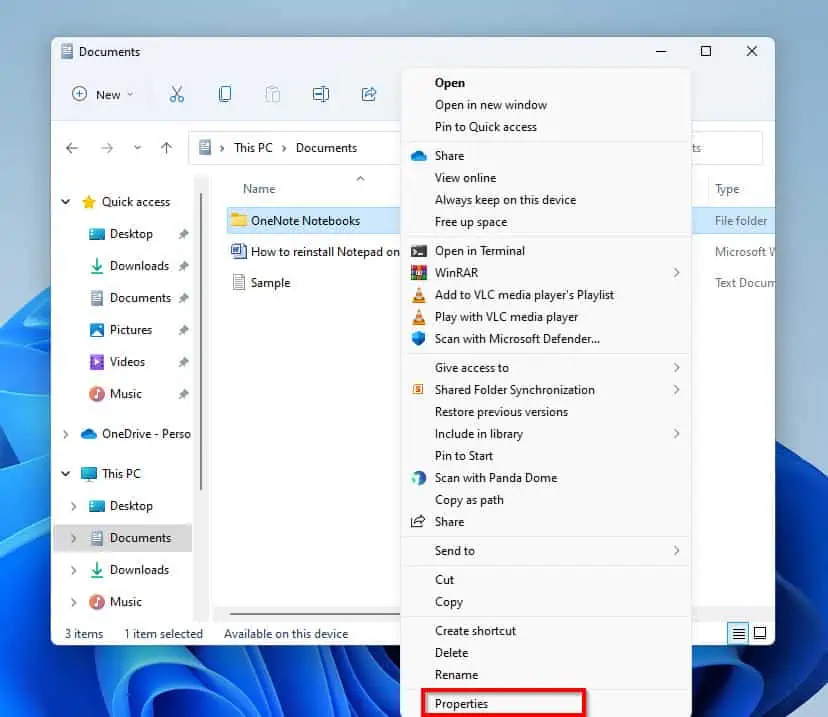
- As expected, clicking on the Properties button reveals the folder’s properties. On the folder’s properties, click on the Security tab.
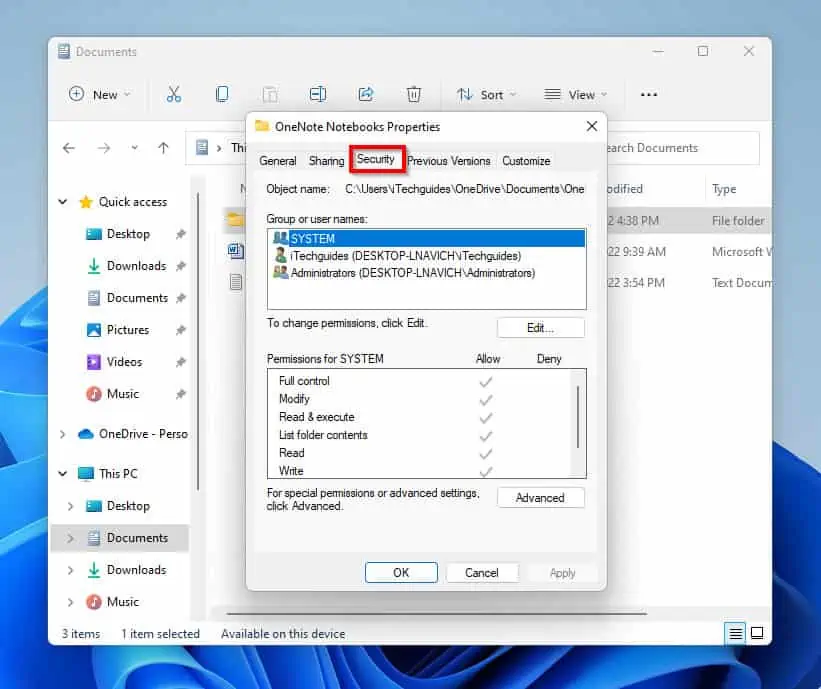
- Next, beneath the Group or user names:, select SYSTEM. Then, on the right side of “For special permissions or advanced settings, click Advanced”, click Advanced.

- When the Advanced security settings of the folder open, beside the name of the current owner, click Change.
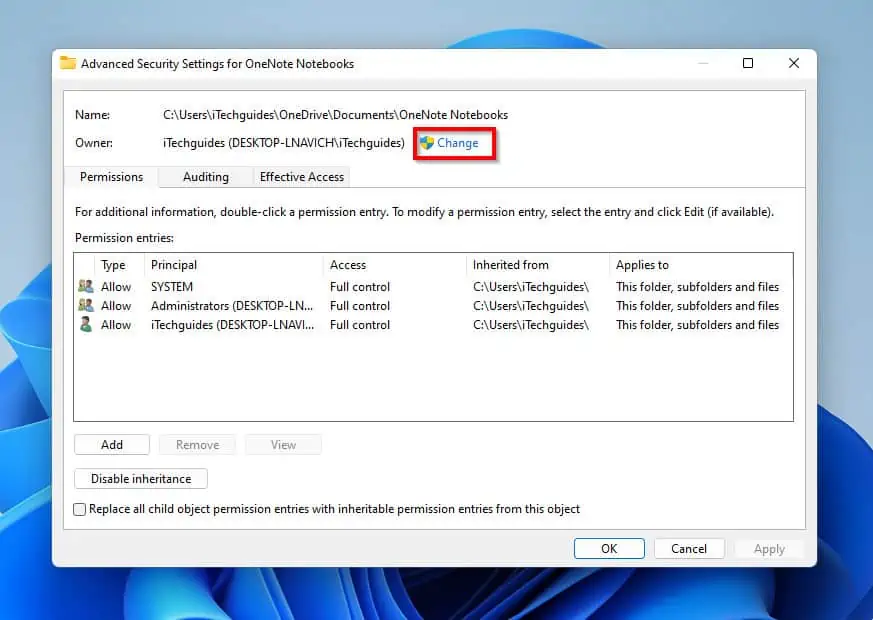
- On the Select User or Group pop-up page, type administrator on the “Enter the object name to select” space. After that, click Check Names.
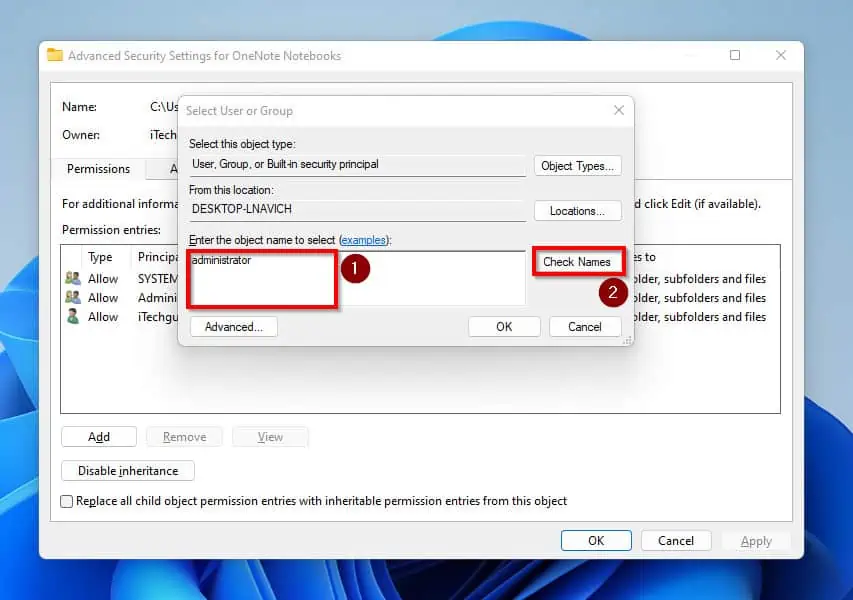
- After that, Windows 11 should find the name of the computer. Thereafter, click OK.
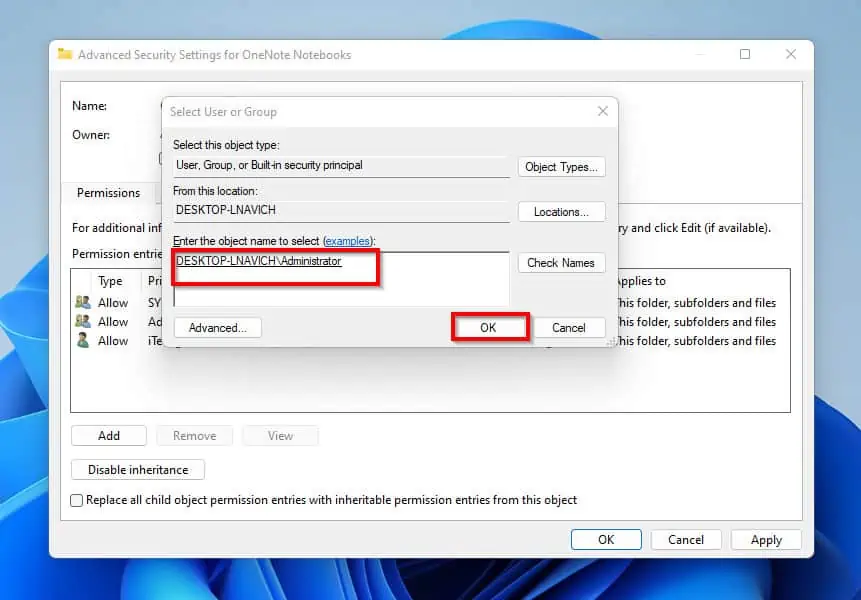
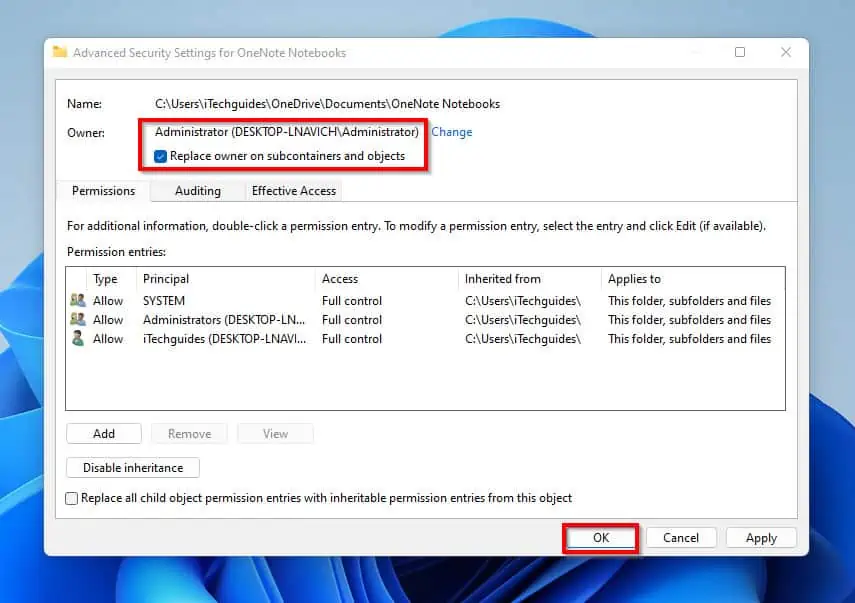
- Back at the Advanced security settings of the folder, the new owner will now be listed beside Owner. Moreover, if you wish to change the ownership of sub-folders in the folder, check Replace owner on subcontainers and objects.
Then, click OK
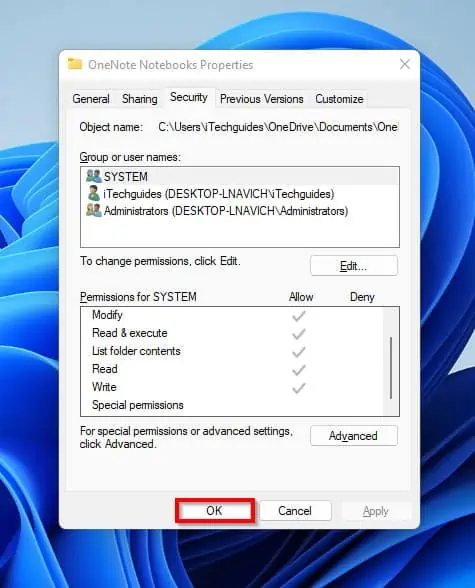
- Finally, when you are directed back to the folder’s properties page, click OK.
Option 2: Take Ownership Of Folder with Command Prompt
The second method we will be discussing on how to take ownership of folders in Windows 11 is via Command Prompt. Below are the steps:
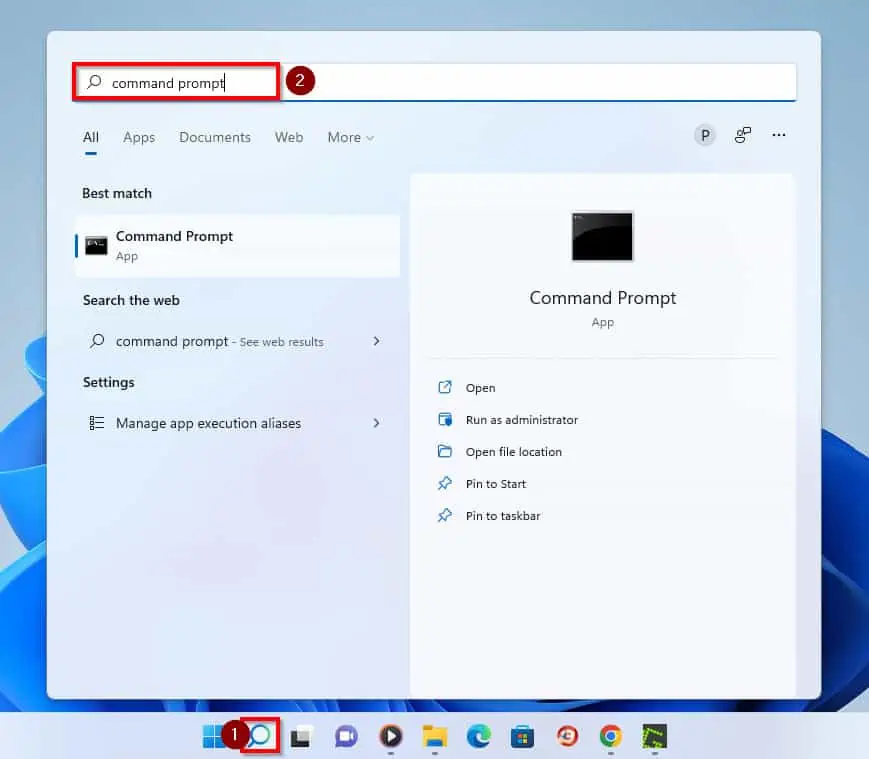
- Click on the search icon on your Taskbar and type command prompt in the search field.
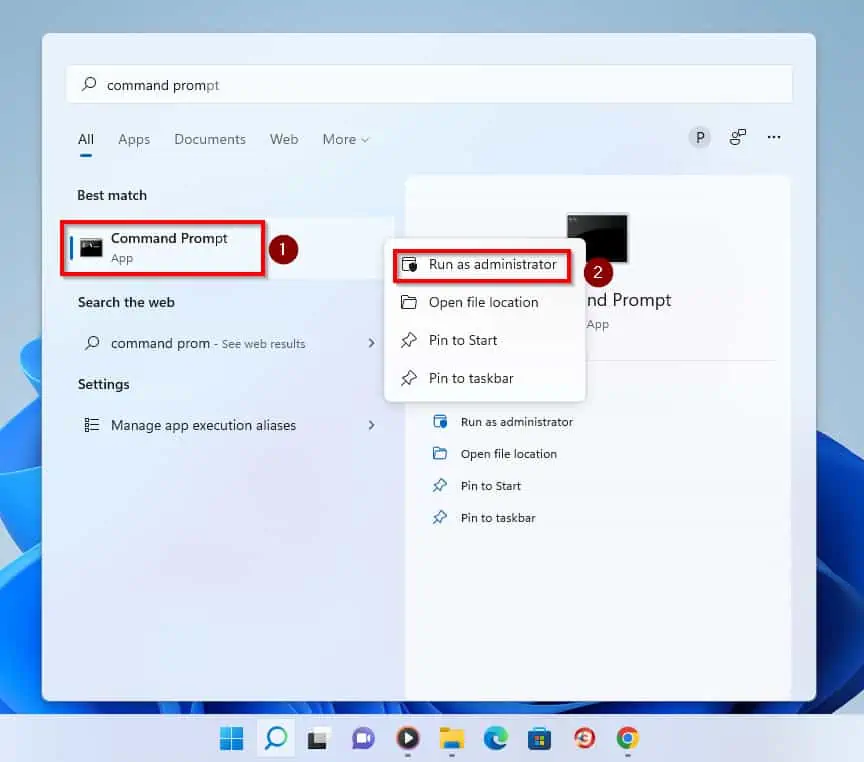
- Then, from the result of your search, right-click Command Prompt and select Run as Administrator.
- You will receive a User Account Control prompt asking you if you want to allow the program to make changes to your device. Click Yes to proceed.
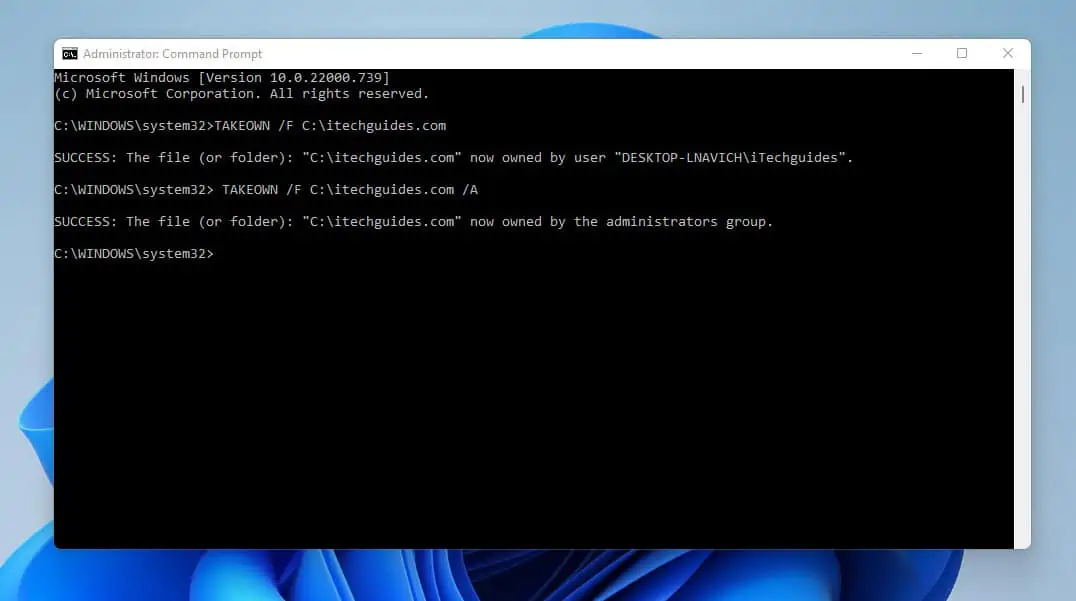
- When Command Prompt opens, type the command below to grant ownership of the folder “C:\www.itechguides.com” to the logged-in user. Then, press Enter.
TAKEOWN /F C:\www.itechguides.com

- To give ownership of a folder to the Administrators group instead of the logged-in user, type the command below and press enter.
TAKEOWN /F C:\www.itechguides.com /A
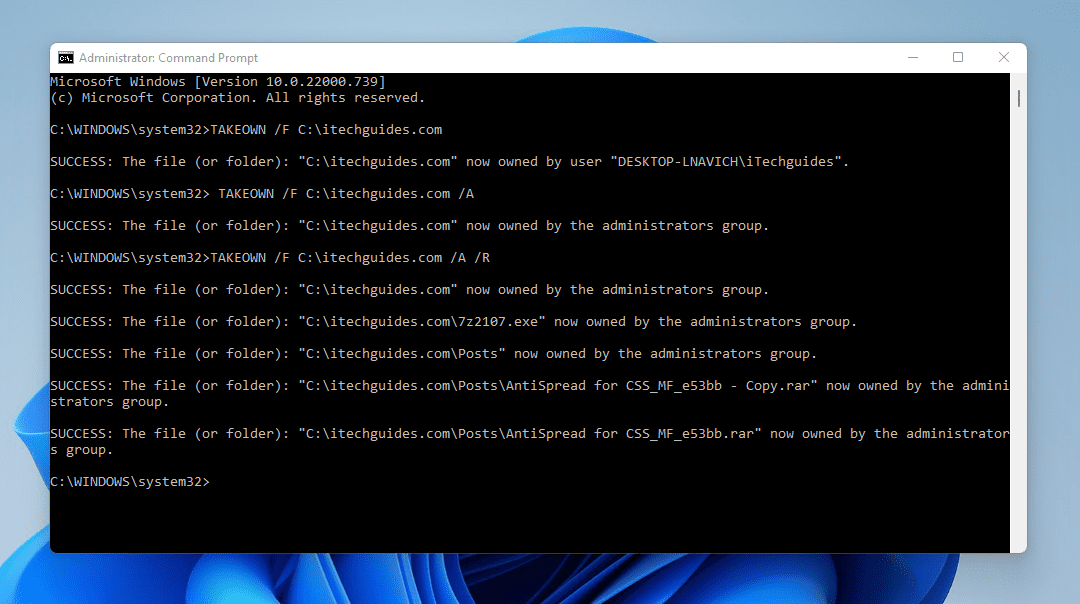
- Type the command below and press Enter to change ownership of the folder and all sub-folders.
TAKEOWN /F C:\www.itechguides.com /A /R
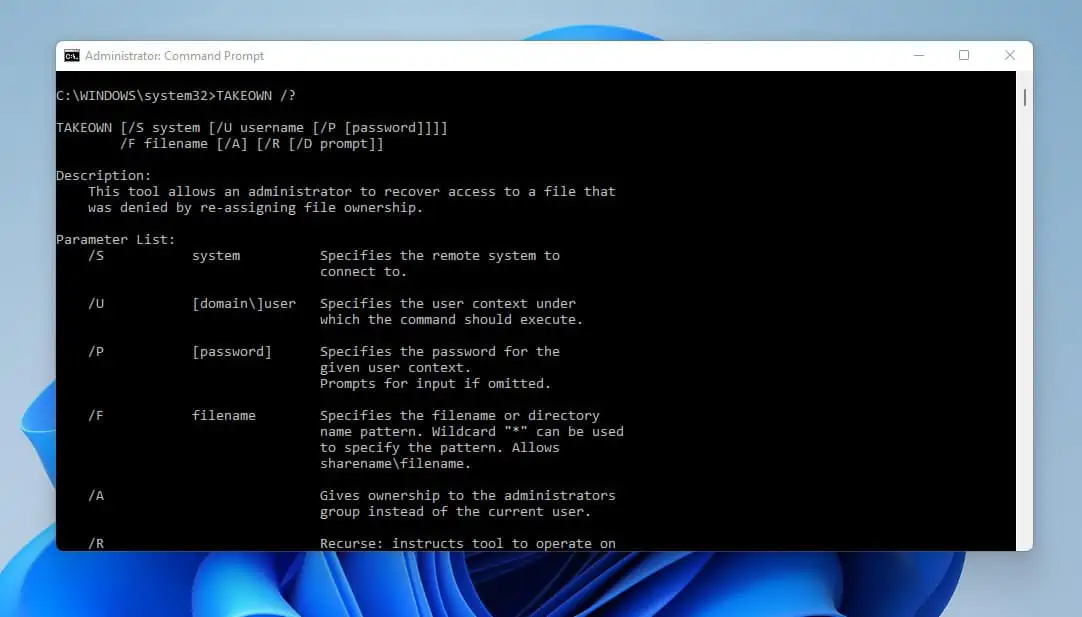
- Finally, type the command below and press Enter to see all available options and other ways to use the TAKEOWN command.
TAKEOWN /?
Frequently Asked Questions
The steps below show how to change ownership of a folder to the administrator of the computer.
a) Right-click on the folder and select Show more options.
b) From the expanded options, click Properties.
c) Click on the Security tab on the folder’s properties page.
d) Then, click Advanced.
e) On the Advanced security settings page of the folder, click Change.
f) Then, on the Select User or Group page, type administrator and click Check name.
g) Finally, when you get the name of the user, click OK.
When you take ownership of a folder in Windows 11, you will be able to decide who can access the folder.
File ownership refers to the identity of the user that created a file. The owner of the file determines who has access to the file.
Besides, the ownership of a file can be shared between multiple users.
The Takeown command is a command that enables an administrator to take ownership of files, folders, and even drives.
The Takeown F command will enable an administrator to take ownership of a folder as well as subfolders in it.
Conclusion
If you are very particular about privacy, file ownership would be an interesting topic for you. File ownership allows you to take full control of files and folders on your computer.
To give more details, it determines who should have access to a particular folder or file on a computer. Hence, I believe this guide has shown you how to take ownership of a folder on your Windows 11 PC with different methods.
Specifically, this guide showed you how to take ownership of a folder using the folder’s security properties. Also, it offered steps on how to use Command Prompt to take ownership of your folders.
Consequently, you should be able to take ownership of any folder on your Windows 11 PC using any of these methods.
I hope this post was helpful to you. If the post was of any help to you, click on “Yes” beside the “Was this page helpful” question below.
You may also express your thoughts and opinions by using the “Leave a Comment” form at the bottom of this page.
Finally, visit our Windows 11 How-To page for more Windows 11 guides.


