Do you want to create a new directory (folder) or a file in PowerShell but you don’t know how? Then, you need to learn how to use the New-Item cmdlet.
Overview
One of the common tasks in PowerShell scripting is creating folders or files. For instance, if you write a script that logs reports by date, you may want to create directories by date.
Then, create text files that save log files say hourly.
Apart from just creating directories, you may also have some other specific requirements. For example, I have written scripts where I create a directory if it does not exist, or create a directory structure.
Not only those, but I have also encountered situations where I had to ignore if a directory exists and create a new directory with the same name.
No matter the reason you want to create directories in PowerShell, when you go through this guide I am confident that you will find an example that works for you.
But first, let’s sort out the tool we need. In the next two sections, you’ll learn the syntax and parameters of the New-Item cmdlet. This is the cmdlet you need to create, not just directories but other items (files and registry keys) in PowerShell.
Syntax
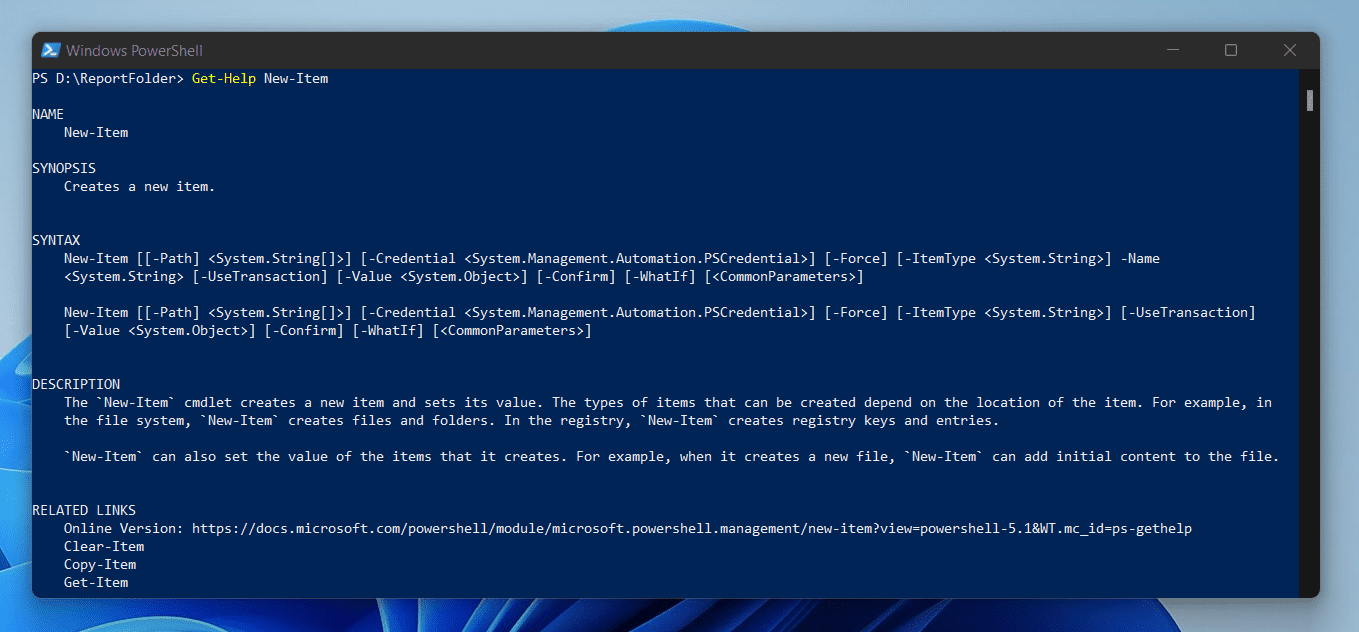
The syntax of the New-Item cmdlet is…
New-Item
   [[-Path] <String[]>]
   -Name <String>
   [-ItemType <String>]
   [-Value <Object>]
   [-Force]
   [-Credential <PSCredential>]
   [-WhatIf]
   [-Confirm]
   [<CommonParameters>]
In the next section, I will discuss in detail the parameters and how you can use them.
Parameters
I already mentioned that you need the New-Item cmdlet to create directories in PowerShell. To help you understand how to use the parameters of the New-Item cmdlet, I have explained its parameters in the table below…
| New-Item Cmdlet Parameter Name | New-Item Cmdlet Parameter Meaning/Notes |
|---|---|
| Path | Use the Path parameter to specify the path of the location of the new item (directory, file, or registry key). If you do not specify the Path parameter, PowerShell will create the new directory, file, or registry keys in the current location. The position of this parameter is 0 and it is not a required parameter. |
| Name | The Name parameter is a required parameter. Use it to specify the name of the directory or file you wish to create. The parameter accepts values from the pipeline. |
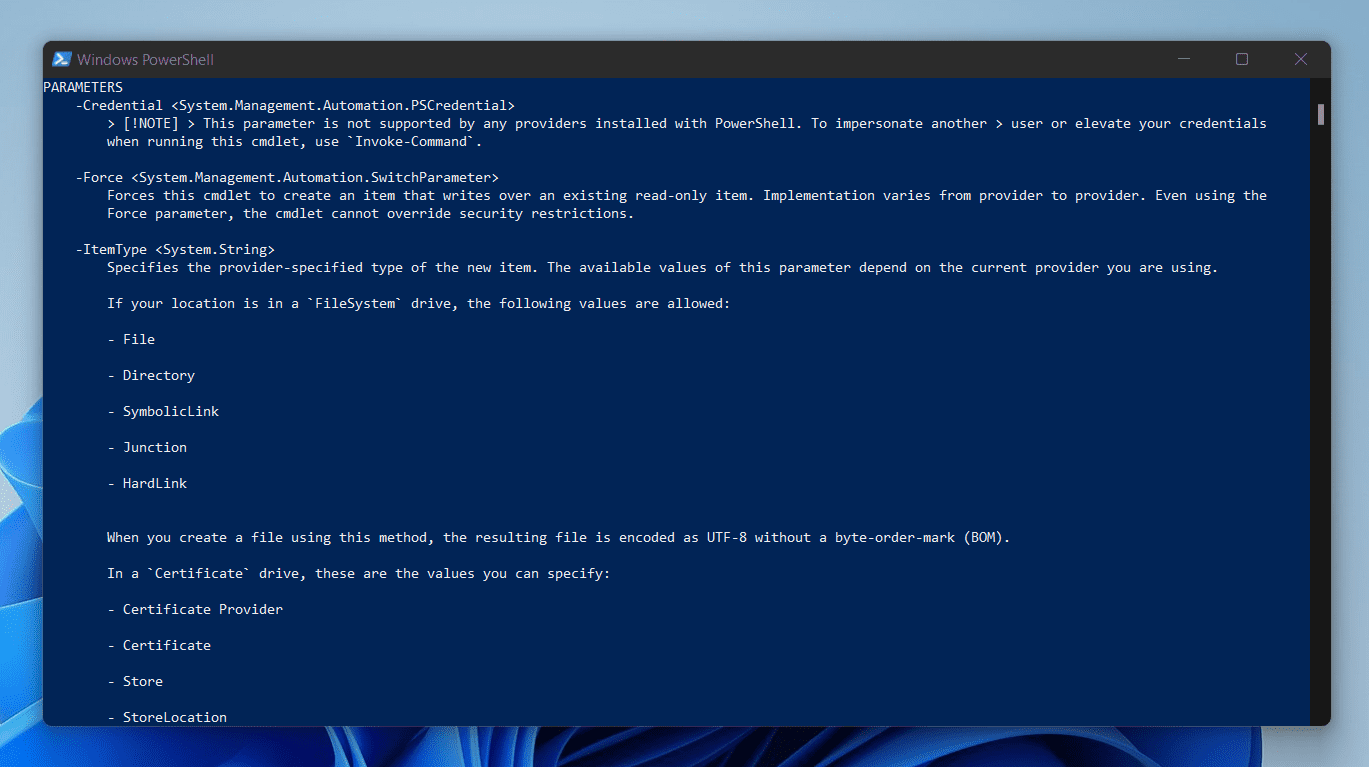
| ItemType | Use the ItemType parameter to specify the type of the new item. If you’re creating an item in a FileSystem drive, you can specify File, Directory, SymbolicLink, HardLink, or Junction. |
| Value | When you create a file with the New-Item cmdlet, you can specify the content of the file with the Value parameter. This parameter only works when you create a file. If you specify the Value parameter when you create a file, the directory crested is turned into a file but because there is no file extension, Windows can’t associate a program to the “file”. |
| Force | Use the Force parameter to force the New-Item cmdlet to create an item that writes over an existing read-only item. For example, if you write a PowerShell script that overwrites existing read-only directories, specify the Force parameter. |
| Credential | When you run the New-Item cmdlet, it uses the currently logged-in user’s credentials to execute the command. However, if you want to use another account, use the Credential parameter. |
| WhatIf | If you do not want to create a directory or file but just want to see what would happen if the New-Item cmdlet runs, specify the WhatIf parameter. |
| Confirm | By default when you run the New-Item cmdlet, it executes the command without prompting. But, if you want to be prompted to confirm the command before it is executed, specify the Confirm parameter. |
Examples and Scenarios
Having discussed the overview of creating directories and files with PowerShell, and the syntax and parameters of the New-Item cmdlet, it is time to get real.
In this section, you’ll learn different ways to create a file or folder in PowerShell. Let’s dive into the examples, shall we?
1. Create a Directory (Folder) or File Silently (Hide the Output of the New-Item Cmdlet)
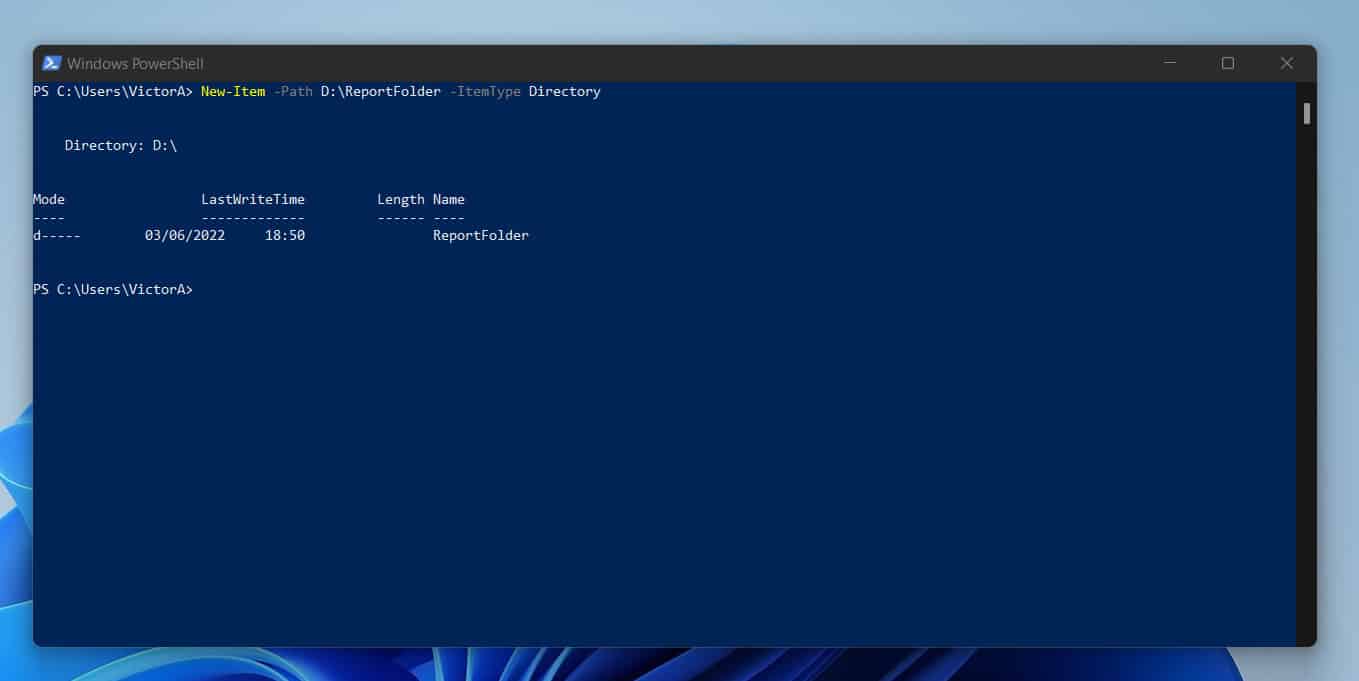
By default, when you use the New-Item cmdlet to create a directory or file, it displays some information on the console. Here is a sample command…
New-Item -Path D:\ReportFolder -ItemType Directory
When you run this command in PowerShell, the New-Item cmdlet creates the folder. Then, after creating the folder, the cmdlet displays some information about the newly created folder.
Here is the result of the last command…
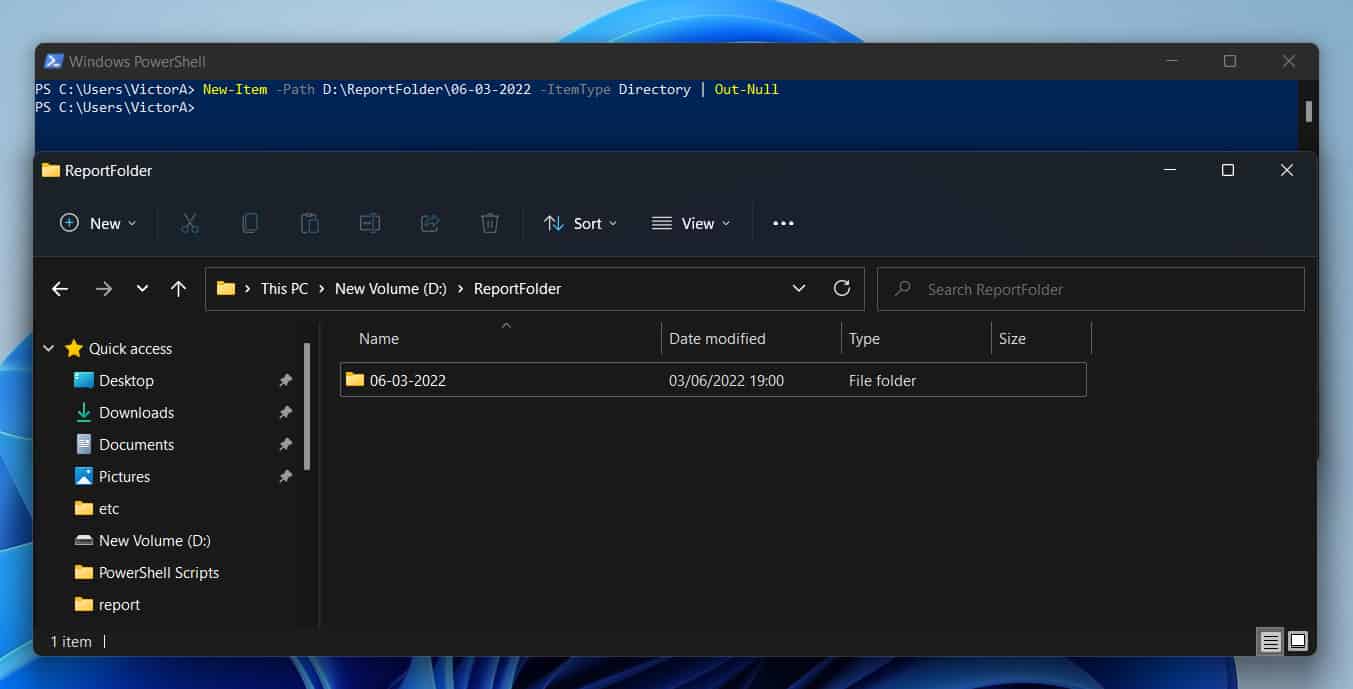
However, if you want to use PowerShell to create a directory silently (or hide the output of the command), pipe the command to the Out-null cmdlet…
New-Item -Path D:\ReportFolder\06-03-2022 -ItemType Directory | Out-Null
Now, the command runs silently. Here is the result of the command in PowerShell. The screenshot also includes the folder I created with the last command.
2. Create a Directory (Folder) or File if it Doesn’t Exist
To create a directory or file with PowerShell if the item doesn’t exist, you need the If conditional statement. Then, within the condition part of the If statement, use the Test-Path cmdlet to check if the item exists.
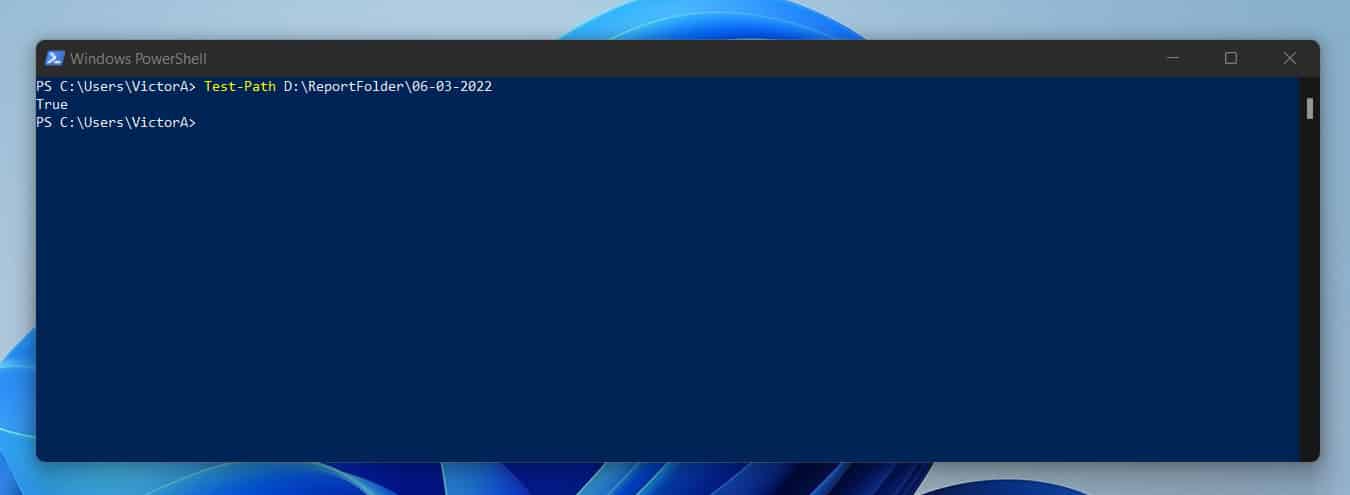
To make it less complex, let’s see how the Test-Path command works. In this example, I want to check if the folder I created in the last example exists.
Test-Path D:\ReportFolder\06-03-2022
The command returns True. This means that the folder exists.
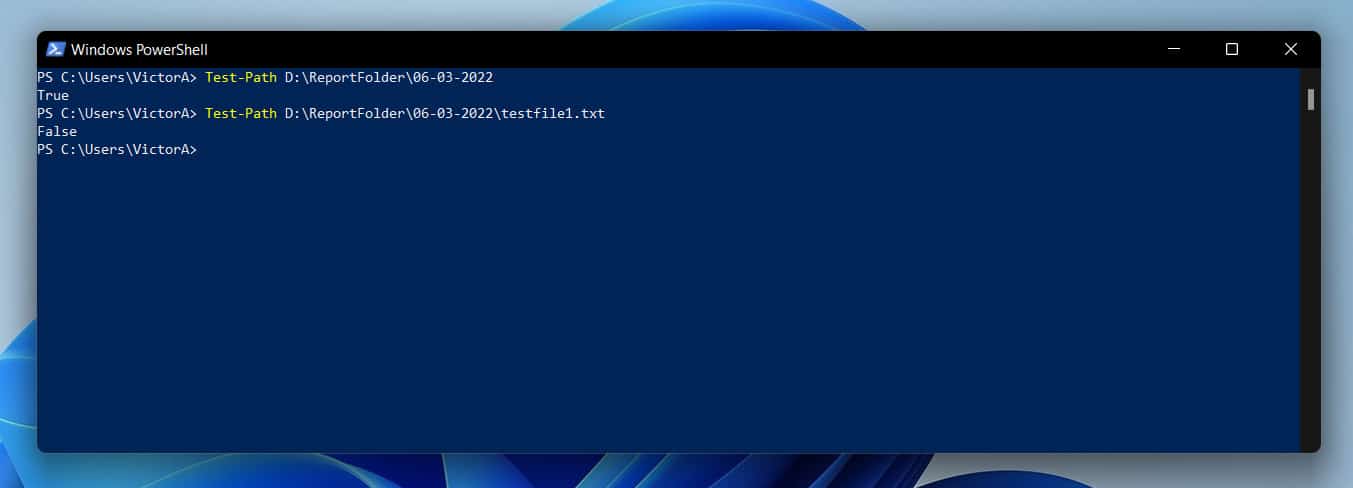
Now, let’s see what Test-Path returns if an item doesn’t exist. In this example, I want to check if the file – D:\ReportFolder\06-03-2022\testfile1.txt – exists.
Here is the command…
Test-Path D:\ReportFolder\06-03-2022\testfile1.txt
This time around, the result is False because the file does not exist.
Now it is time to introduce the If statement. First, let’s add the Test-Path command in the If statement’s condition.
If (Test-Path D:\ReportFolder\06-03-2022) {

}
If you know the syntax of the If statement, you’ll know that the above command is incomplete. Before I introduce the comparison element of the If statement’s condition, bear in mind what the Test-Path command returns – True.
With this in mind, we can introduce the comparison operator. In the next step, I want to compare the result of the Test-Path command with either the $True or $False.
In PowerShell, $True and $False are referred to as logical TRUE and FALSE respectively.
So, if I want to create a folder with PowerShell only if it doesn’t exist, I will use the condition below…
If ((Test-Path D:\ReportFolder\06-03-2022) -ne $True) {

}
Before I introduce the New-Item command in the If statement, let’s see the result of the command in the If statement’s condition.
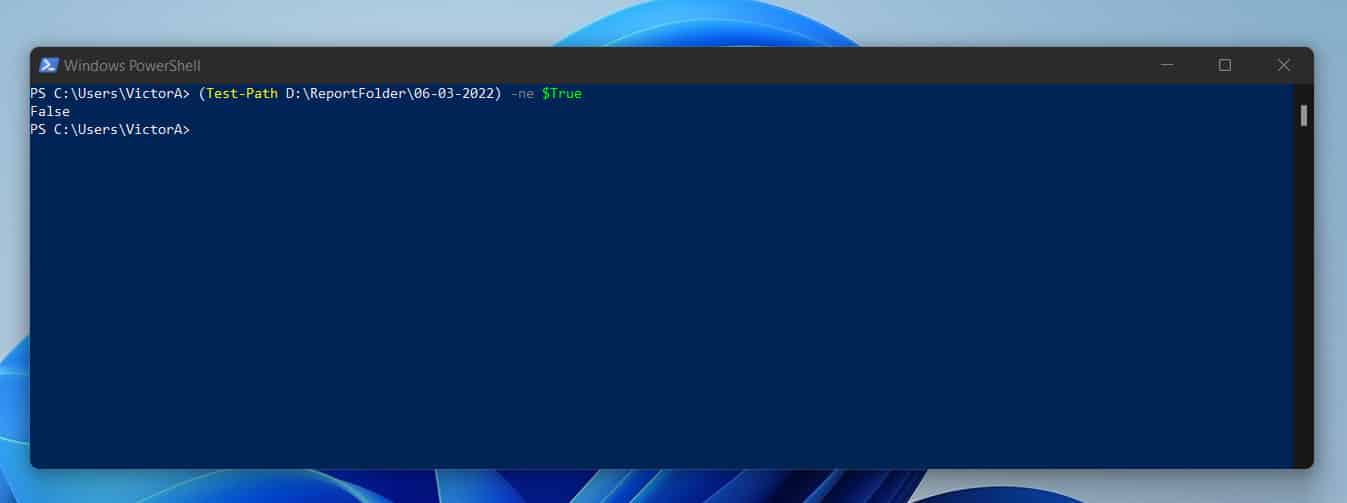
(Test-Path D:\ReportFolder\06-03-2022) -ne $True
The result is False because the Test-Path command for the specified path returned True. Now, let’s proceed to the command part of the If statement – proceed below this screenshot.
If ((Test-Path D:\ReportFolder\06-03-2022) -ne $True) {
   New-Item -Path D:\ReportFolder -ItemType Directory
}
The PowerShell statement says “if the result of the Test-Path command is NOT equal True, create the directory specified in the New-Item command“. Let’s run the command and see what happens.
But this time, it is better to run the command in PowerShell ISE. When you run the script, it doesn’t produce any result, or so it seems.
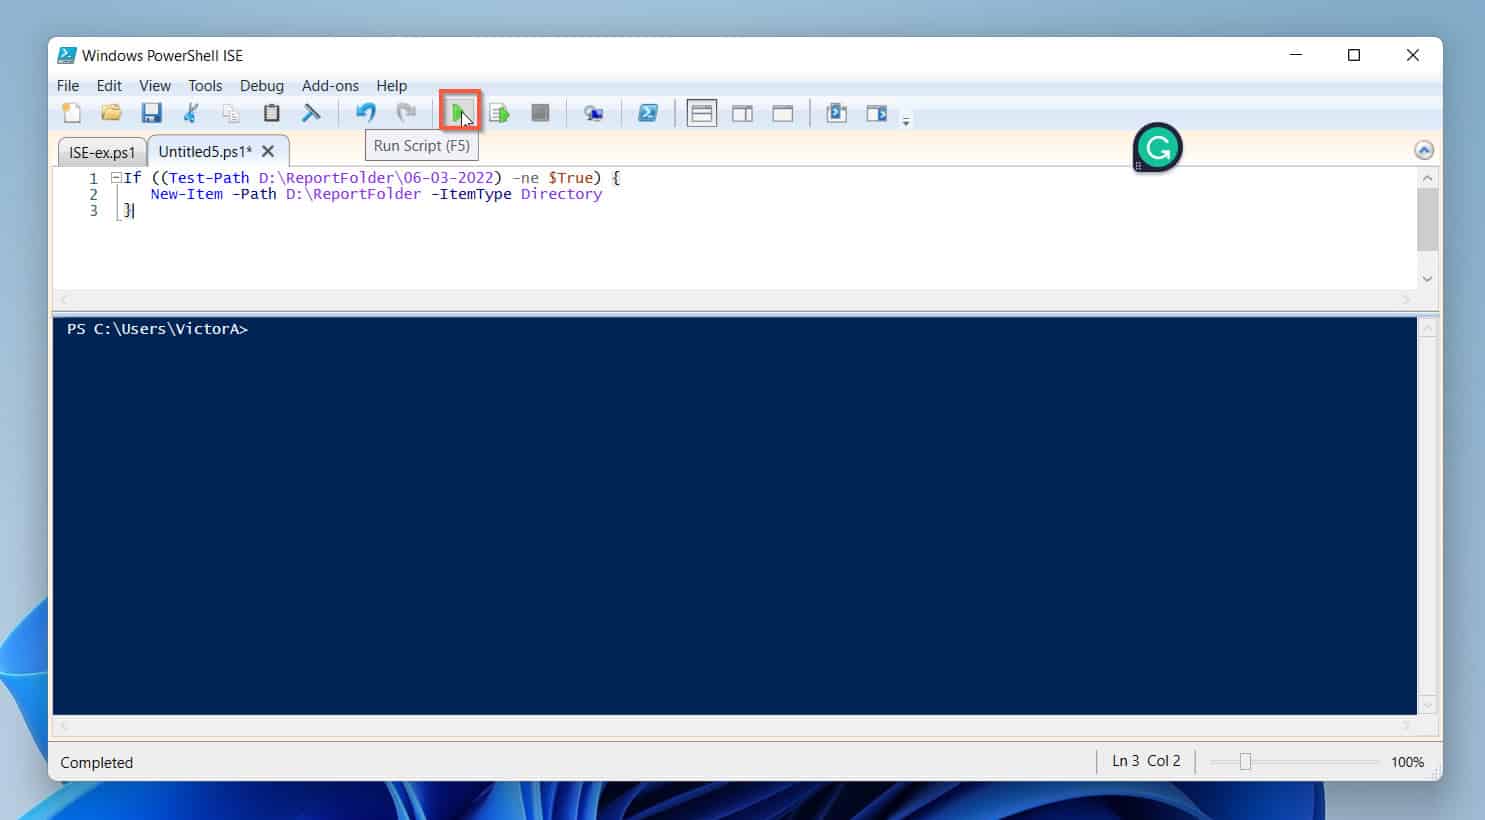
The reason nothing will happen is that the New-Item command did not execute because the folder exists. Remember we wanted to create the folder only if it doesn’t exist.
But, we can make the script better by introducing the Else the If statement. Then, within the Else loop, we can write a message.
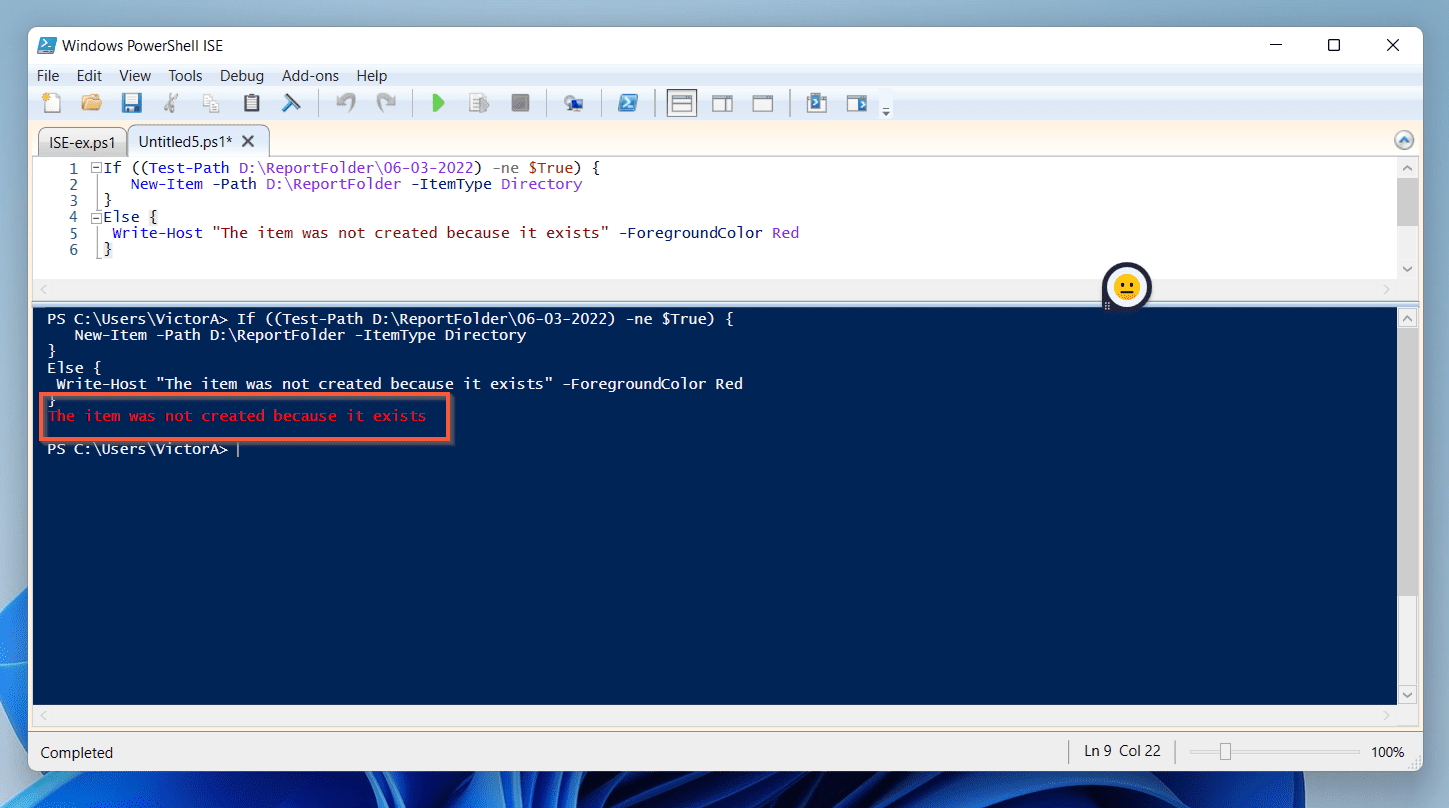
Here is the updated script…
If ((Test-Path D:\ReportFolder\06-03-2022) -ne $True) {
   New-Item -Path D:\ReportFolder -ItemType Directory
}
Else {
 Write-Host "The item was not created because it exists" -ForegroundColor Red
}
The updated command provides a useful message…
3. Create a Directory with the Folder Name Based on Current Date
Creating a folder in PowerShell with the current date as the folder name is very common. One scenario that may require this is if you run a script daily and generate a daily report.
So, how do you do this?
You use the Get-Date command to generate the folder name. Then, you add the Get-Date command on the location of the path you want the folder created.
In this example, I want to create a folder with today’s date in the path D:\ReportFolder. I can achieve this in two ways.
I can create the folder name with the Get-Date command and save the result in a variable. Then, I’ll use the New-Item command to create the directory (folder).
Here are the commands…
$foldername = (Get-Date).ToString('MM-dd-yyyy')
New-Item -Path D:\ReportFolder\$foldername -ItemType Directory
The commands create a folder called 06-03-2022 in D:\ReportFolder. Here is a screenshot of the command and the folder created.

Earlier, I said that you could accomplish this scripting task in two ways. The second way to write the script is to use a single command.
This time, I do not need to run the Get-Date command separately. Here is the command…
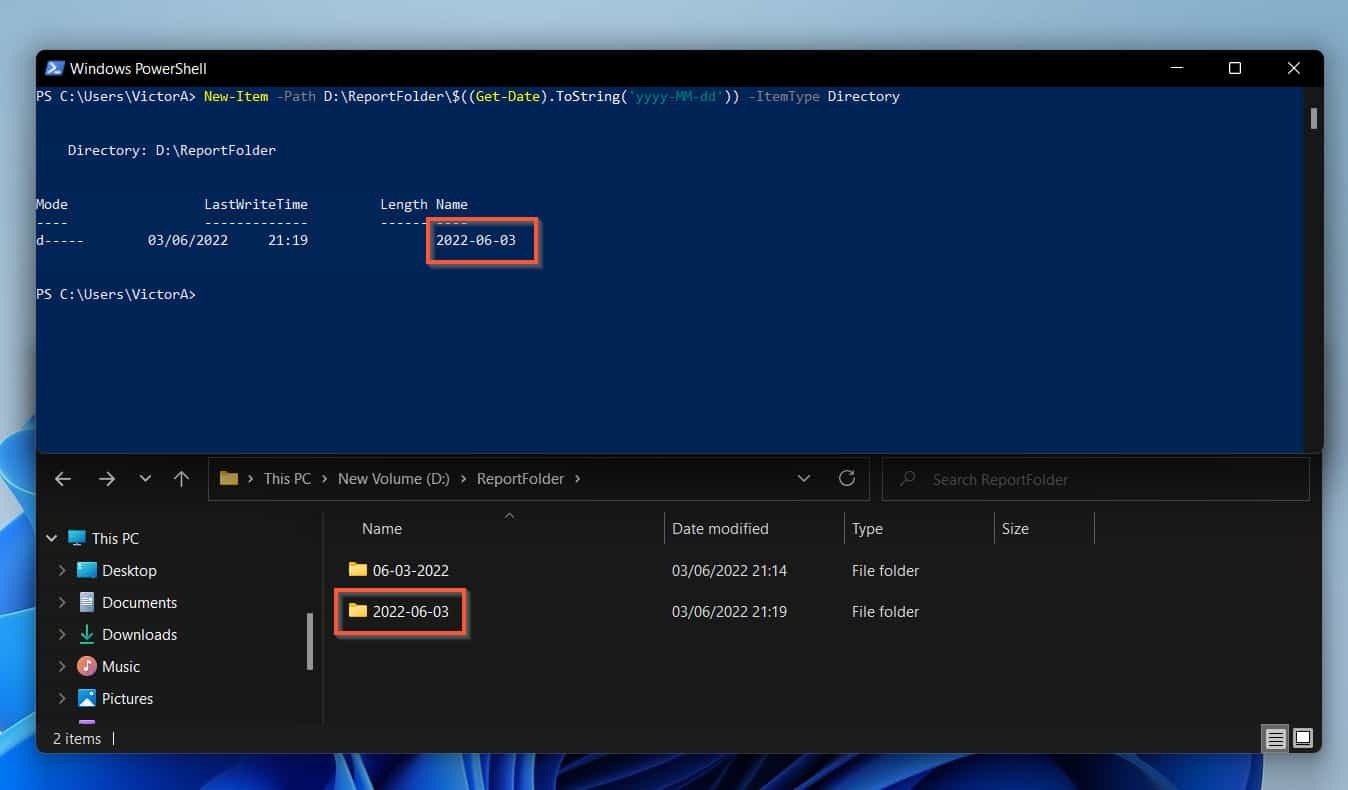
New-Item -Path D:\ReportFolder\$((Get-Date).ToString('yyyy-MM-dd')) -ItemType Directory
The command produced the same result. Here is the screenshot of the command and the folder created.
Get-Date -Format MM-dd-yyyy
4. Create a Directory Junction
One of the parameters of the New-Item cmdlet is the ItemType parameter. This is the parameter you use to specify the type of item you wish to create.
If you’re creating a filesystem item, one of the ItemTypes you can create is a Junction. To create a Directory Junction with PowerShell, specify Junction as the ItemType when you run the New-Item cmdlet.
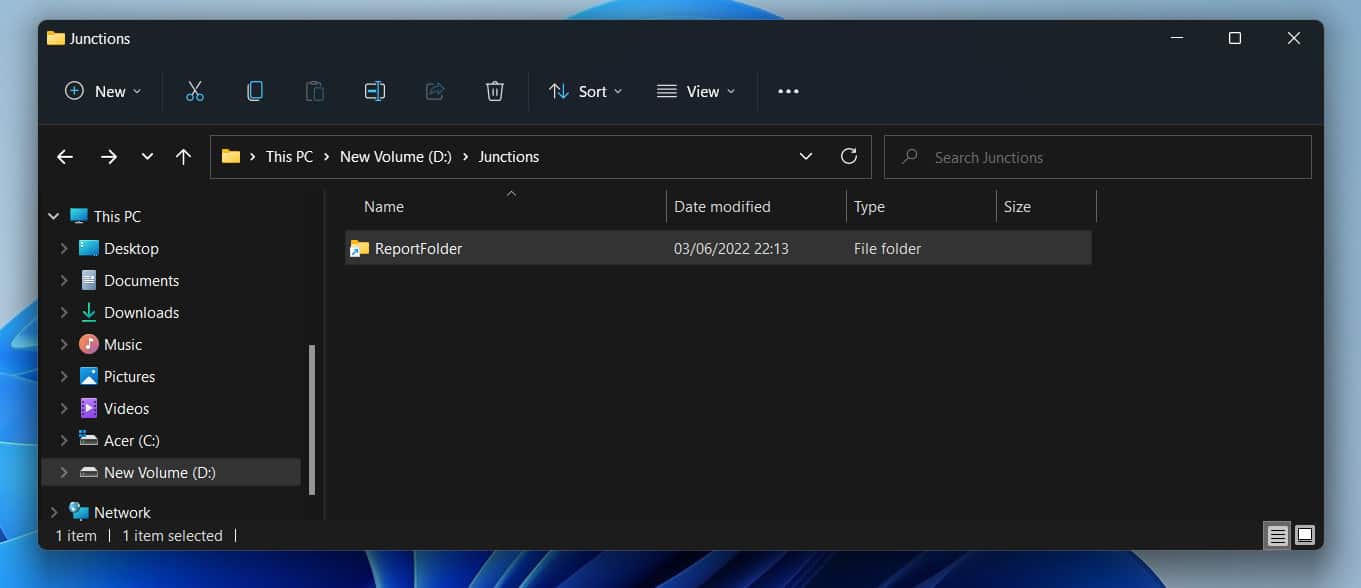
The command below creates a Directory Junction called ReportFolder in the path D:\Junctions. Moreover, the Directory Junction points to the folder D:\ReportFolder.
New-Item -ItemType Junction -Path D:\Junctions\ReportFolder -Target D:\ReportFolder
Here is a screenshot of the Directory Junction created with the PowerShell command.
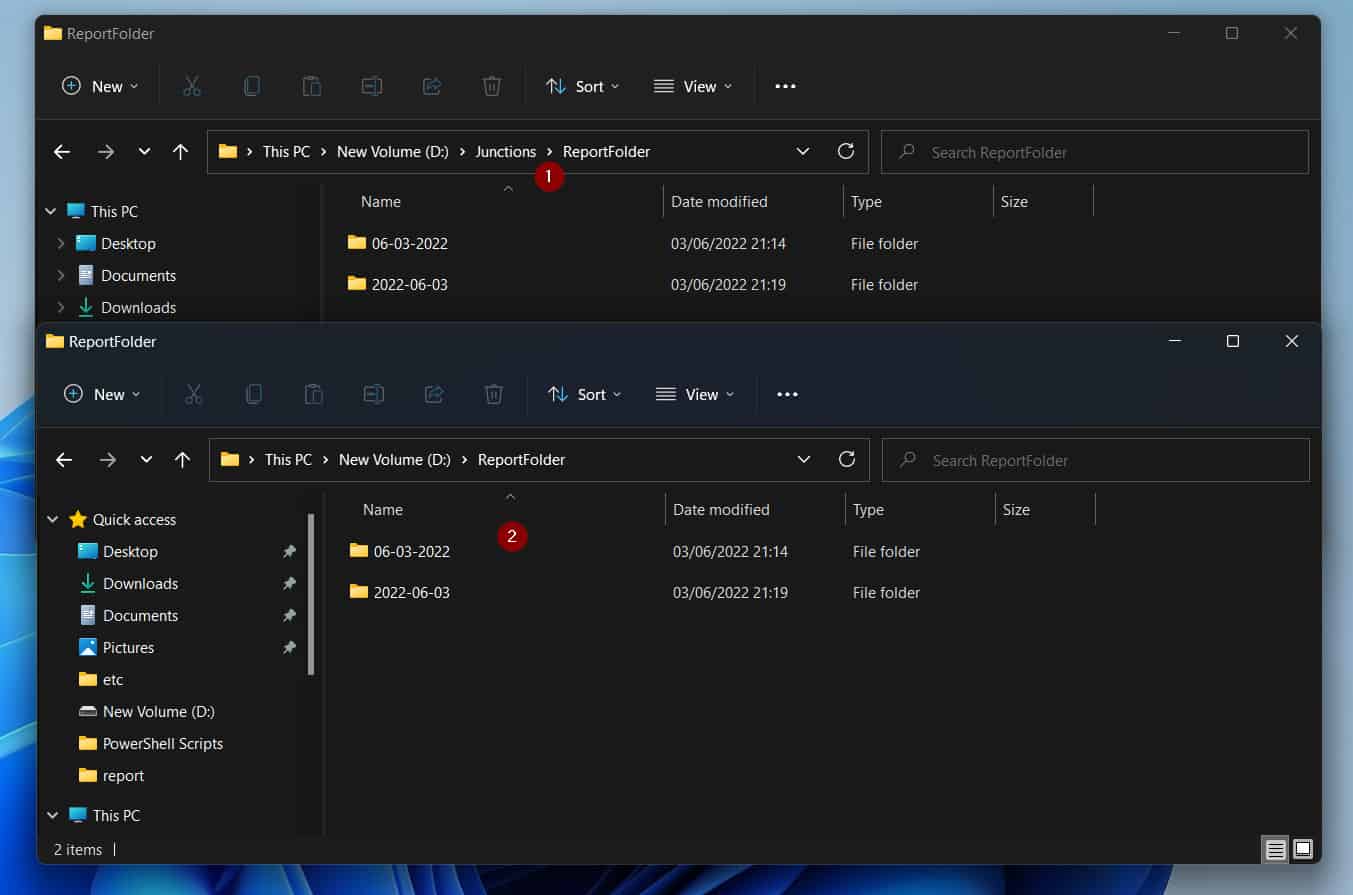
If you open the Directory Junction, it points to D:\ReportFolder…
5. Create a Directory and a File in the Same Command
Creating a directory and file using a one-line PowerShell command is very simple. All you need to do is to create a file with the New-Item command.
Then, include the name of the new directory in the file path. Since the directory does not exist, the New-Item command will create it.
However, for the New-Item command to create the directory, you MUST specify the Force parameter.
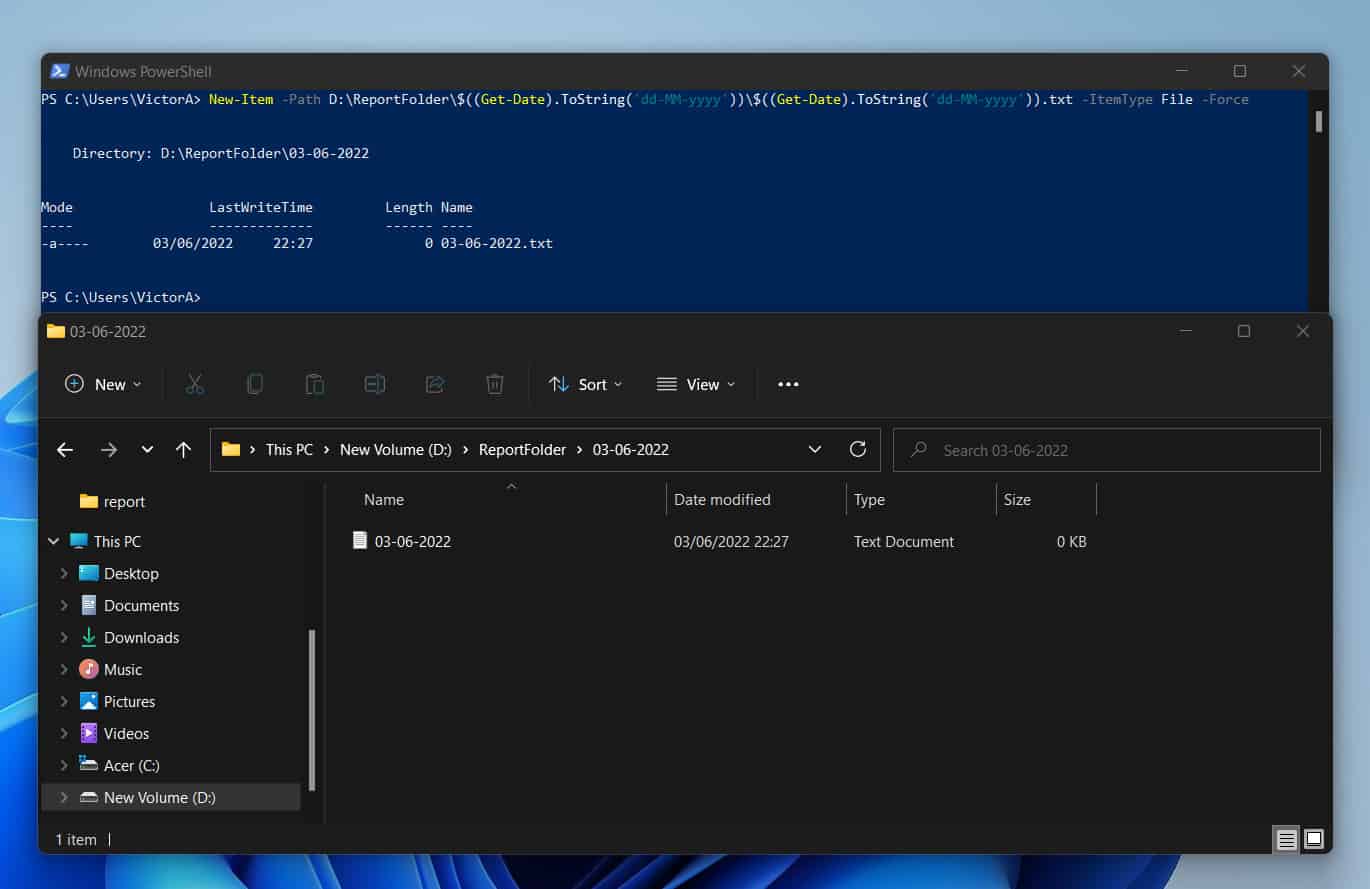
The PowerShell command below creates a new directory with today’s date. Then, it creates a text file in the new folder with today’s date.
New-Item -Path D:\ReportFolder\$((Get-Date).ToString('dd-MM-yyyy'))\$((Get-Date).ToString('dd-MM-yyyy')).txt -ItemType File -Force
Here is the screenshot of the command and the full path to the file.
6. Create a Directory and CD Into the Directory with a Single Command
Naturally, you need two PowerShell commands to create a directory and CD (navigate) into the directory.
Specifically, you need the New-Item command to create the directory. Then, you need the Set-Location command to CD into the new folder.
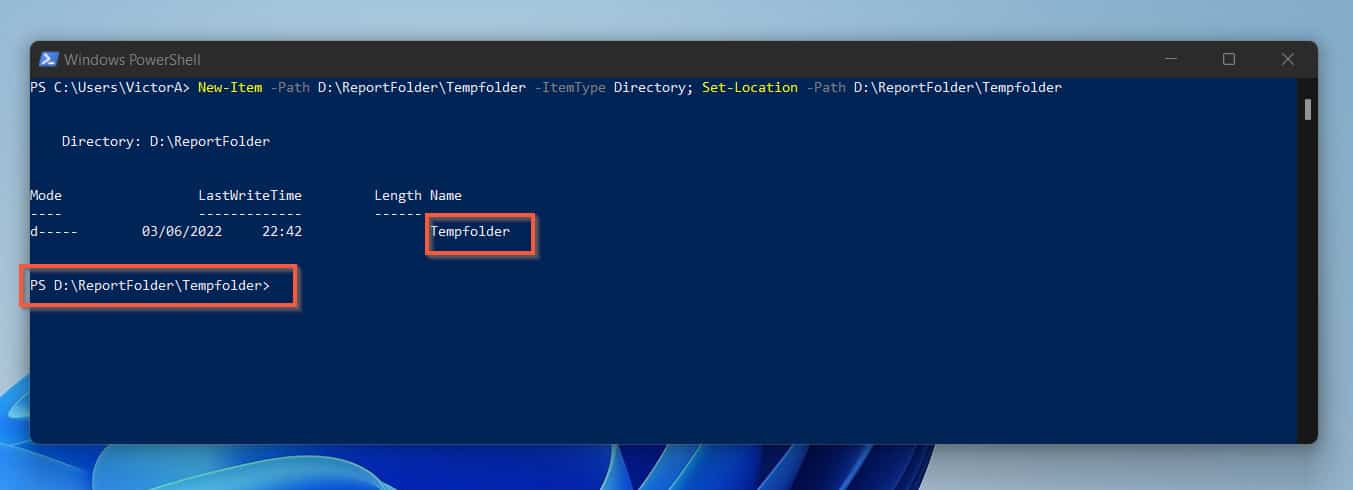
However, you can use the semi-colon (;) character to run both commands in one line. Here is a sample command that creates a folder and navigates into the folder…
New-Item -Path D:\ReportFolder\Tempfolder -ItemType Directory; Set-Location -Path D:\ReportFolder\Tempfolder
Here is the screenshot showing the command. As you can see, after creating the folder, PowerShell navigated to the path.
7. Create a Directory and Move Files Into the New Directory
There are so many scenarios for this example to work. But I will use the simplest scenario.
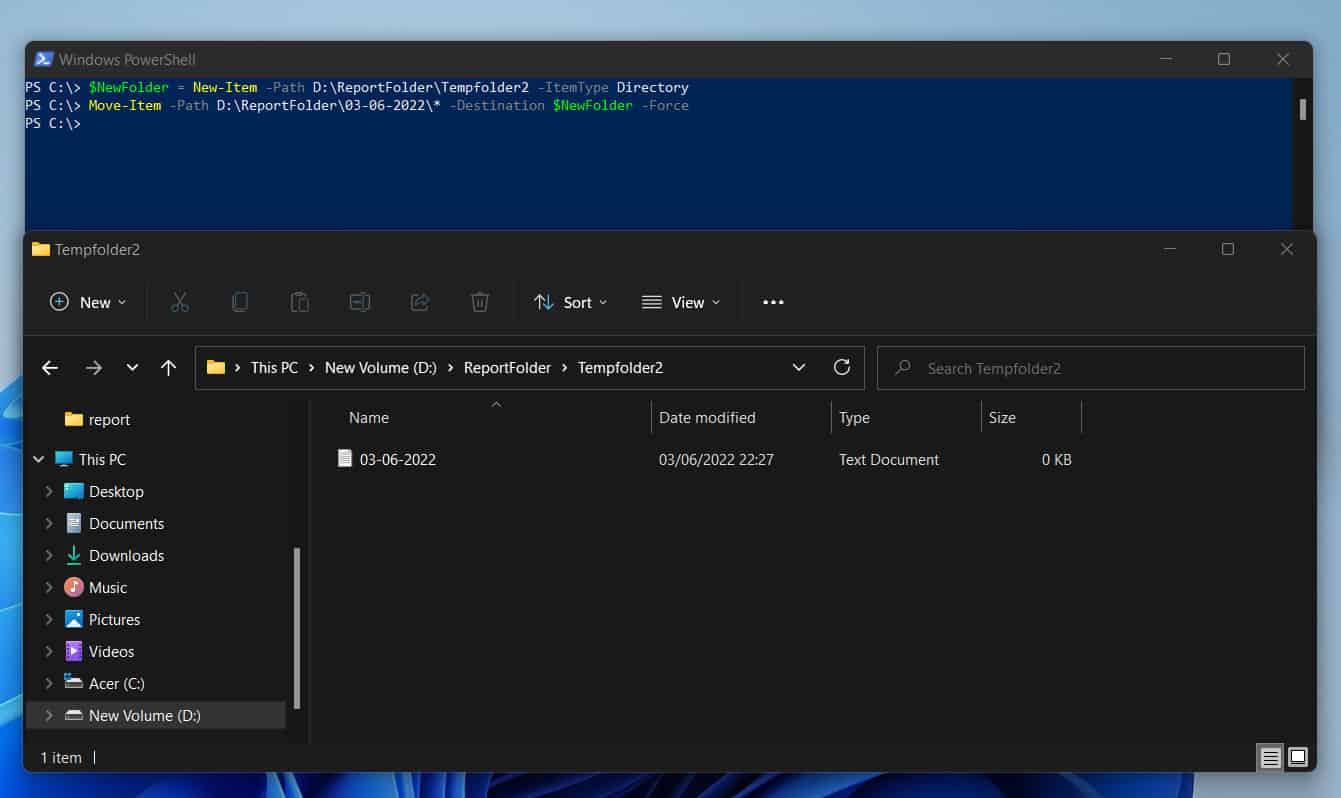
In this example, I want to create a new folder in D:\ReportFolder. Then, move all files in D:\ReportFolder\03-06-2022 into the newly created folder.
$NewFolder = New-Item -Path D:\ReportFolder\Tempfolder2 -ItemType Directory
Move-Item -Path D:\ReportFolder\03-06-2022\* -Destination $NewFolder -Force
8. Create and Share Directory
The command required to create a new directory and share it is similar to the previous example. The only difference is that in the second leg of the command, you use the New-SmbShare cmdlet.
The New-SmbShare cmdlet is used to share folders. So, here are the two commands you need to create and share a directory in PowerShell.
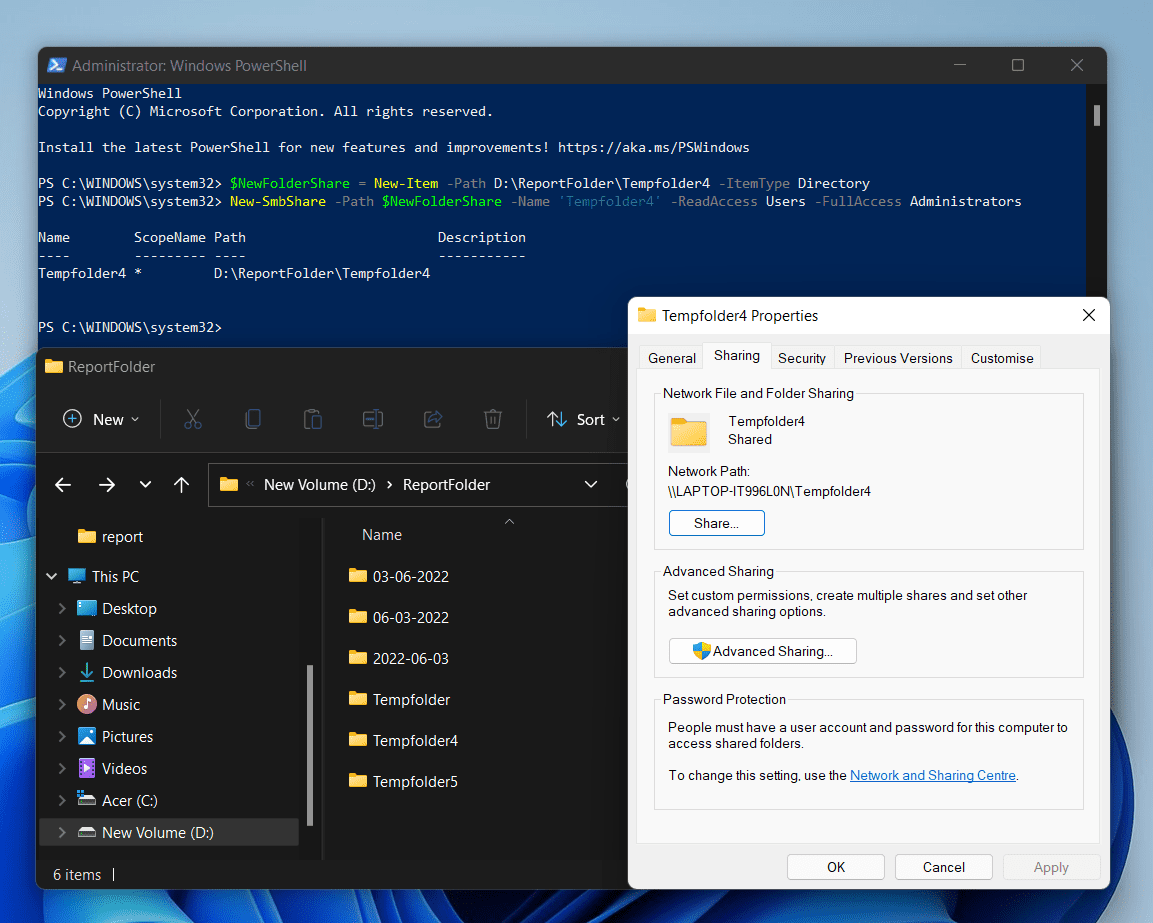
To run the New-SmbShare command, you MUST run PowerShell as administrator.
$NewFolderShare = New-Item -Path D:\ReportFolder\Tempfolder4 -ItemType Directory
New-SmbShare -Path $NewFolderShare -Name 'Tempfolder4' -ReadAccess Users -FullAccess Administrators
When I ran the second command, I received an “Access is denied” error message. The reason I received the error message is that I did not run PowerShell as administrator.
Once I ran PowerShell as administrator, the second command was completed successfully. Below is a screenshot of the command, the folder created, and its properties.
9. Create a Directory Based on Filename
To show you how to create a directory with PowerShell based on filename, I have created a set of files in an existing folder. See the screenshot below.
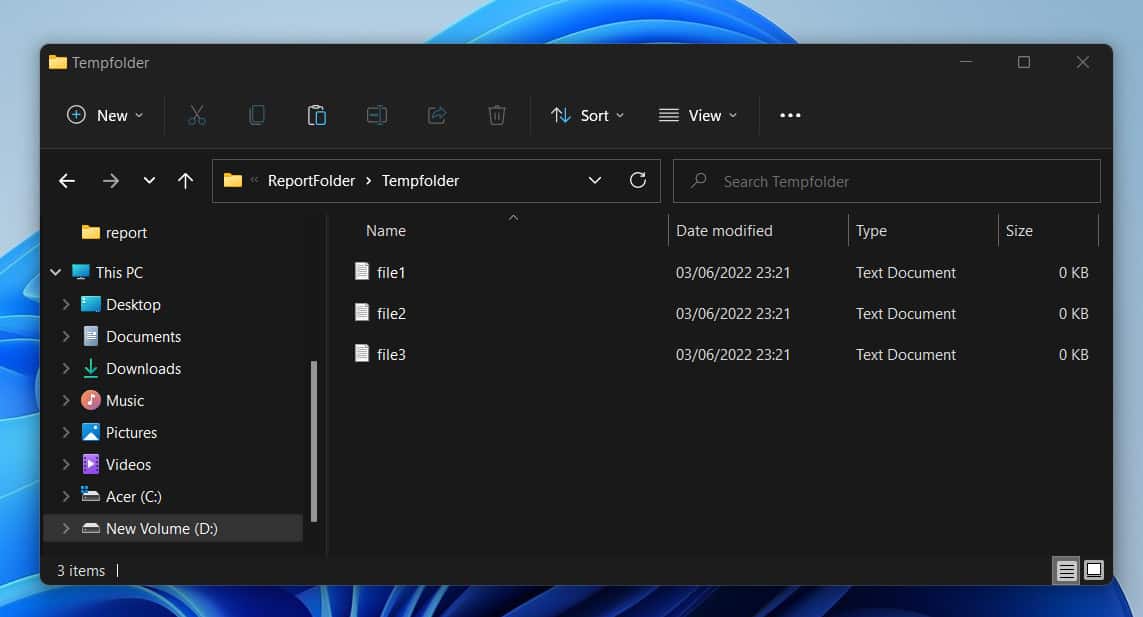
I want to show you how to create directories based on the filenames shown in the screenshot above.
The first step is to get the filenames. To do this, use the Get-ChildItem cmdlet. Then, to make it easy for me to explain the proceeding commands, I’ll save the result of the Get-ChildItem command in a variable.
$filenames = Get-ChildItem D:\ReportFolder\Tempfolder | Where-Object {$_.PSIsContainer -ne $True}
The above command piped the Get-ChildItem command to the Where-Object command. Then, in the Where-Object command, I returned only items that are not folders.
Here is the result of the command. I did not include the variable yet because I wanted you to see some of the properties of the files returned.
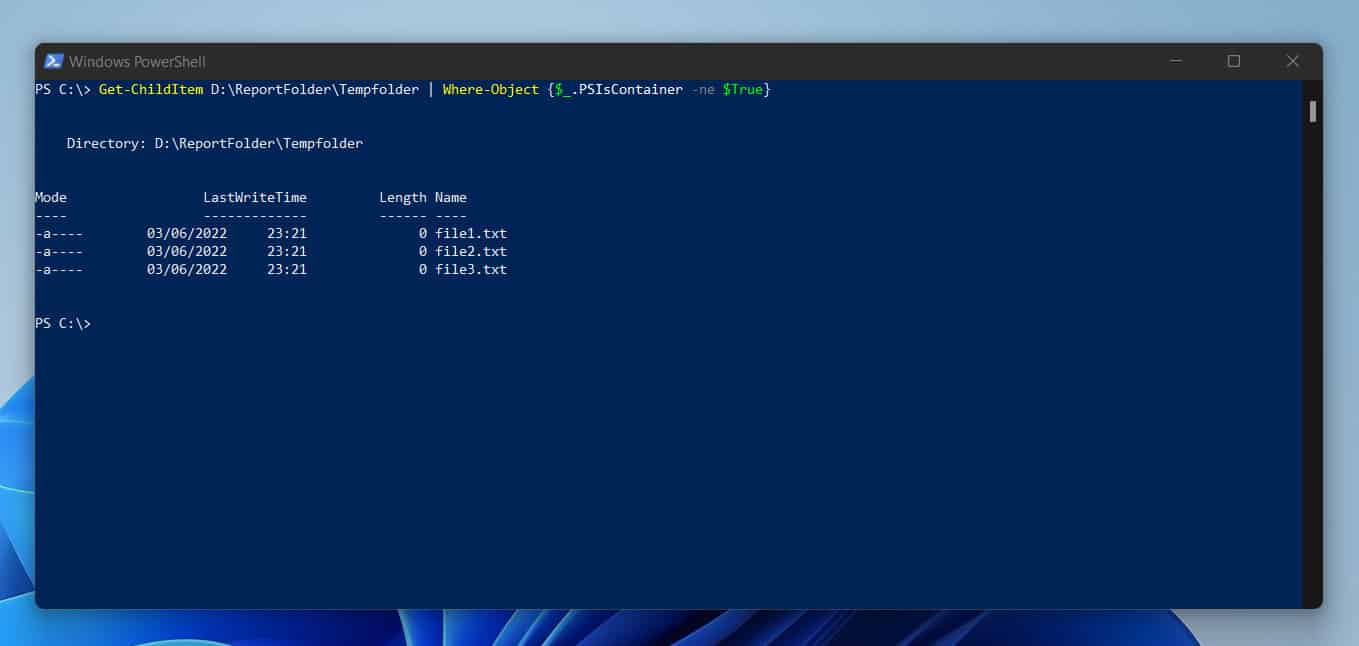
The command returned a property called BaseName (the names of the files, excluding their extensions). I’ll use this property to return the filenames.
But to do that, I need to pipe the output of the last command to the ForEach statement. Before then though I want to modify the last command to return just the name of the files.
The BaseName property of the file returns just the name, excluding the extension. If I wanted to return the filename with its extension I will use the Name property.
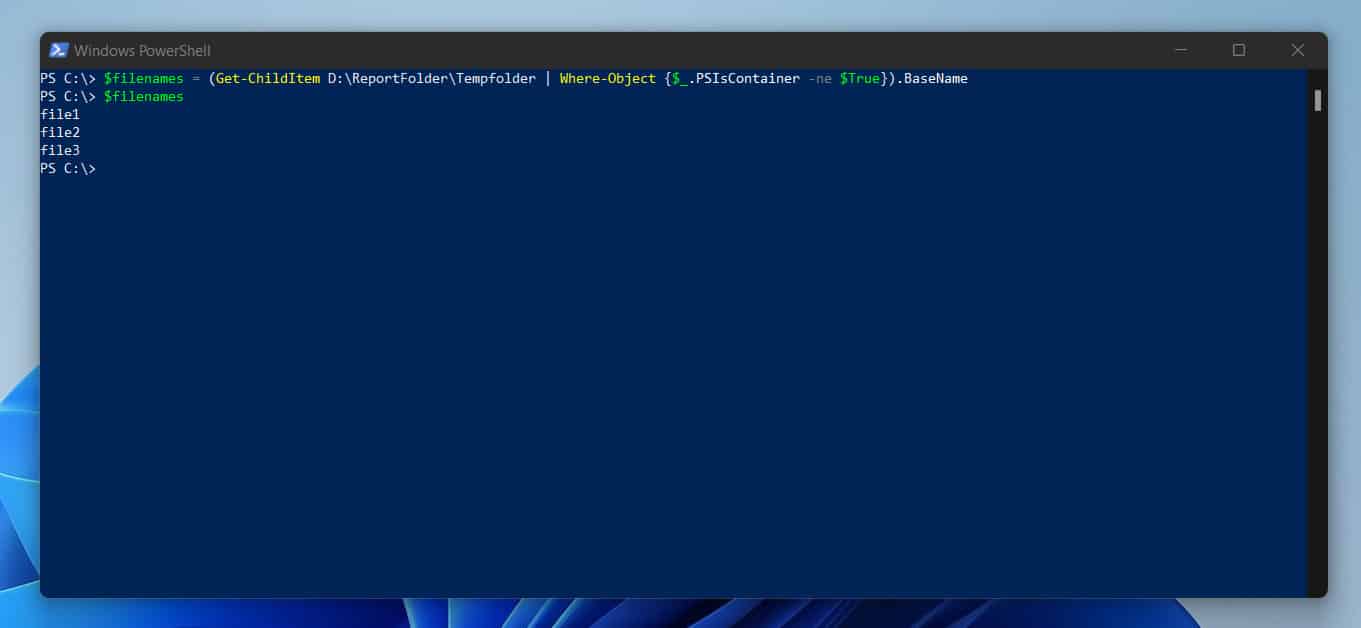
$filenames = (Get-ChildItem D:\ReportFolder\Tempfolder | Where-Object {$_.PSIsContainer -ne $True}).BaseName
To show you the result to this point, I’ll run the last command. Then, I’ll also display the result of the variable.
The command displays the filenames.
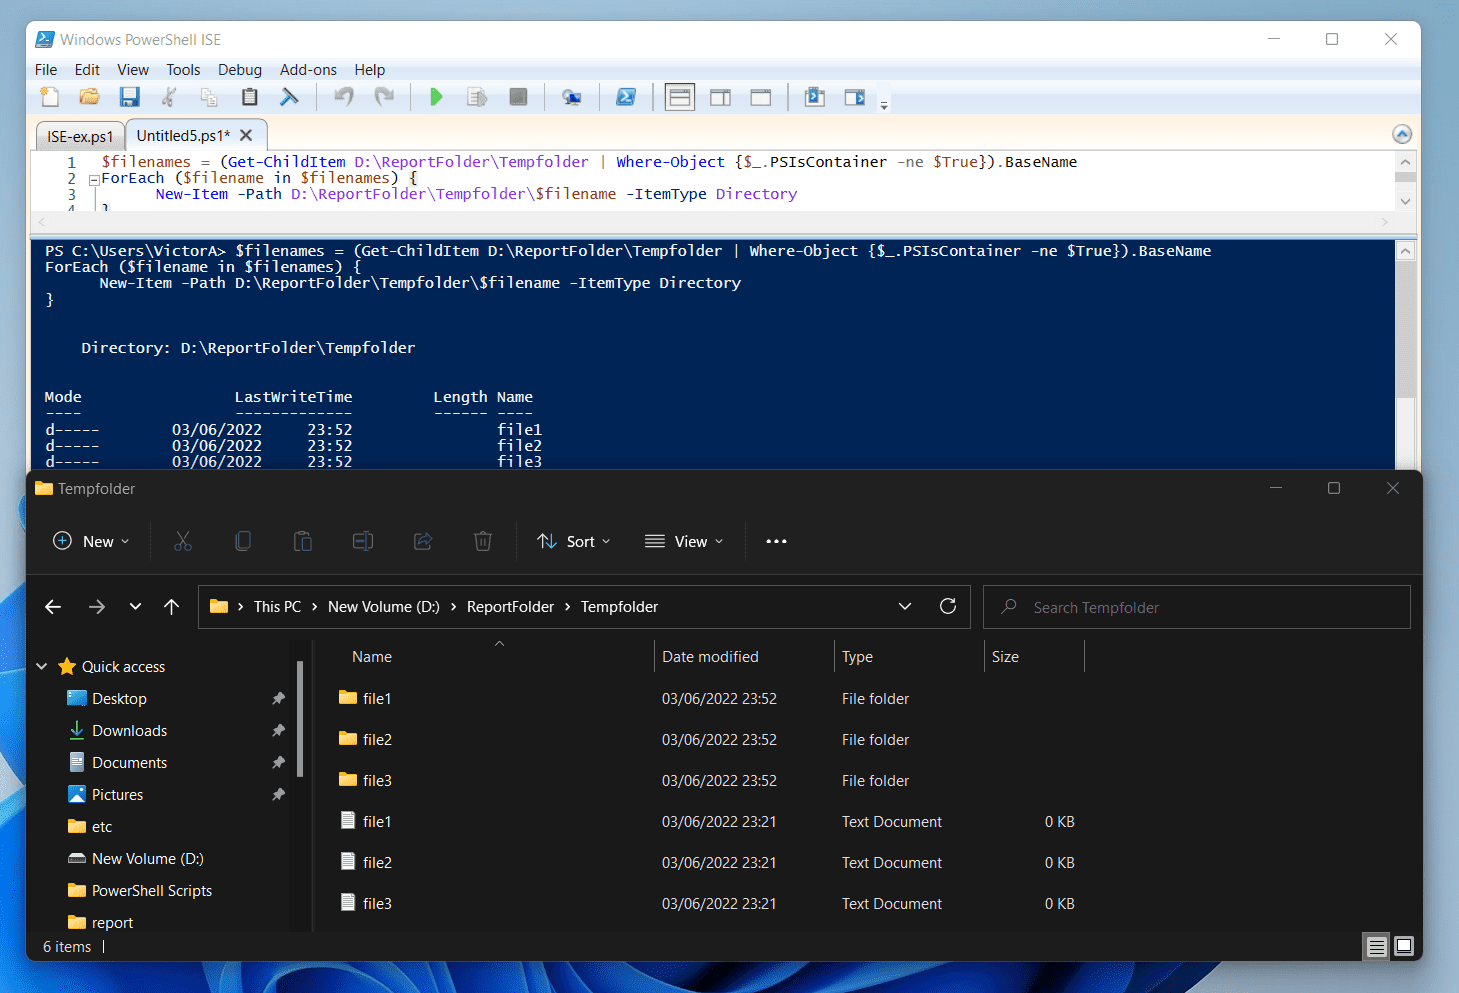
Finally, I can introduce the ForEach statement. To learn more about ForEach statement, read my article – PowerShell ForEach: Syntax, Parameters, Examples.
To run the script copy it to PowerShell ISE.
$filenames = (Get-ChildItem D:\ReportFolder\Tempfolder | Where-Object {$_.PSIsContainer -ne $True}).BaseName
ForEach ($filename in $filenames) {
      New-Item -Path D:\ReportFolder\Tempfolder\$filename -ItemType Directory
}
Here are the results. The PowerShell script successfully created directories based on the filenames.
Frequently Asked Questions
Yes, you can. Like most cmd commands, MKDIR works in PowerShell
MKDIR creates a new folder in the current directory while MKDIR -p creates a folder in the path you specify with the -p switch.
To create a new file in PowerShell, use the New-Item command. Then, specify the file in the ItemType parameter.
Here is a sample command that creates a file called test.txt in the path D:\ReportFolder\Tempfolder.
New-Item -Path D:\ReportFolder\Tempfolder\test.txt -ItemType File
To set the location in PowerShell, use the Set-Location cmdlet.
Here is an example command that sets the location to D:\ReportFolder
Set-Location D:\ReportFolder
You can use the New-Item cmdlet to create a directory or a file. Here is a command that creates a directory in PowerShell
New-Item -Path D:\ReportFolder\Tempfolder\testfolder -ItemType Directory
Conclusion
There is no doubt that when you write PowerShell scripts you must come across the need to create directories (folders) or files.
For example, if you write a script that creates daily reports, you may want to create folders based on the current date. Similarly, you may create the reports (txt or CSV) based on the current date and time.
To accomplish this, you need to understand how to use the New-Item cmdlet. I have covered the syntax, parameters, and the use of this cmdlet extensively in this detailed guide.
I hope I was able to help you understand how to create files and folders using PowerShell. If you found this guide helpful and easy to understand, click on “Yes” beside the “Was this page helpful” question below.
You may also express your thoughts and opinions by using the “Leave a Comment” form at the bottom of this page.
Finally, to deepen your PowerShell knowledge more, I recommend you visit our Windows PowerShell Explained page. You can also find more useful PowerShell guides on our Windows PowerShell How-To Guides page.