Do you want to see all the hidden folders on your computer? In that regard, this guide gives you three steps to unhide folders in Windows 11.
Step 1: Enable Show Hidden Files, Folders, and Drives
First and foremost, if you wish to unhide folders on your Windows 11 PC, you have to enable Folder Option to view hidden items. Follow the steps below to enable view hidden items:
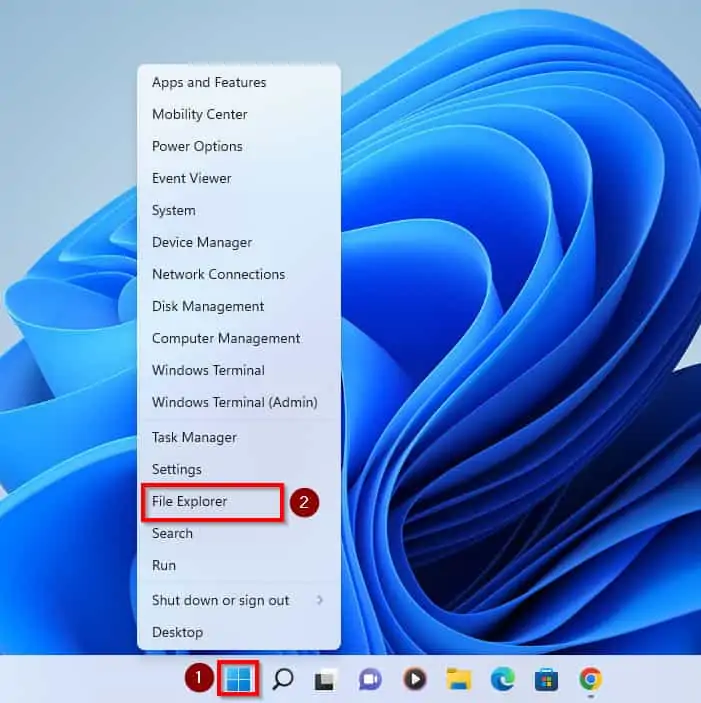
- To begin with, right-click on the Windows start menu and select File Explorer.
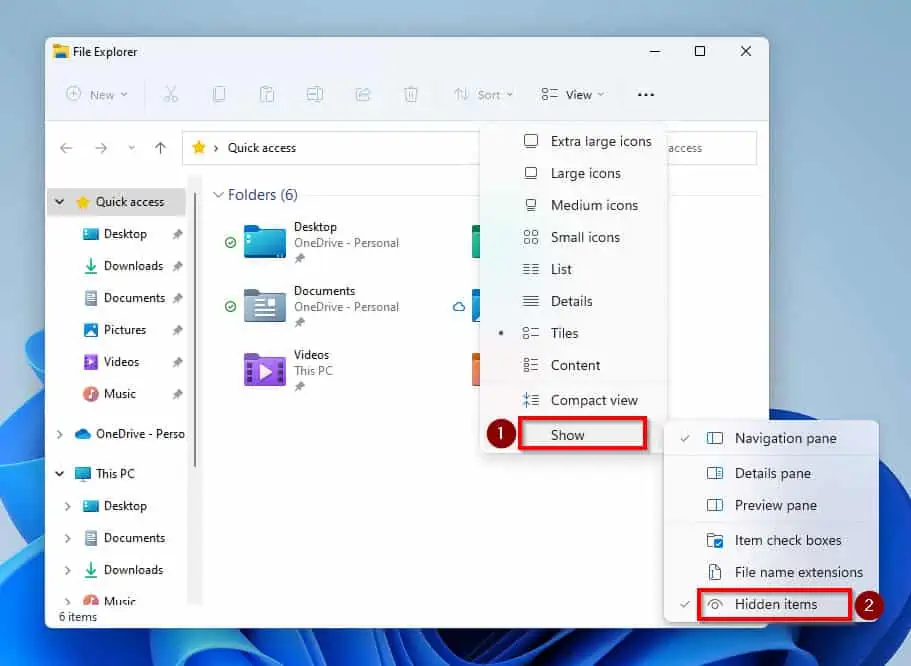
- Then, on the top right of File Explorer, click on View.

- Then, at the button of the View drop-down, hover on Show and click on Hidden items.
Step 2: Unhide Folders (or a Specific Folder)
Once you have enabled show hidden items, all hidden folders on your File Explorer will be visible. Next, follow the steps below to remove the Hidden Attribute of a folder:
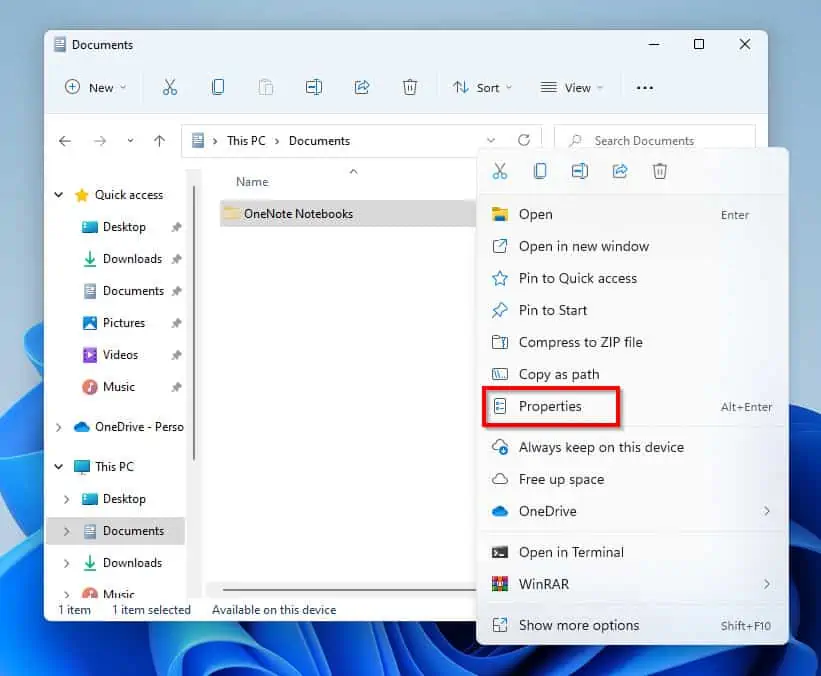
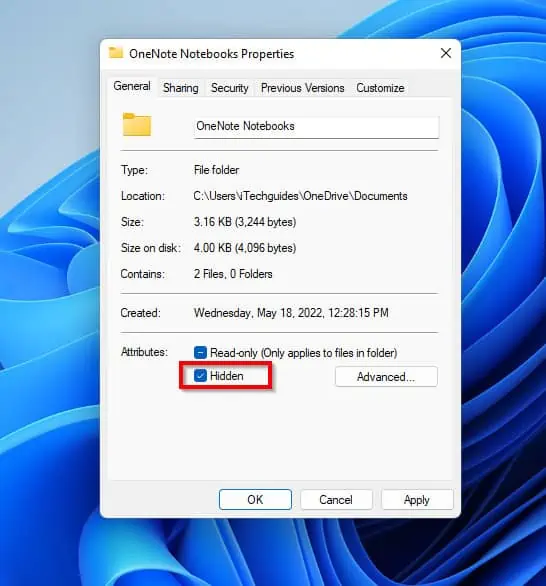
- Right-click the hidden folder you want to unhide and select Properties.
- Then, under the General tab in the Properties pop-up menu, uncheck the Hidden checkbox and click OK
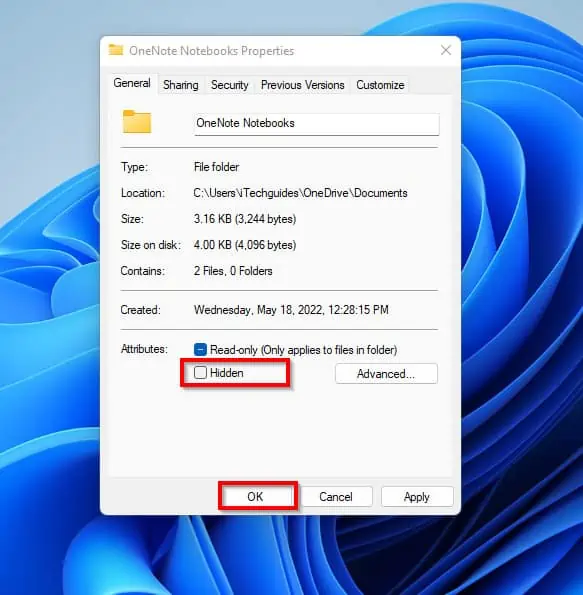
- On the Confirm Attributes Changes pop-up menu, click Ok to apply changes to subfolders and files.

Step 3: Disable Show Hidden Files, Folders, and Drives
In this section, your hidden folder is already unhidden. However, you need to reverse the process.
You can hide the folder again by using the method in step 1. Nevertheless, I want to show you another way of performing this task.
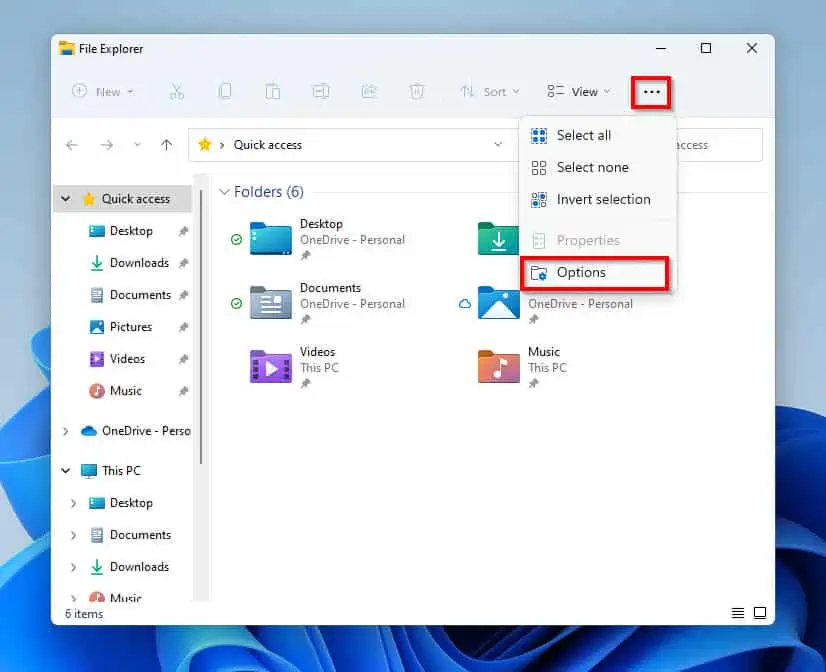
- To start with, right-click on the Windows 11 start menu and select File Explorer.
- Then, on the top right of File Explorer, click the three dots, and select Options. This step will prompt a Folder Options pop-up menu.
- On the Folder Options menu, click on the View tab.
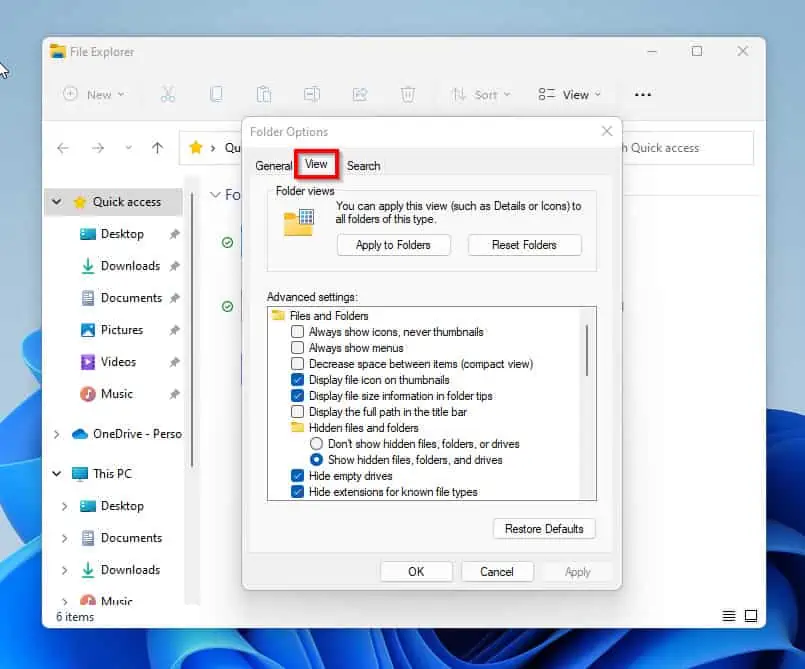
- Then, under Advanced settings, locate the Hidden files and folders category and click Don’t show hidden files, folders, and drives. To save your changes, click OK.

Frequently Asked Questions
a) Navigate to Control Panel-> Appearance and Personalization -> select File Explorer Options-> click View -> Under the Advanced settings option, click Show hidden files, folders, and drives -> then, OK to save your changes.
To open folder Options on your Windows 11 PC:
a) Right-click Windows 11 Start menu and select File Explorer.
b) Then, when File Explorer opens, click the 3 dots on the top right of the menu and select Options.
Yes, it does. Like all other versions of the Windows operating system, Windows 11 features a taskbar.
To show all active files in your Taskbar, press the Window key and Tab together.
Yes, you can. You can customize what appears on your taskbar from the taskbar settings. To get to the Taskbar settings, right-click on an open space on the taskbar and click Taskbar settings.
Conclusion
By default, your computer hides some files and prevents you from viewing them. These files are hidden to help prevent vital data from being deleted by accident.
However, if you wish to view these files you can use the three steps discussed in this article. To give more detail, I showed you enable show hidden files, folders, and drives.
Furthermore, the article teaches how to uncheck the hidden attribute in folder properties and disable show hidden items. Hence, with the step-by-step approach that this guide employs, you should be able to unhide folders on your Windows 11 computer.
I hope this post was helpful. If you were able to unhide folders on your computer with the aid of this guide, click on “Yes” beside the “Was this page helpful” question below.
You may also express your thoughts and opinions by using the “Leave a Comment” form at the bottom of this page.
Finally, visit our Windows 11 How-To page for more Windows 11 guides and fixes.