Are you having issues with pop-ups and wish to disable them? Lucky for you, we prepared a series of techniques to teach you how to stop pop-ups on Windows 11.
Option 1: Disable OneDrive or Microsoft Office Pop-ups
Perhaps you have been receiving disturbing reminders from Microsoft to buy either Microsoft Office or OneDrive. Follow these steps to stop the pop-ups.
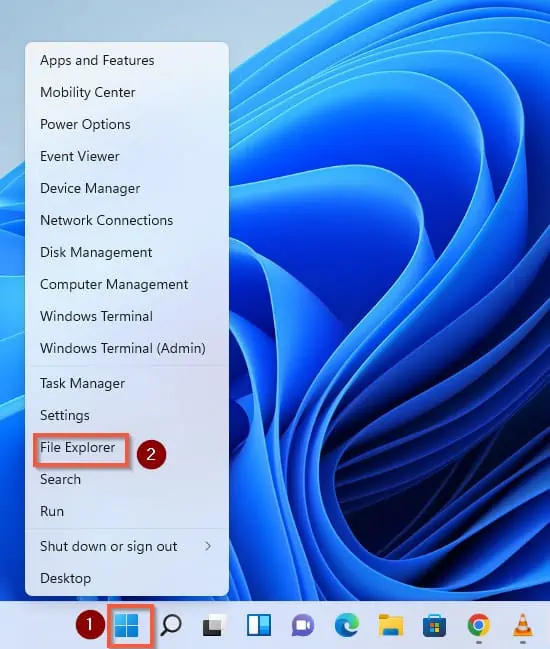
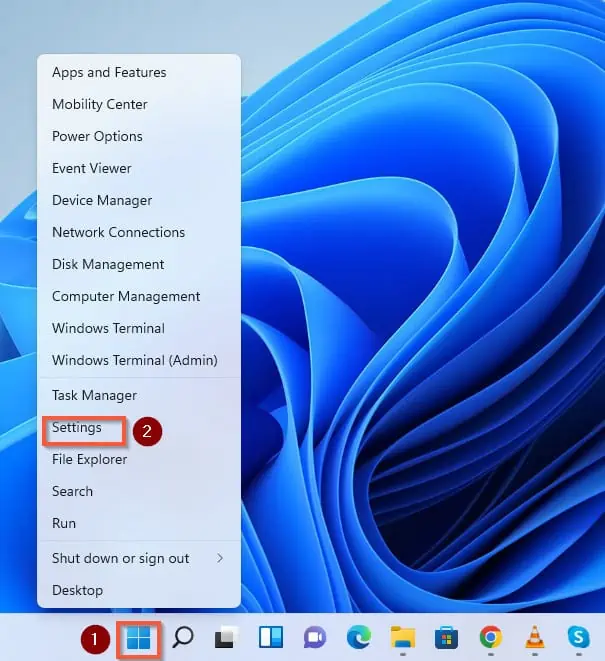
- First, go to the taskbar, right-click the Windows Start icon, and click on File Explorer.
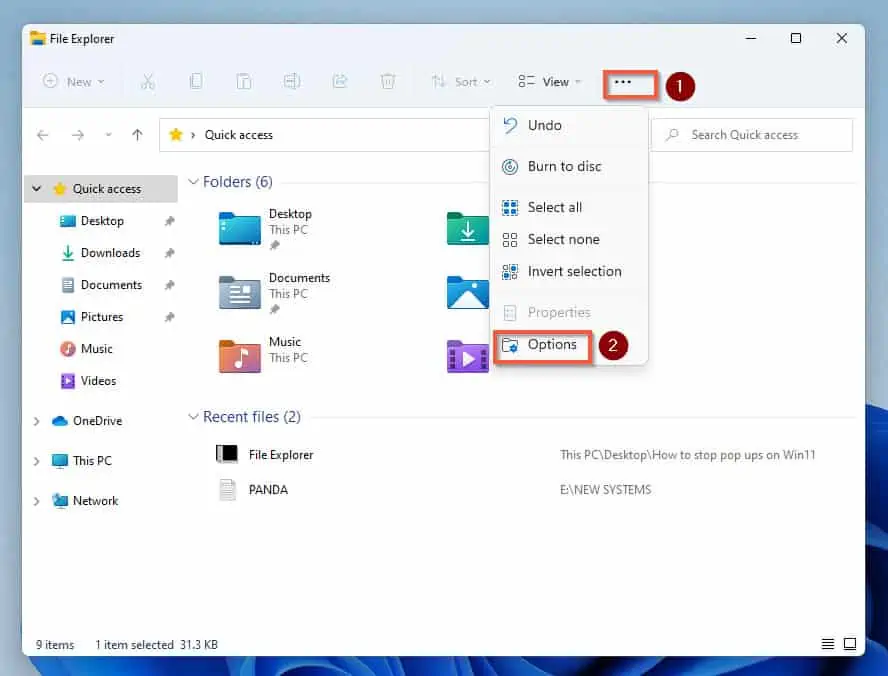
- Then, on the File Explorer Window, click on the Three Horizontal Dots on the toolbar. Thereafter, click on Options.
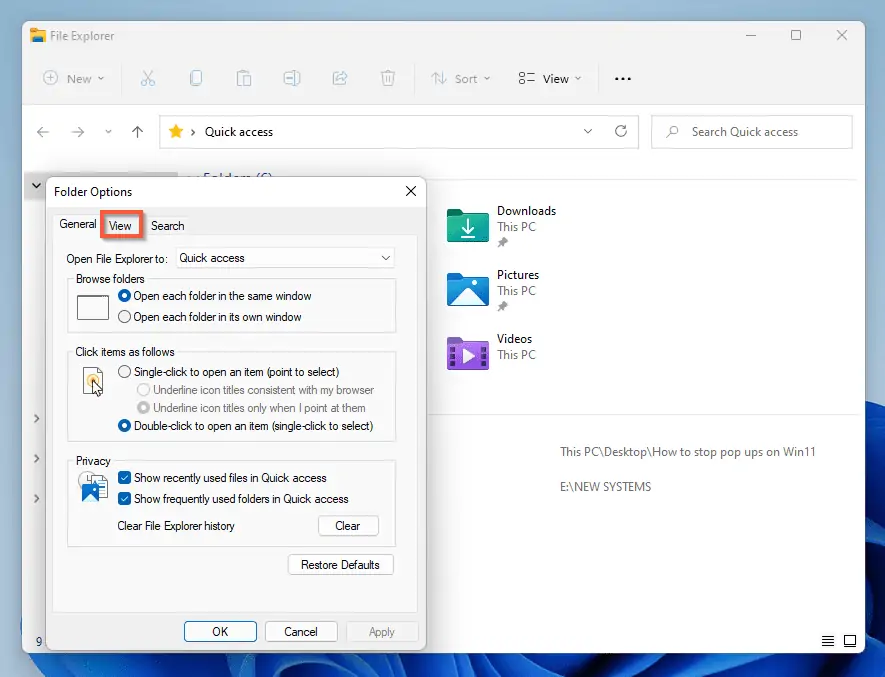
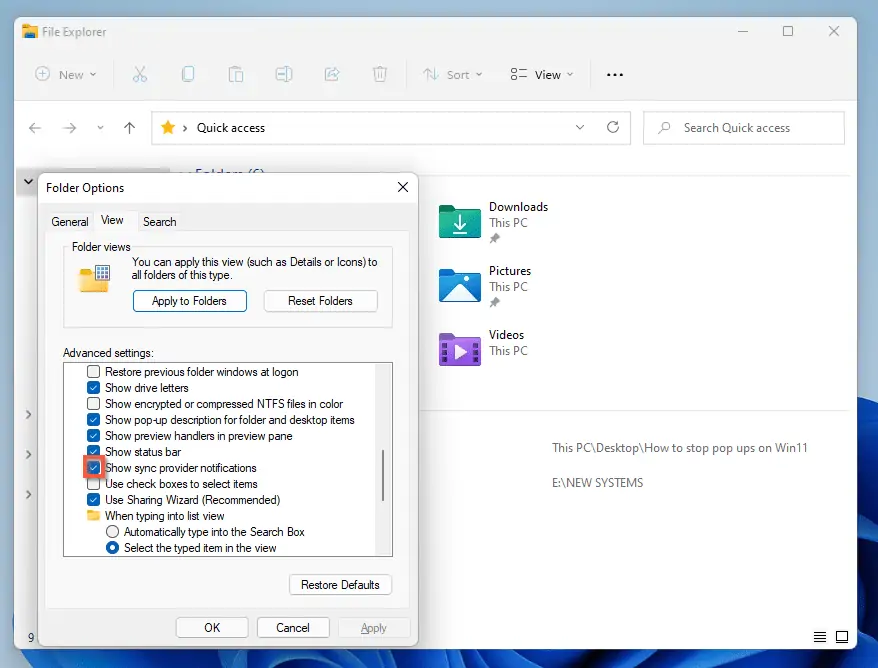
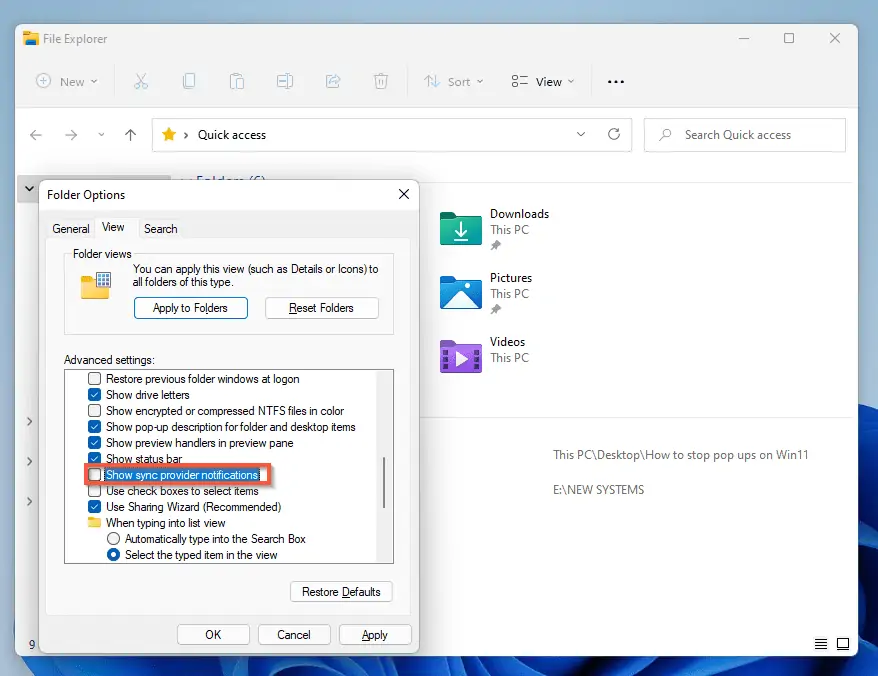
- Once the Folder Options window opens, click on the View tab.
- Lastly, go to the Advanced settings area, scroll down, and uncheck the Show sync provider notifications checkbox, then click OK.
Option 2: Stop Lock Screen Pop-Ups
If you often get pop-up Ads on your Windows 11 lock screen, follow the steps below to disable those pop-ups.
- Begin by right-clicking the Windows 11 Start menu, then click on Settings.
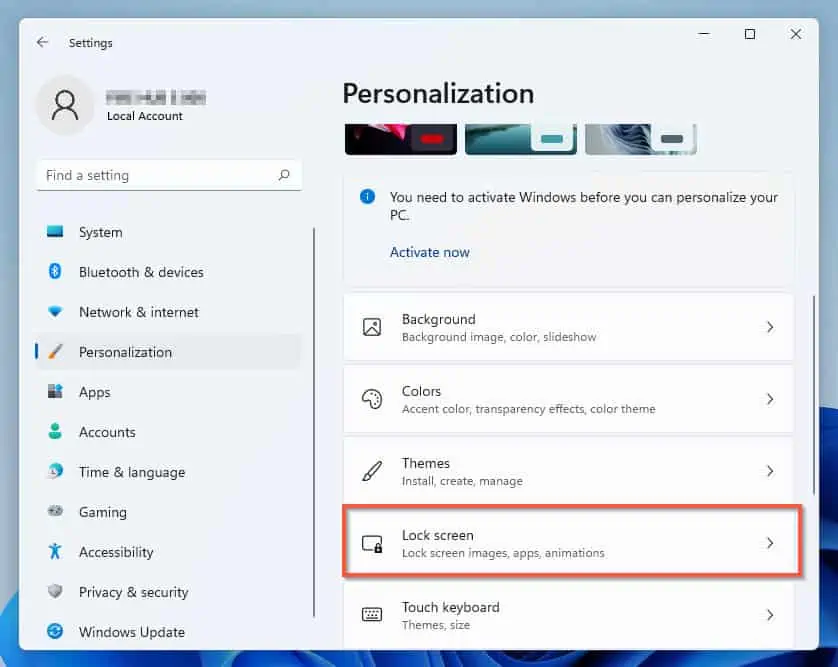
- When the Settings window opens, navigate to the window’s left-pane and click on Personalization.

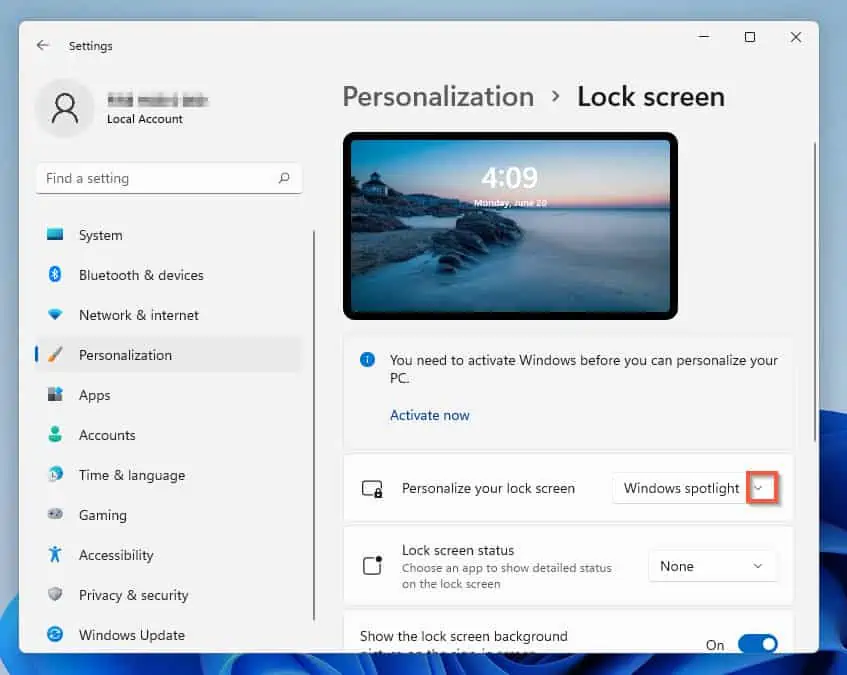
- Then, on the right pane of the Personalization settings, select Lock screen.
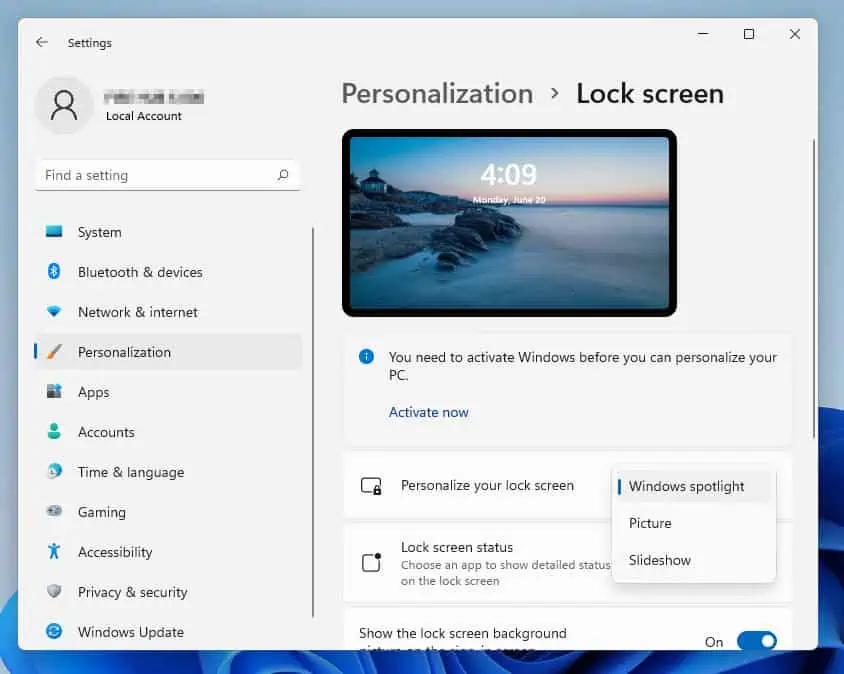
- On the Lock screen settings, go to Personalize your lock screen, click the drop-down arrow, and select Picture or Slideshow.
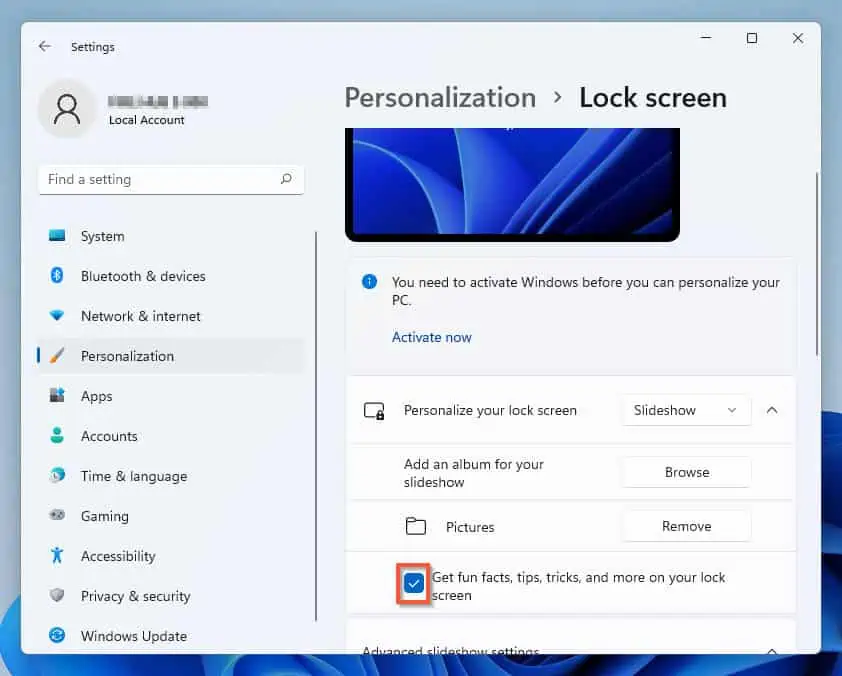
- For the final steps to stopping pop-ups on Windows 11 Lock screen, do this. Uncheck Get fun facts, tips, tricks, and more on your lock screen checkbox.

Option 3: Deactivate Pop-Ups from Programs
To stop pop-up messages from programs such as Skype, Chrome, Outlook, etc, follow the procedures below.
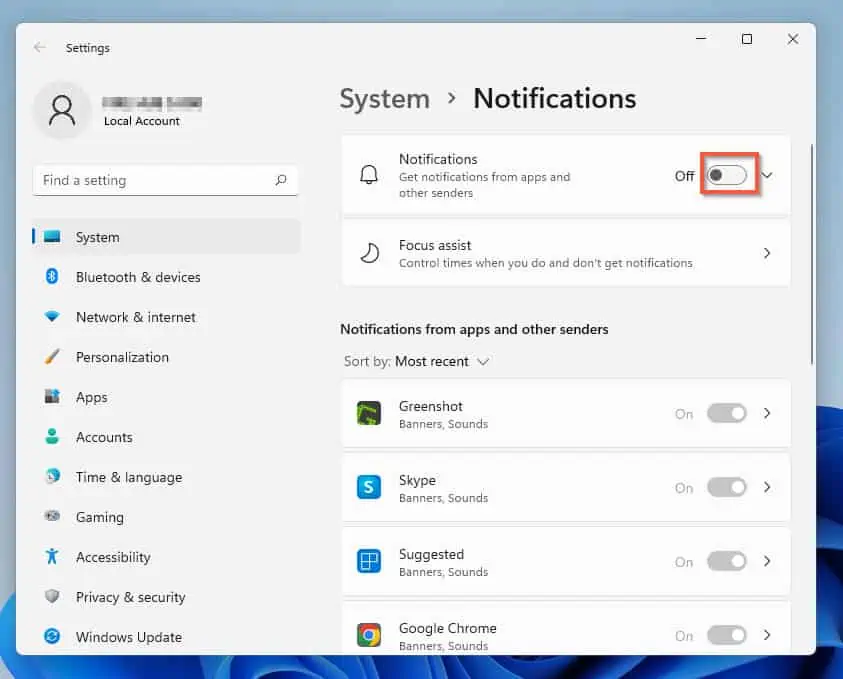
- Navigate to the Windows 11 taskbar right-corner and right-click on the notification area, then select Notifications settings.
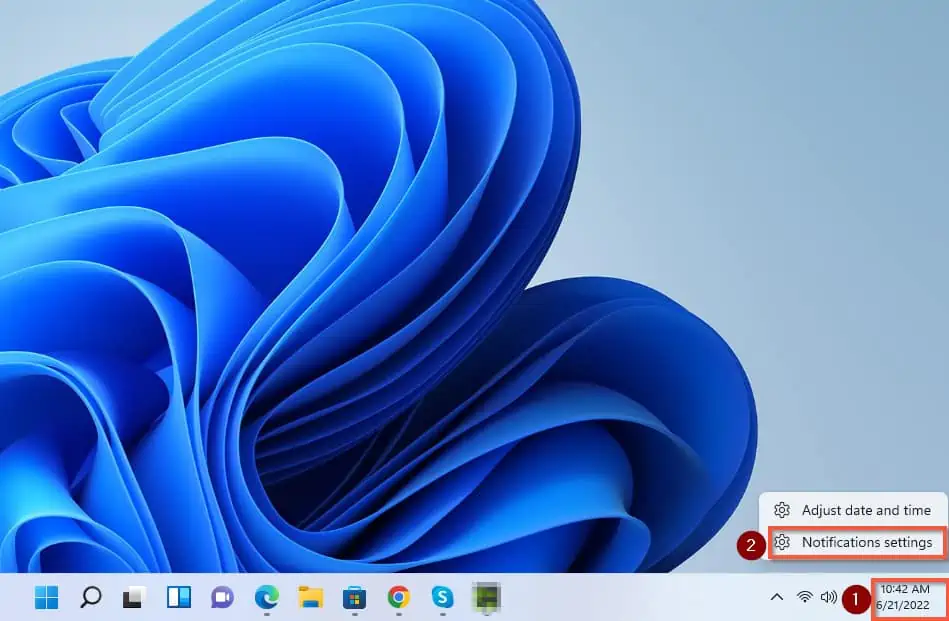
- On the left pane of the Notifications settings window, switch the Get notifications from apps and other senders On button to Off.
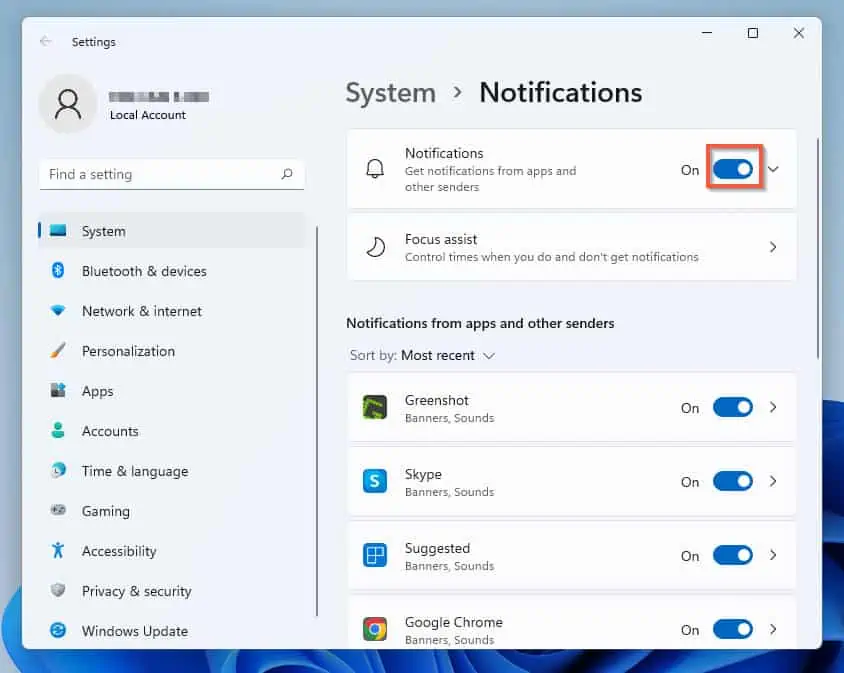
- Once the notification switch is turned Off, the switch changes from blue to gray.
Option 4: Stop Pop-Ups from Microsoft Edge
If you often get Ads and pop-up notifications when using Microsoft Edge, below are some guidelines to disable those notifications.
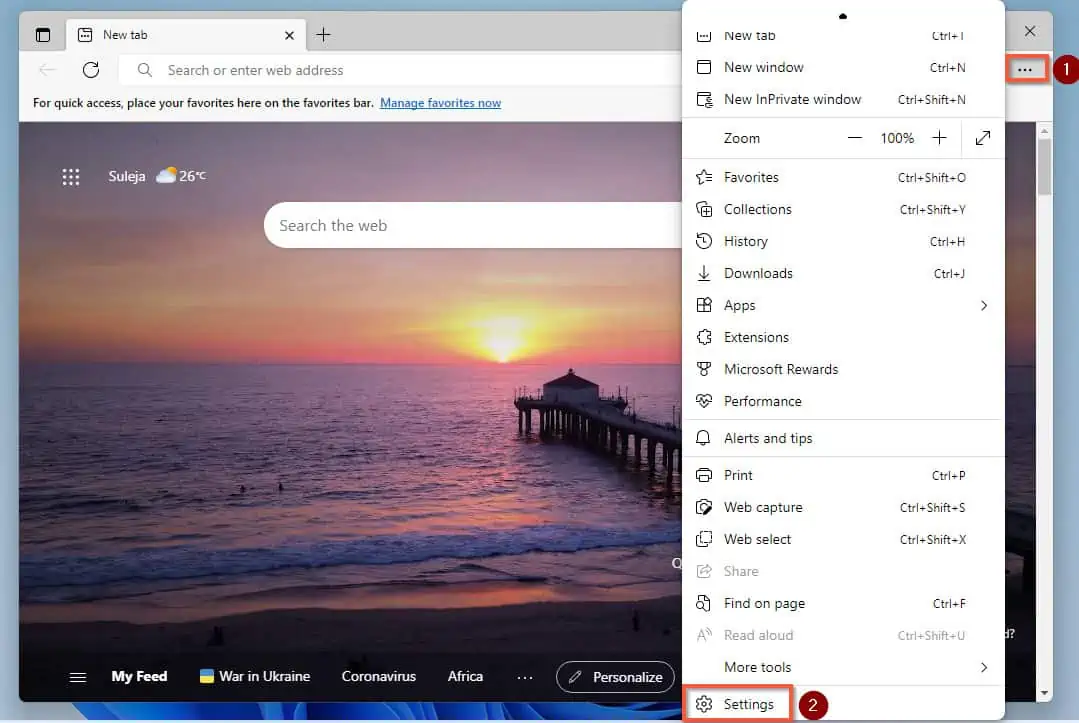
- Launch the Microsoft Edge, then click on the Menu (3 horizontal dots) on the top-right of Microsoft Edge.
- Thereafter, from the displayed options, select Settings.
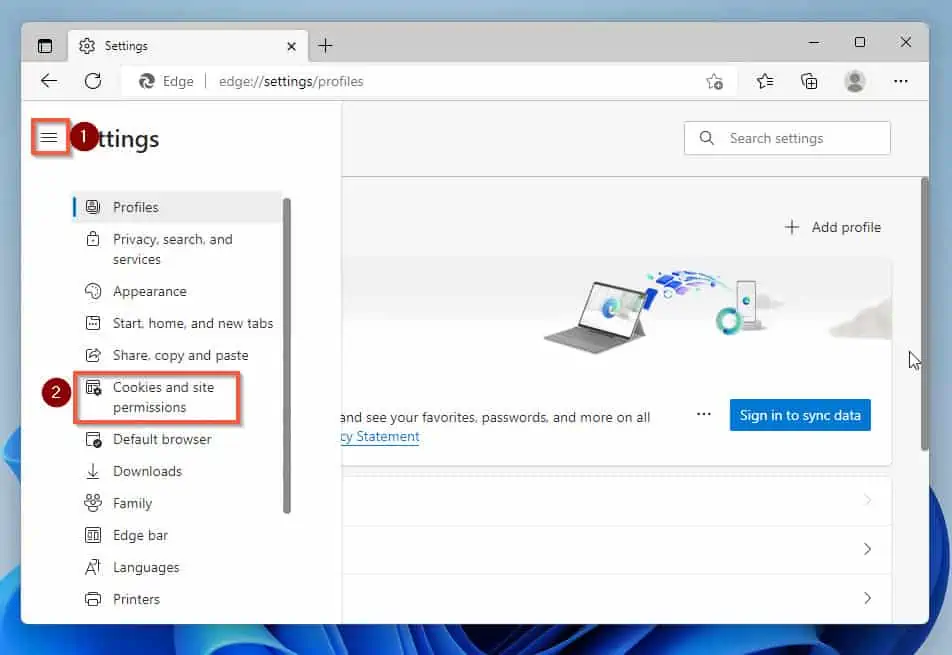
- When the Settings page loads, click on the Settings menu.
- After that, click on Cookies and site permissions.
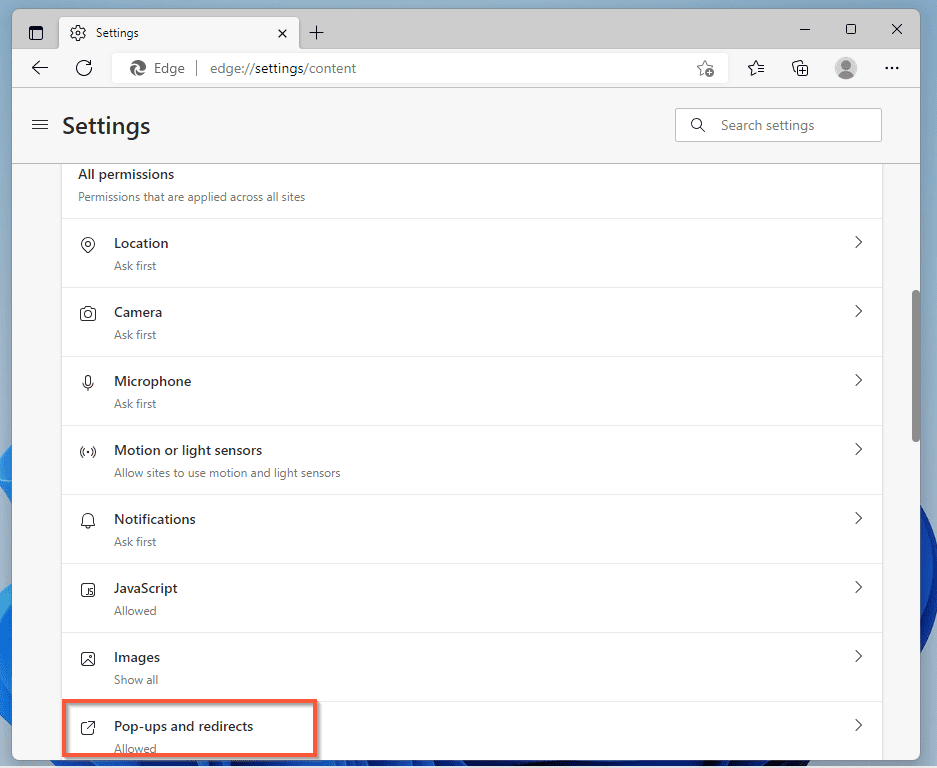
- When the Cookies and Site Permissions page opens, scroll down to All permissions and click Pop-ups and redirects.
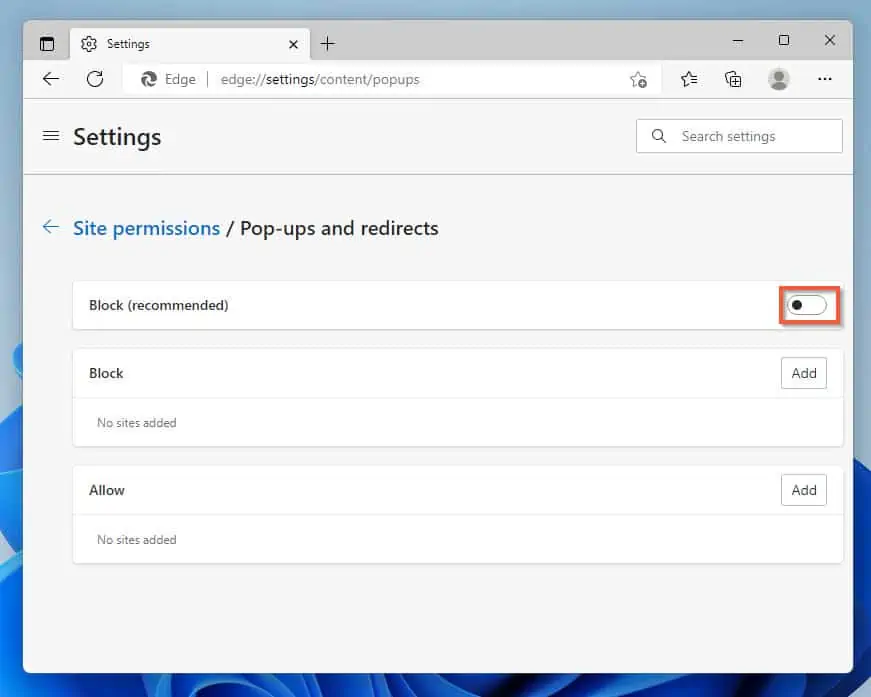
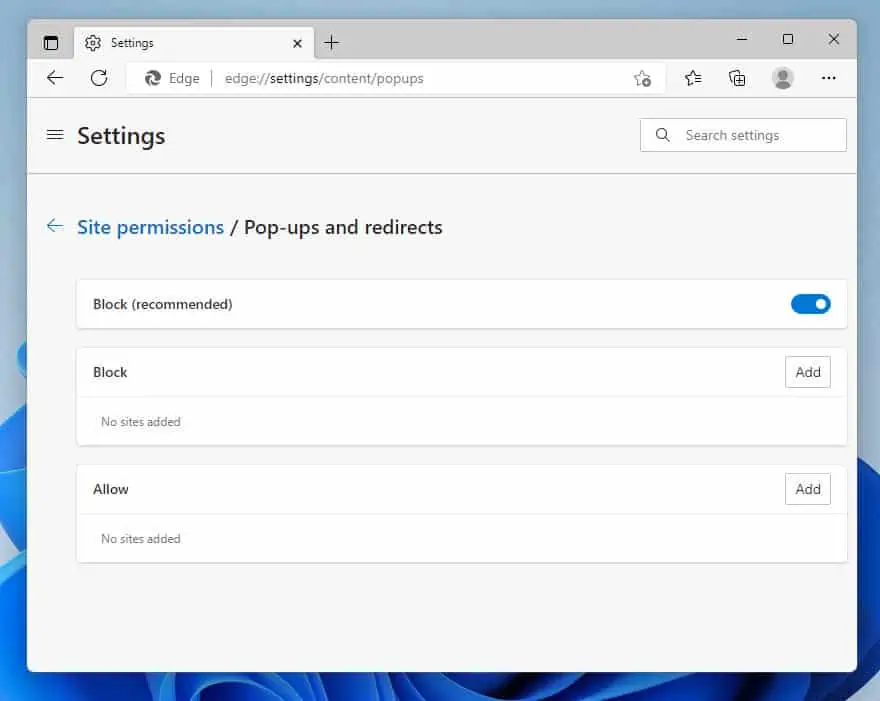
- On the Pop-ups and redirects page, go to Block (recommended) and toggle the button on.
Option 5: Disable Pop-ups from Google Chrome
- Launch the Google Chrome browser. Afterward, paste the URL text below into the address bar of the browser and hit enter.
chrome://settings/content
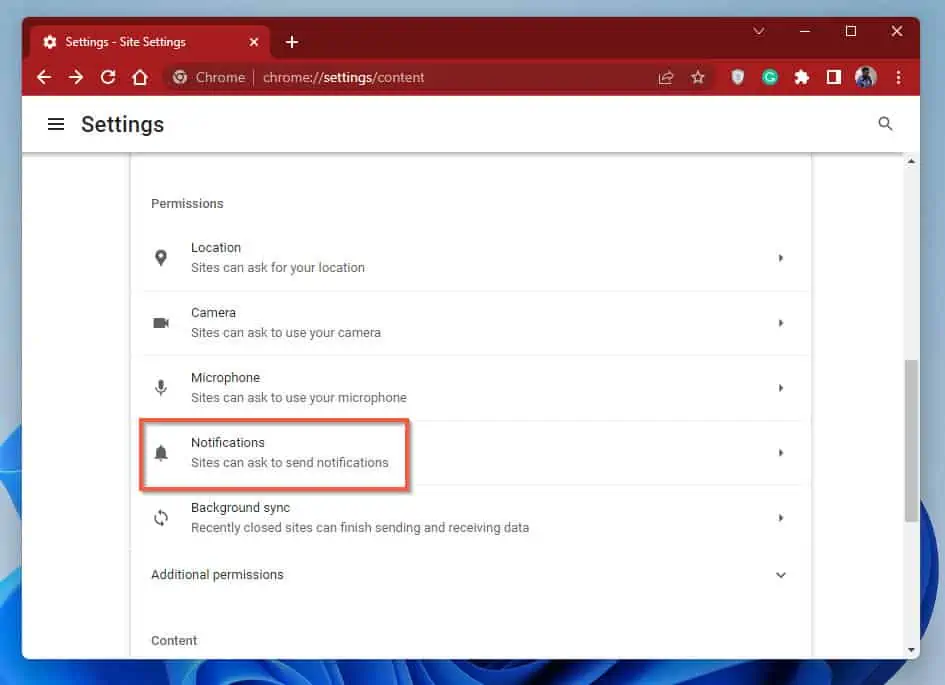
- This URL text will open the Chrome Settings. Then scroll down and click Notifications.
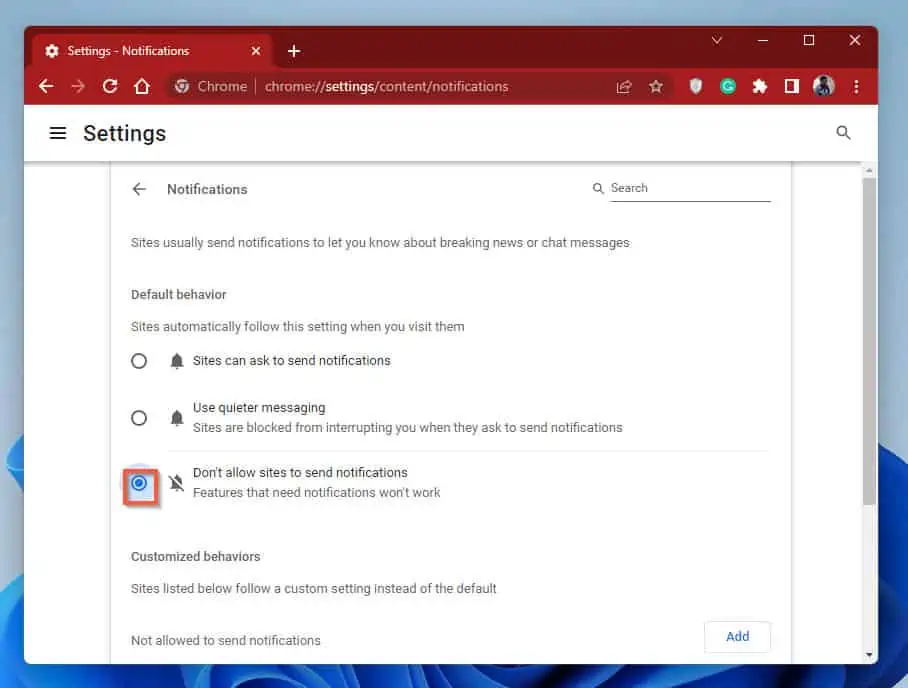
- On the Notification page, activate the radio button beside the “Don’t allow sites to send notifications“.
- When you activate it, the radio button will turn from gray to blue.

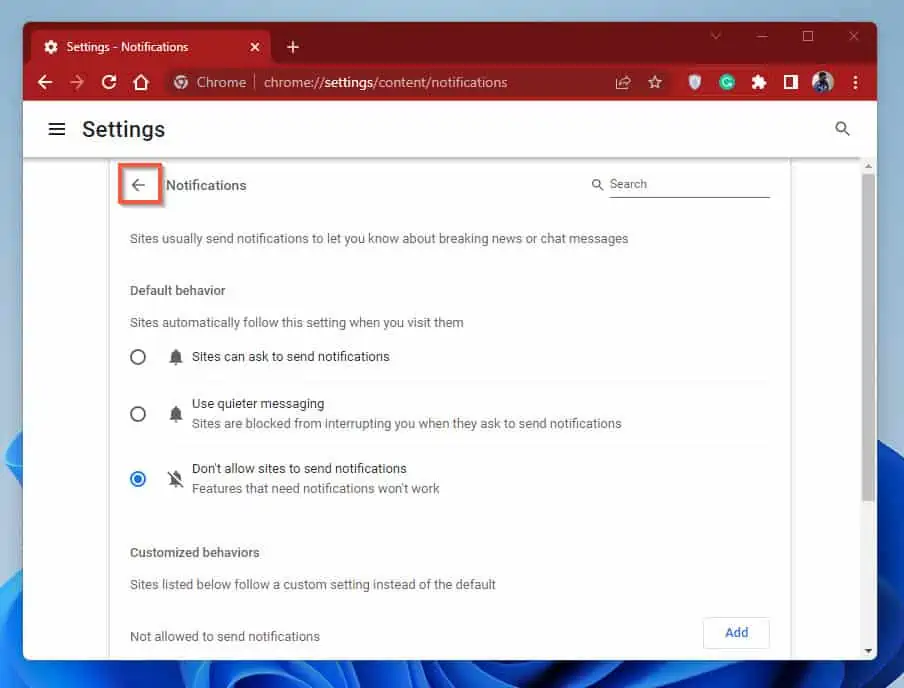
- To go back to the previous page, click the arrow on the top left side of the Notification page. Now the Notification will display Don’t allow sites to send notifications.
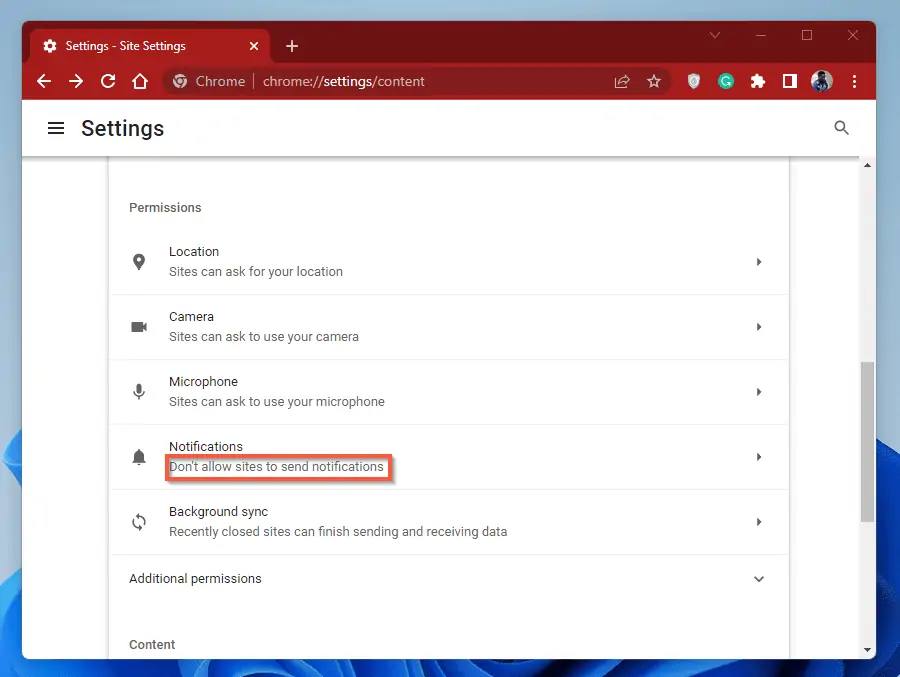
- Lastly, scroll down to set up “Pop-ups and redirects” settings. Then, click “Don’t allow sites to send pop-ups or use redirects“.
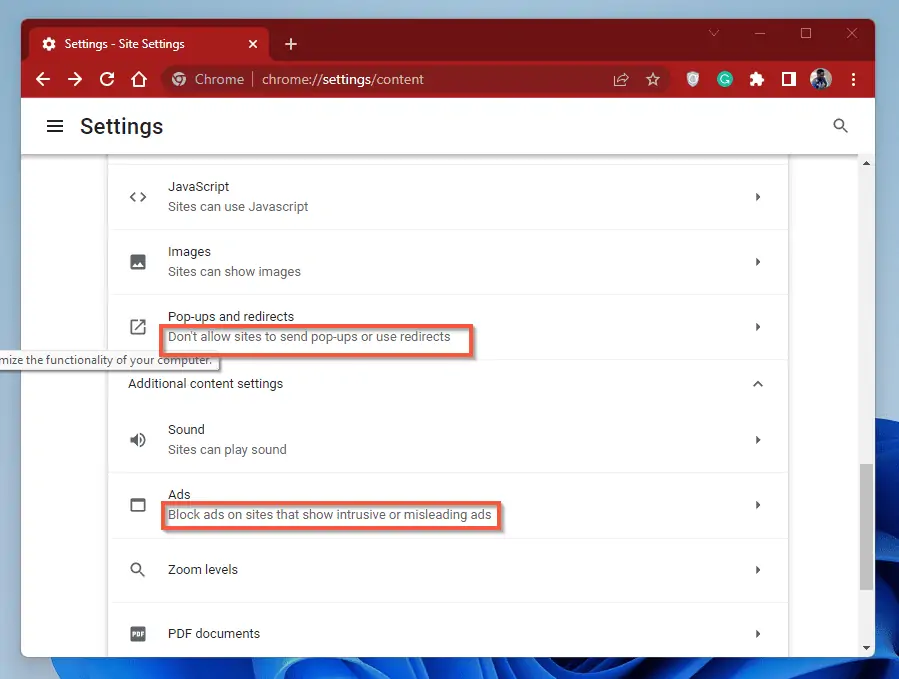
When the Pop-ups and redirects page opens, ensure that the “Don’t allow sites to send pop-ups or use redirects” option is selected.
Also, set up Ads to Block ads on sites that show intrusive or misleading ads.
Frequently Asked Questions
Yes, there are ads on Windows 11. So, if you see any don’t panic, they are not like the ones on the web. Moreover, they are paid ads placed by Microsoft.
To stop all Windows 11 pop-ups, follow these steps.
a) Right-click the Start menu and select settings.
b) After that, on the right pane of the Settings page click Notification category.
c) On the Notification pane, toggle the notification button from On to Off.
To disable ads in Windows 11, use the following steps:
a) Launch the Windows Settings page.
b) On the right pane of the Settings window, click Notification.
c) Thereafter, on the Notification pane toggle the Get notification from apps and other senders from On to Off.
To make Chrome browser the default browser on Windows 11, follow the steps below.
a) Launch the Chrome browser.
b) On the top right of the browser, click on 3 vertical dots to open the browser Customization and control menu.
c) On Customization and control, click Settings.
d) When the Settings page opens, on the left pane, click Default browser.
e) On the Default browser pane click Make default and immediately, Windows 11 Settings will open.
f) On the Settings window, scroll down under Default apps pane, locate and click Google Chrome.
g) When the Google Chrome pane opens click the Set default button beside Make Google Chrome your default browser.
On Windows 11, Microsoft Edge is the default web browser. However, you can install other browsers like Google Chrome.
Conclusion
Pop-ups and ads can be very annoying most time and one common feature about pop-ups is, that they show up uninvited. Moreover, nobody likes ads except for those who make money from them.
So, if you’ve read this article to this point, it means two things. You are a Windows 11 user and and you don’t like pop-ups.
Also, I believe, this article has taught you how to stop Windows 11 pop-ups reminders to Microsoft products. Also, you’ve learned how to disable lock screen pop-ups and pop-up notifications from programs.
Finally, I believe you’ve also learned how to stop pop-ups from Microsoft Edge and Google Chrome in Windows 11.
I hope you found this Itechguide helpful. If it was helpful, click on “Yes” beside the “Was this page helpful” question below.
You may also express your thoughts and opinions by using the “Leave a Comment” form at the bottom of this page.
Also to get more Windows 11 guides and fixes, visit our Windows 11 How-To page.