Do you want to service an offline Windows image but need help mounting it? This guide teaches you how to mount a Windows image with DISM or PowerShell.
Option 1: Mount a Windows Image With DISM
This section teaches you how to mount a WIM image with DISM. If you prefer to mount a Windows image with PowerShell, jump to section two of this guide.
You can use the steps to mount a VHD or VHDX file with DISM. To mount a Windows image with DISM, follow the steps in the subsections below:
Step 1: Get the Index Number of your Windows Image
Before you can mount a Windows image, you need its index number. To get the index number of the edition of Windows stored in a WIM file, follow the steps below.
- Search cmd and click Run as administrator. Windows will display a User Account Control pop-up, click Yes.
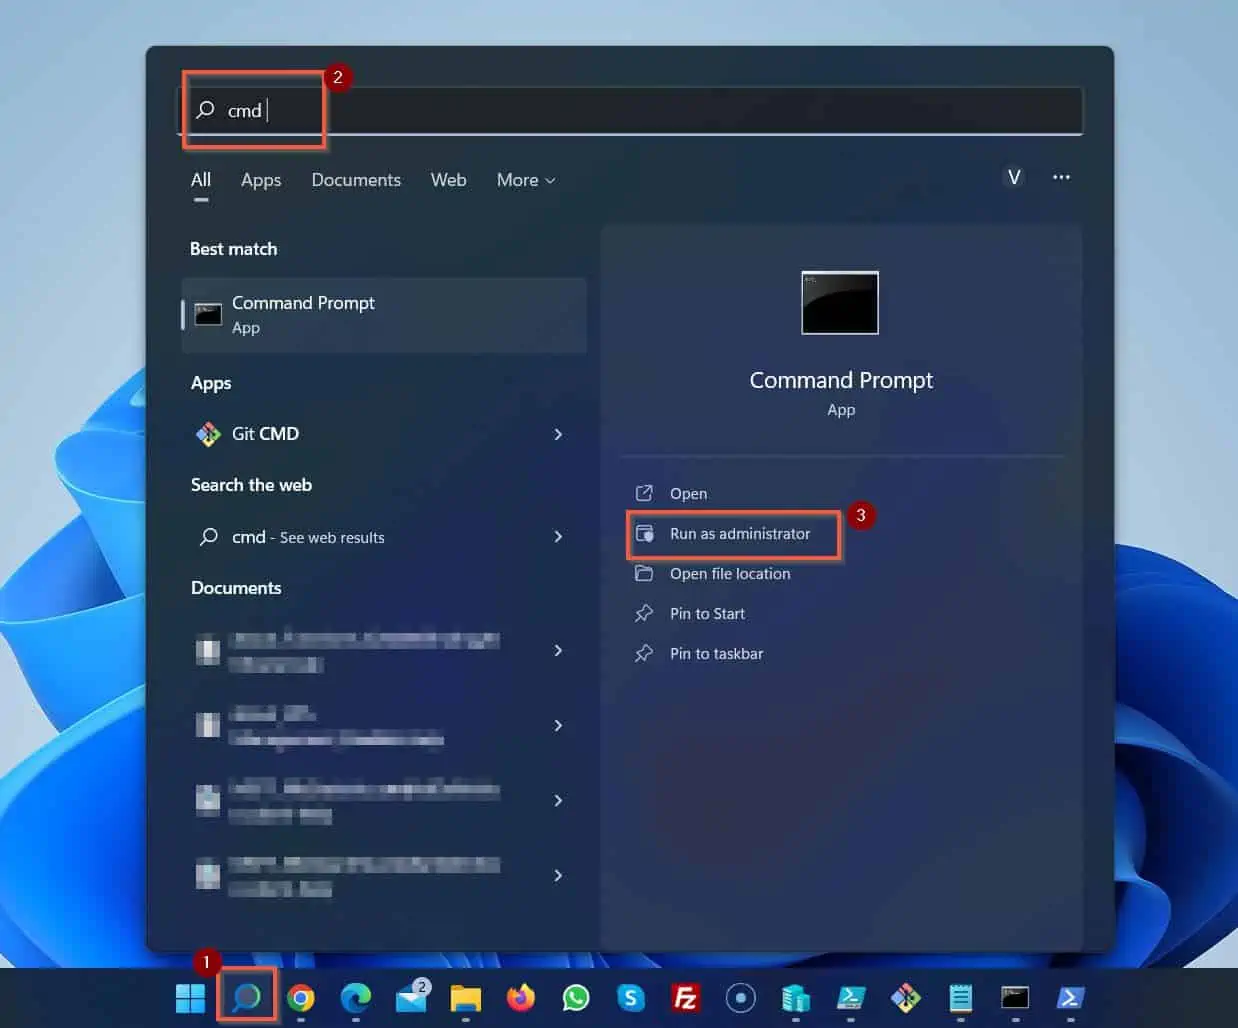
- When Command Prompt opens, copy and paste the command below. Then, press the Enter key on your keyboard to run the command.
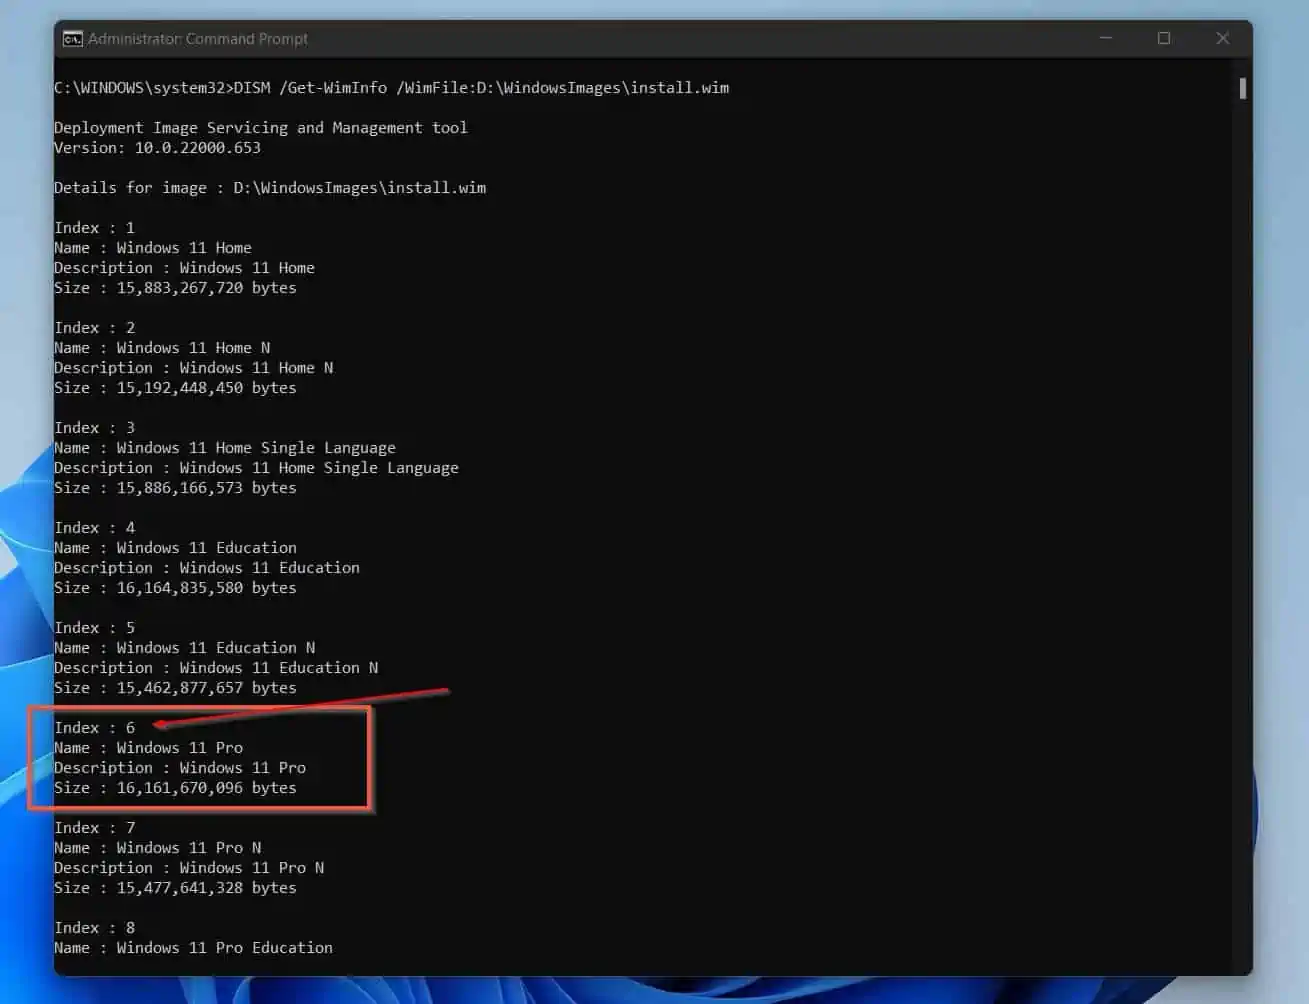
DISM /Get-WimInfo /WimFile:D:\WindowsImages\install.wim
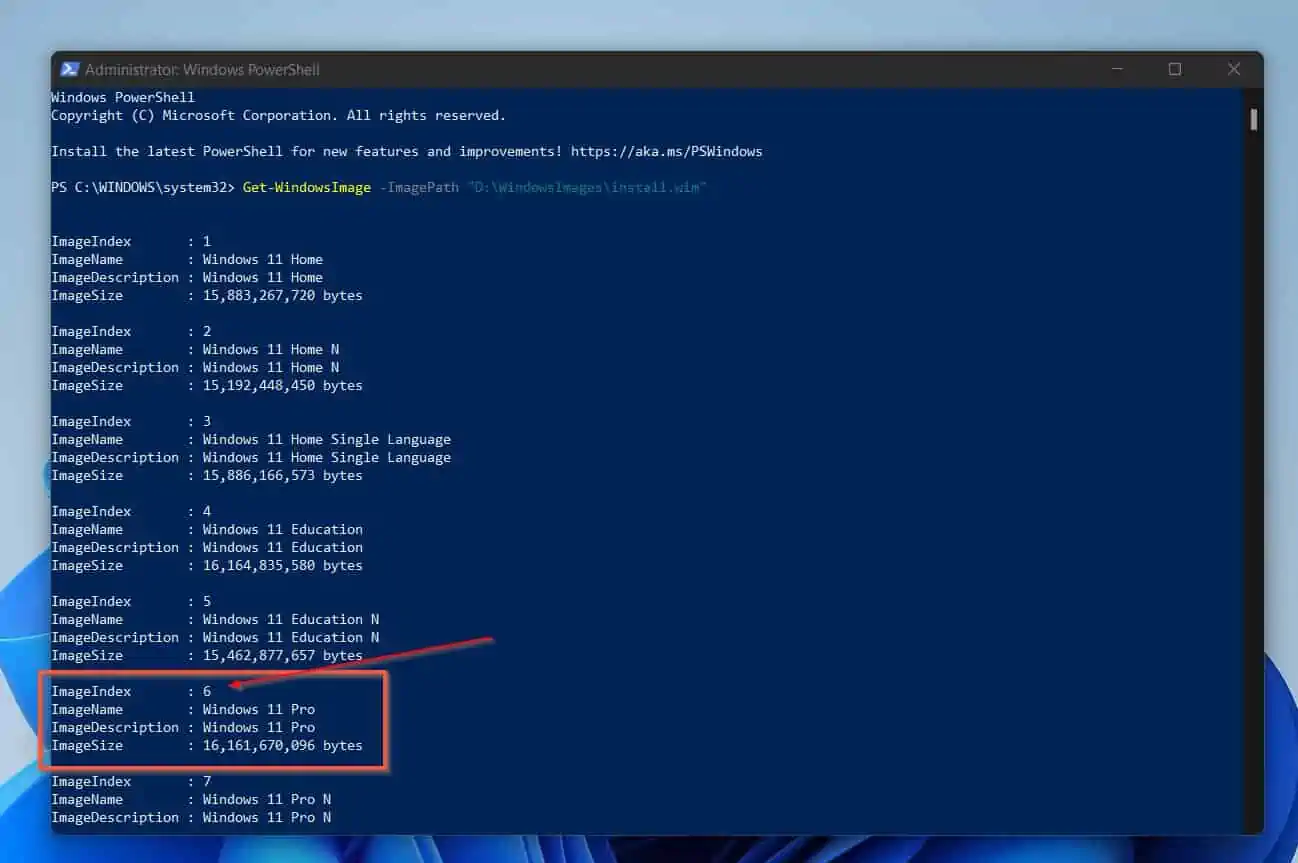
When you run the command, DISM displays the editions of Windows in the WIM image. Note the index number of the edition you want to mount.
In my example, I am mounting “Windows 11 Pro”, the index number is 6.
Step 2: Mount the Windows Image Using the Index Number
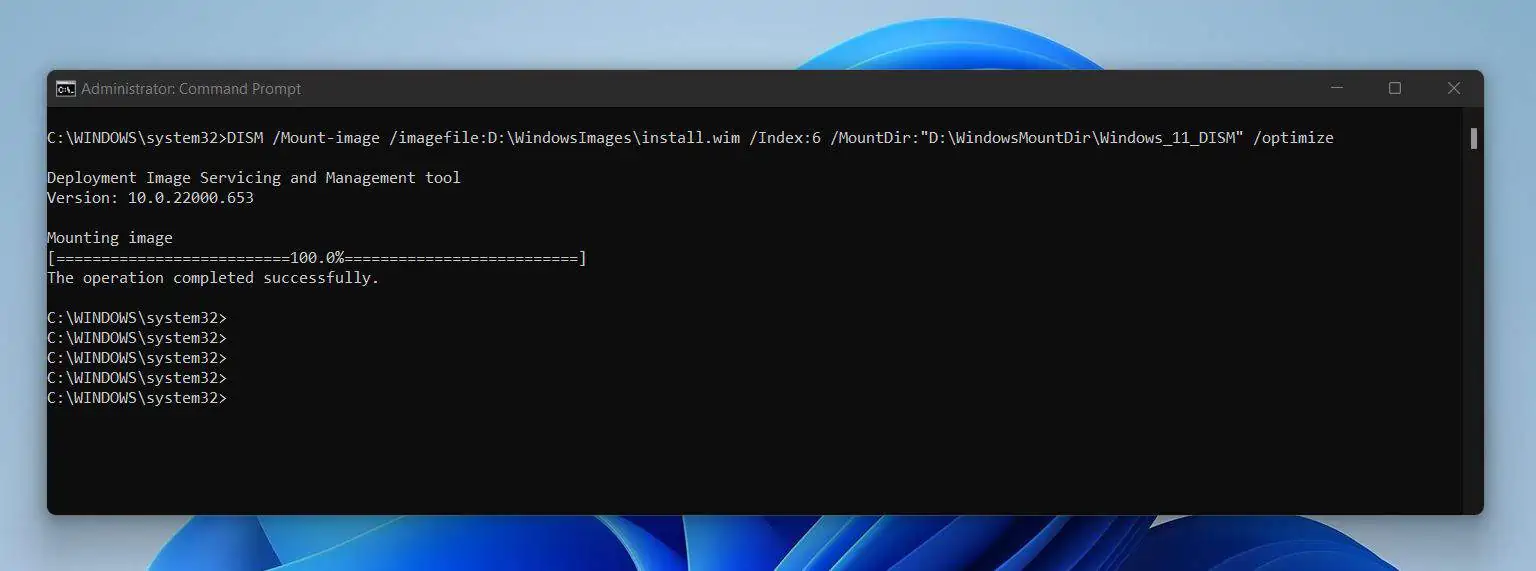
Now that you have the index number of the edition of Windows in the image you want to mount, mount the image with the /Mount-image switch.
Here is the command I used for my example…
DISM /Mount-image /imagefile:D:\WindowsImages\install.wim /Index:6 /MountDir:"D:\WindowsMountDir\Windows_11_DISM" /optimize
When you run the above command, it will take a while to complete.
When it completes, open the folder you mounted the Windows image. The screenshot below shows the folder I mounted my WIM file.
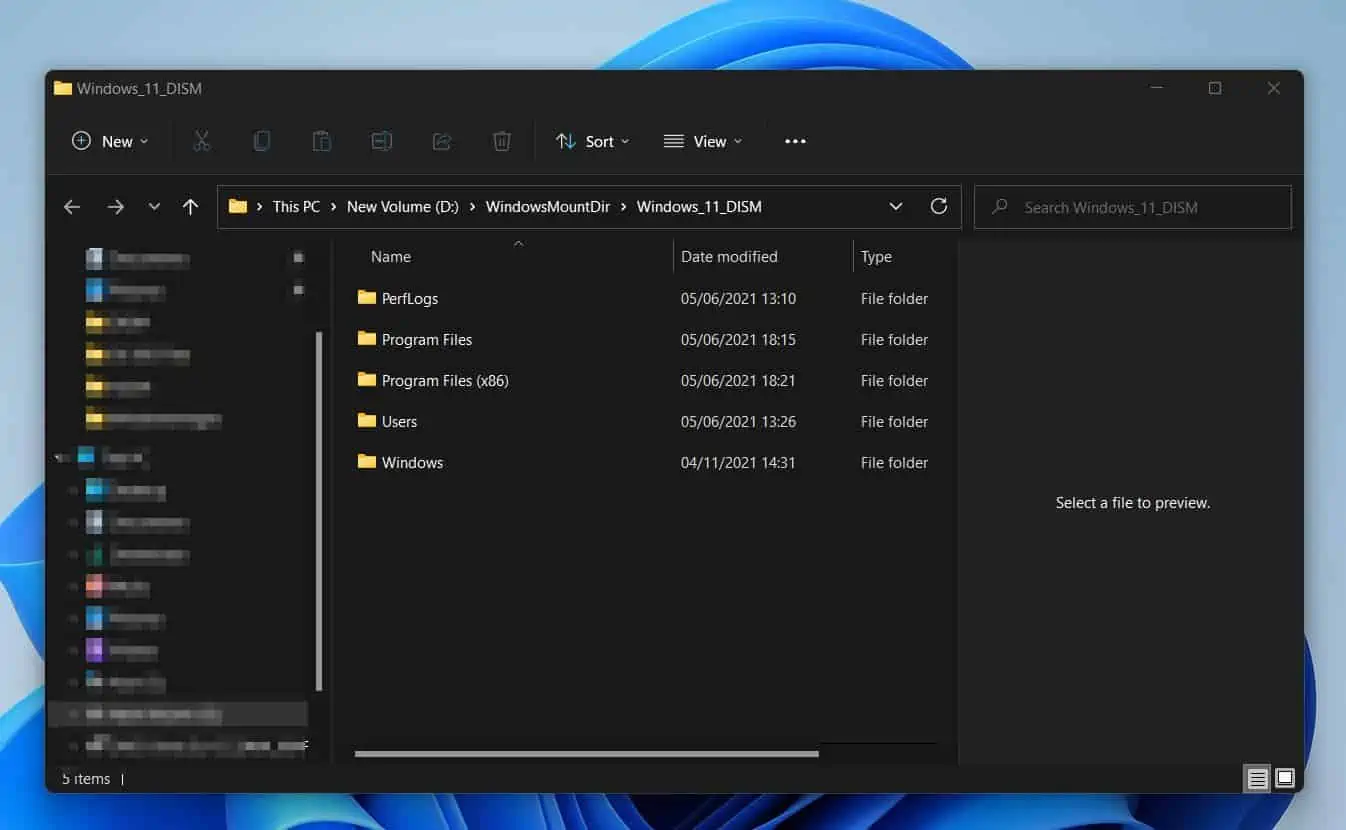
The folder will look like a standard installation folder in a Windows installation.
Option 2: Mount a Windows Image with PowerShell
In this section, you’ll learn how to mount a VHDX file with PowerShell. The steps are similar to mounting a WIM Windows image with DISM.
The only difference is that you’ll be using PowerShell instead of DISM. Before you proceed with the steps in the subsequent sections of this section, copy the Windows image file to a folder.
Additionally, create a folder you intend to mount the Windows image.
Step 1: Get the Index Number of your Windows Image
You need the index number of the Windows edition in the image you want to mount. Follow the steps below to get the index number of a Windows image.
- Search powershell; then click Run as administrator. Windows will display a User Account Control pop-up, requesting you to allow the app to make changes to your device. Click Yes
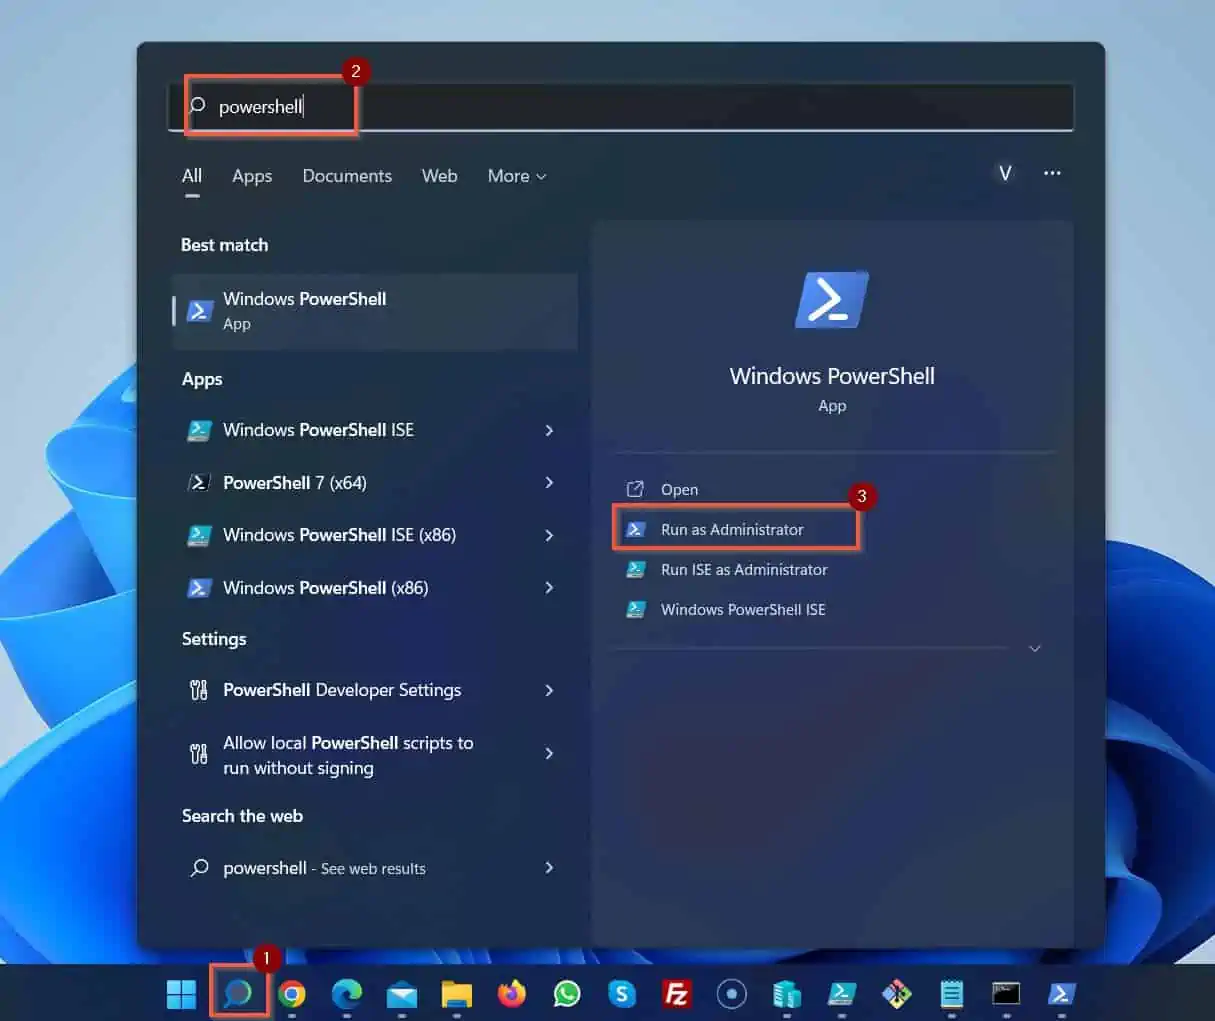
- Then, on the Windows PowerShell console, enter the command below.
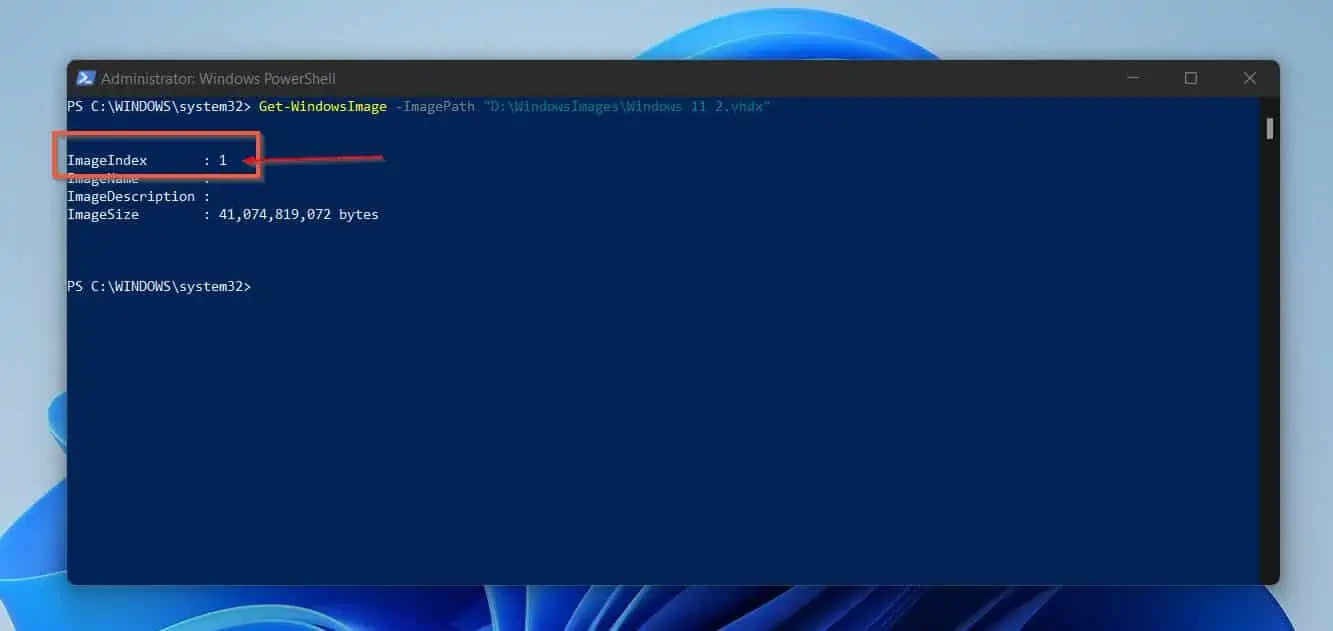
Get-WindowsImage -ImagePath "D:\WindowsImages\Windows 11 2.vhdx"
The PowerShell Get-WindowsImage command displays information about the Windows image. Note the index of the image.
If it is a WIM image, it will have multiple editions of Windows. However, since my image is a VHDX, it has just one index, 1.
If the image is a WIM image, it will display multiple editions of Windows in the image. See the screenshot below.
Step 2: Mount the Windows Image Using the Index Number
Once you have the index number of the Windows image you want to mount, run the PowerShell command below to mount the image.
Mount-WindowsImage -Path "D:\WindowsMountDir\Windows_11_PowerShell" -ImagePath "D:\WindowsImages\Windows 11 2.vhdx" -Index 1
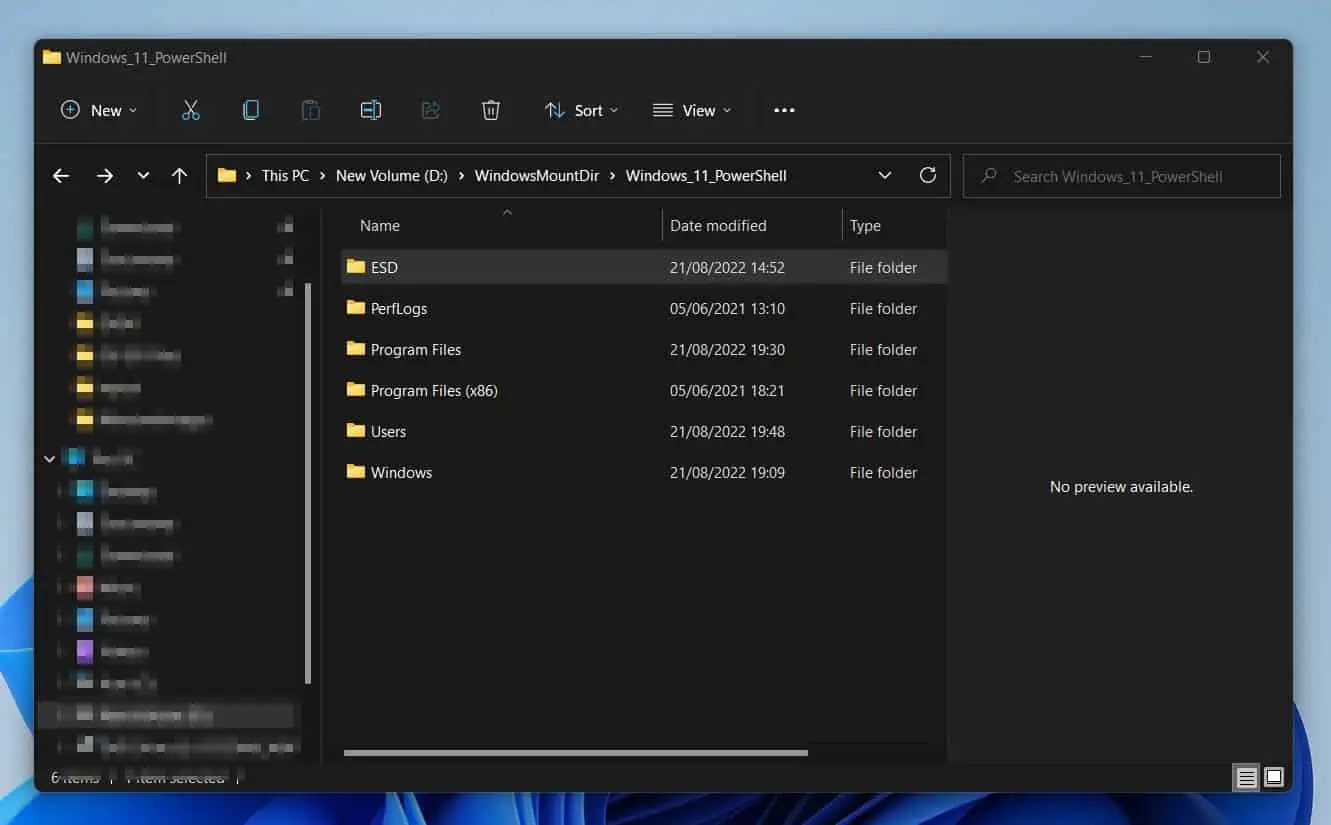
When the command completes, the image will be mounted in the folder you specified in the -path parameter. In my example, PowerShell mounted my VHDX in D:\WindowsMountDir\Windows_11_PowerShell folder.
If you open the folder you mounted the Windows image, it will look like a standard installation folder in a Windows installation.
Frequently Asked Questions
The DISM tool is used to service a running or image Windows image file.
To mount an image in Windows, follow the steps below:
i) Get the index of the image you want to mount. To get the index of an image with DISM, run the command below:
DISM /Get-WimInfo /WimFile:
You may also get the index of an image you wish to mount by running the PowerShell command below:
Get-WindowsImage -ImagePath
ii) From the result of the command above, note the index number of the Windows image
iii) Create a folder to mount the Windows image
iv) Copy the WIM, VHD, or VHDX file to another folder
v) Finally, mount the Windows image, and run one of the commands below:
DISM /Mount-image /imagefile:D:\WindowsImages\install.wim /Index:6 /MountDir:”D:\WindowsMountDir\Windows_11_DISM” /optimize
OR
Mount-WindowsImage -Path “D:\WindowsMountDir\Windows_11_PowerShell” -ImagePath “D:\WindowsImages\Windows 11 2.vhdx” -Index 1
I have boldened the texts in the commands you need to modify.
DISM has a lot of command line options. But the primary command-line options for servicing Windows images are /Online and /Image command-line options.
Use the /Online option if you wish to service a running Windows Operating System. However, use the /Image command-line option to service an offline Windows image.
To get additional options for the /Online and /Image switches, run the command below:
DISM /Online /?
OR
DISM /Image: /?
Not all DISM commands may require your computer to be connected to the internet. However, some may require your computer to be connected to the internet because DISM may need to download the latest files from Windows update.
Definitely, you can run most DISM commands and continue using your computer while the command is running.
Conclusion
Before you can service an offline Windows image – WIM, VHD, or VHDX – you must first mount the image. Then, after servicing the image, you can perform tasks on the mounted Windows image.
When you finish servicing the image, you must run the DISM /Unmount-image with either the /commit or /discard switch to save or discard the changes you made to the image.
This guide discussed the steps to mount an offline Windows image with either DISM or PowerShell, and I hope you found the guide helpful! If you found the article helpful, click on “Yes” beside the “Was this page helpful” question below.
You may also express your thoughts and opinions by using the “Leave a Comment” form at the bottom of this page.
Finally, for more Windows Command guides, visit our Windows Command Prompt Guides page.