Do you want to create virtual machines and run other operating systems within Windows 11? Enabling virtualization in Windows 11 will allow you to do this and this article walks you through the steps.
Step 1: Review the Windows 11 Virtualization Requirements
I already hinted above that you need to enable the virtualization feature on your PC’s UEFI or BIOS. Then, you’ll enable the virtualization option within Windows.
However, not all Windows 11 versions support virtualization. To install this optional feature, you must have Windows 11 Pro or above.
Here is a summary of the requirements your PC must meet before you can enable virtualization in Windows 11:
- Your PC must support Intel VT (Intel Processors) or AMD-V (for AMD processors)
- The processor must be 64-bits and must support Second Level Address Translation (SLAT)
- You should have a reasonable RAM (8 GB RAM recommended)
- You must be running Windows 11 Pro or above
Step 2: Check if Your PC’s Processor Supports SLAT
My introduction outlined the requirements for enabling virtualization in Windows 11. One of the requirements is that the PC’s processor must support Second Level Address Translation (SLAT).
So, before you check that your PC’s processor supports Intel VT (Intel Processors) or AMD-V (for AMD processors), follow the steps below to check whether the processor supports SLAT.
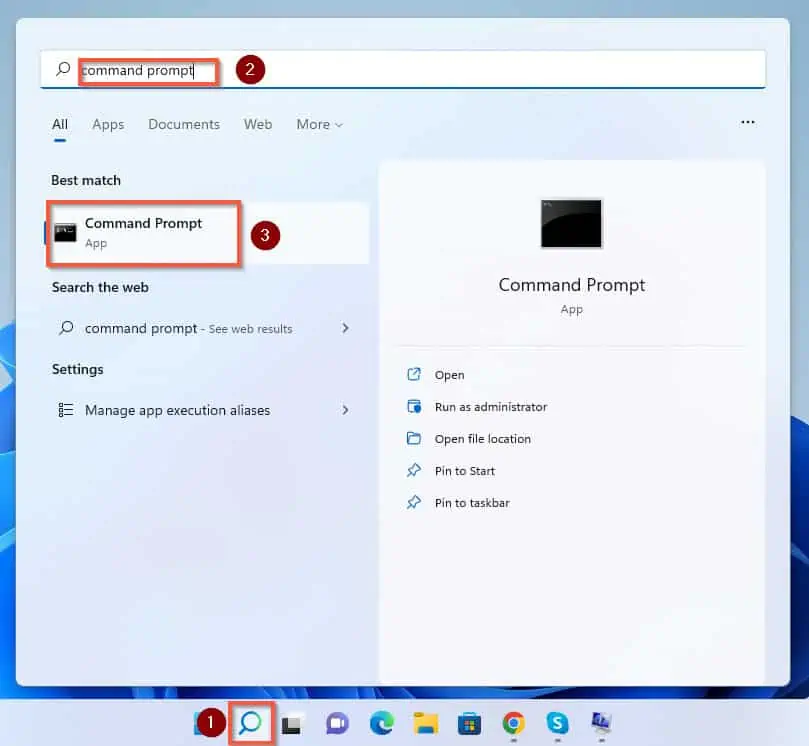
- Click the search icon on your Windows 11 PC. Then, on the search box, type cmd and open Command Prompt from the search results.
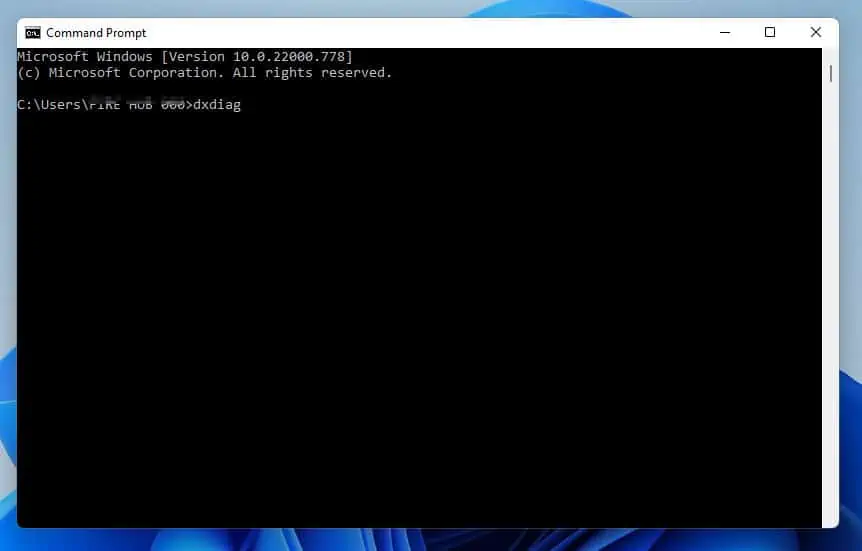
- When the Command Prompt opens, type the command below and press enter.
systeminfo
The above command will display a set of information. Scroll through to the “Hyper-V Requirements” section. If your PC’s processor supports SLAT, the Second Level Address Translation should show “Yes.”
If the processor on your PC supports SLAT, proceed to the next step. Otherwise, you need to get a PC that supports this feature.
Step 3: Enable Virtualization in Your PC’s UEFI or BIOS
This section involves two steps. In the first sub-section below, I will walk you through the steps to re-boot your PC to UEFI or BIOS.
Then, in the second sub-section, I provided additional information you need to enable virtualization in your PC UEFI or BIOS. The information in this second sub-section is dependent on your PC manufacturer.
Step 1: Boot Your PC to UEFI or BIOS
If you’re already logged into Windows, follow the steps below to restart your computer. The steps will boot your computer directly to UEFI or BIOS.
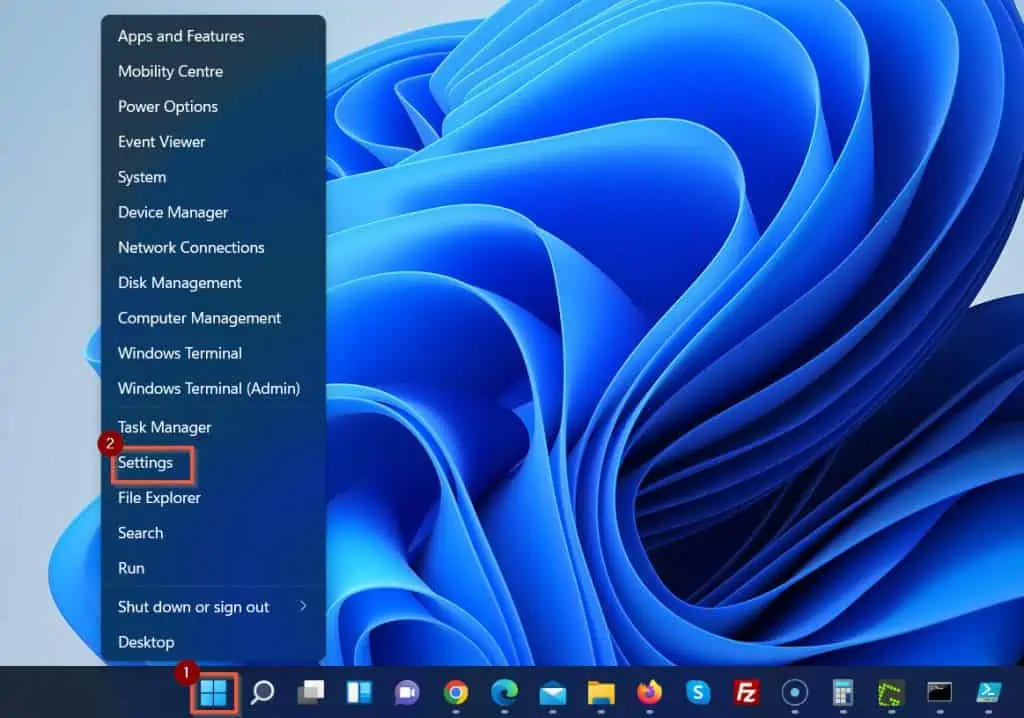
- Right-click the Windows Start menu. Then, from the displayed options, click Settings.
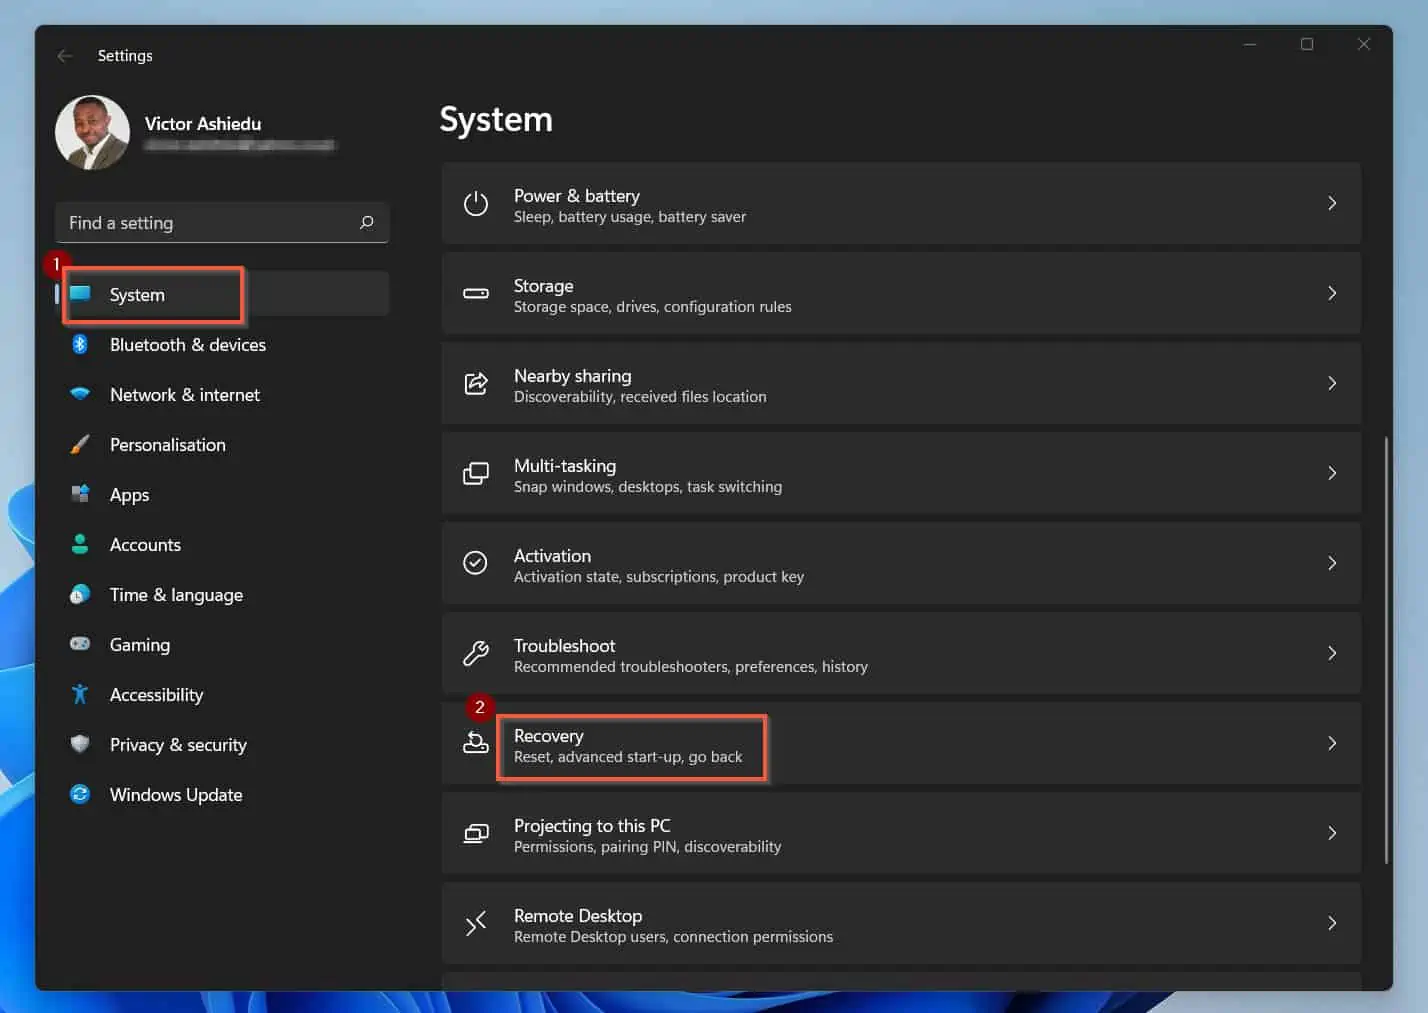
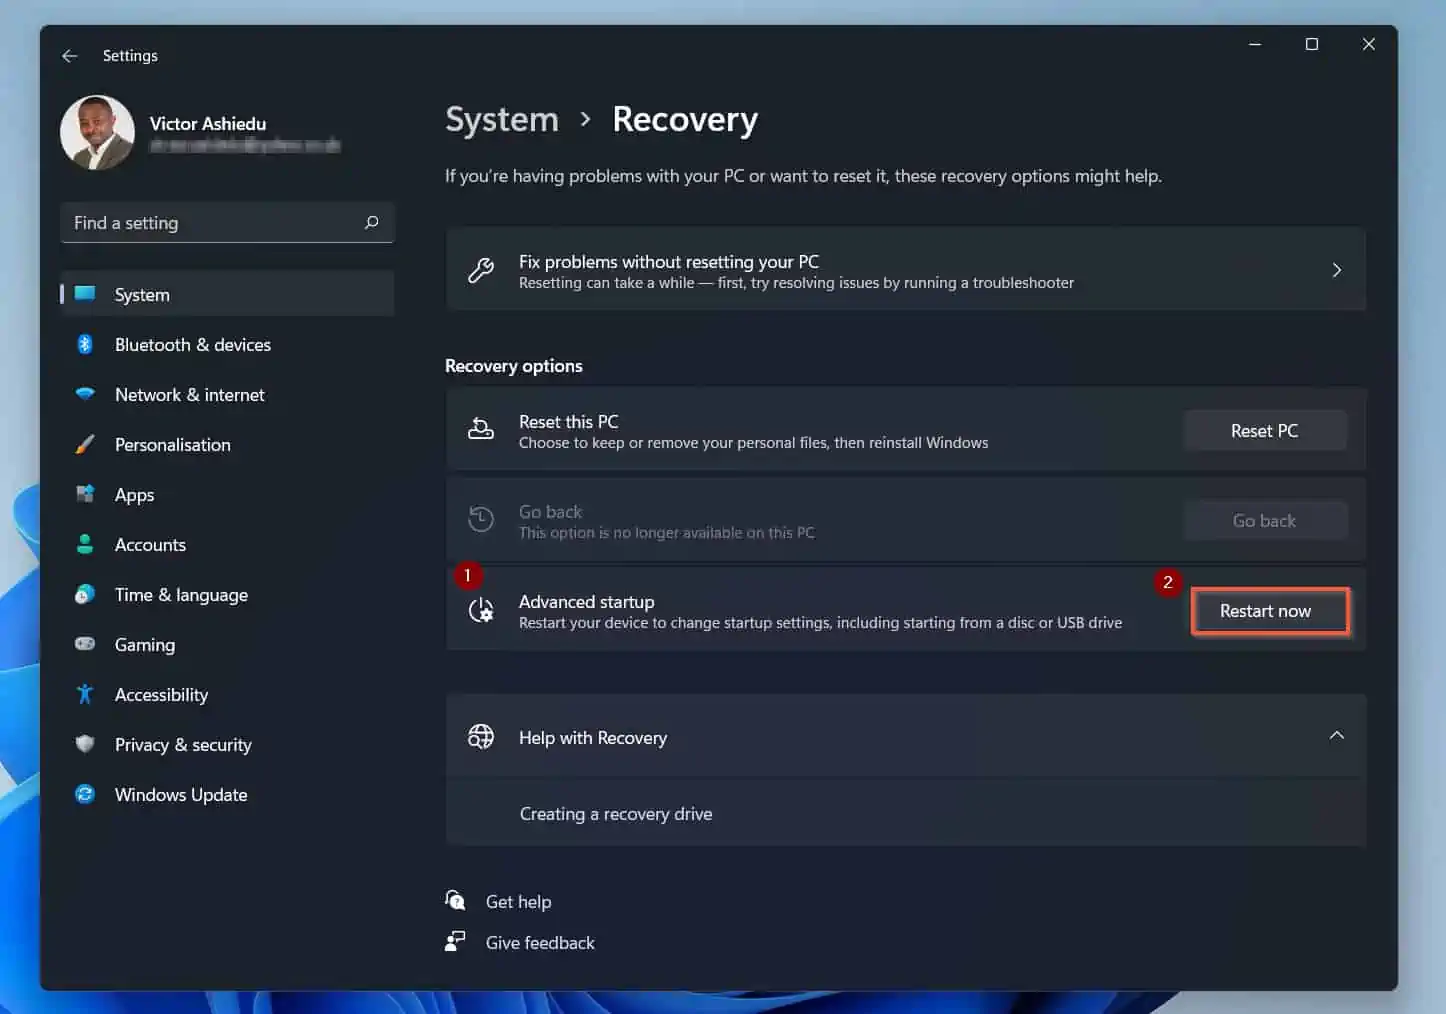
- In Windows Settings, click System on the left pane (selected by default). Then, scroll down the right pane and select Recovery.
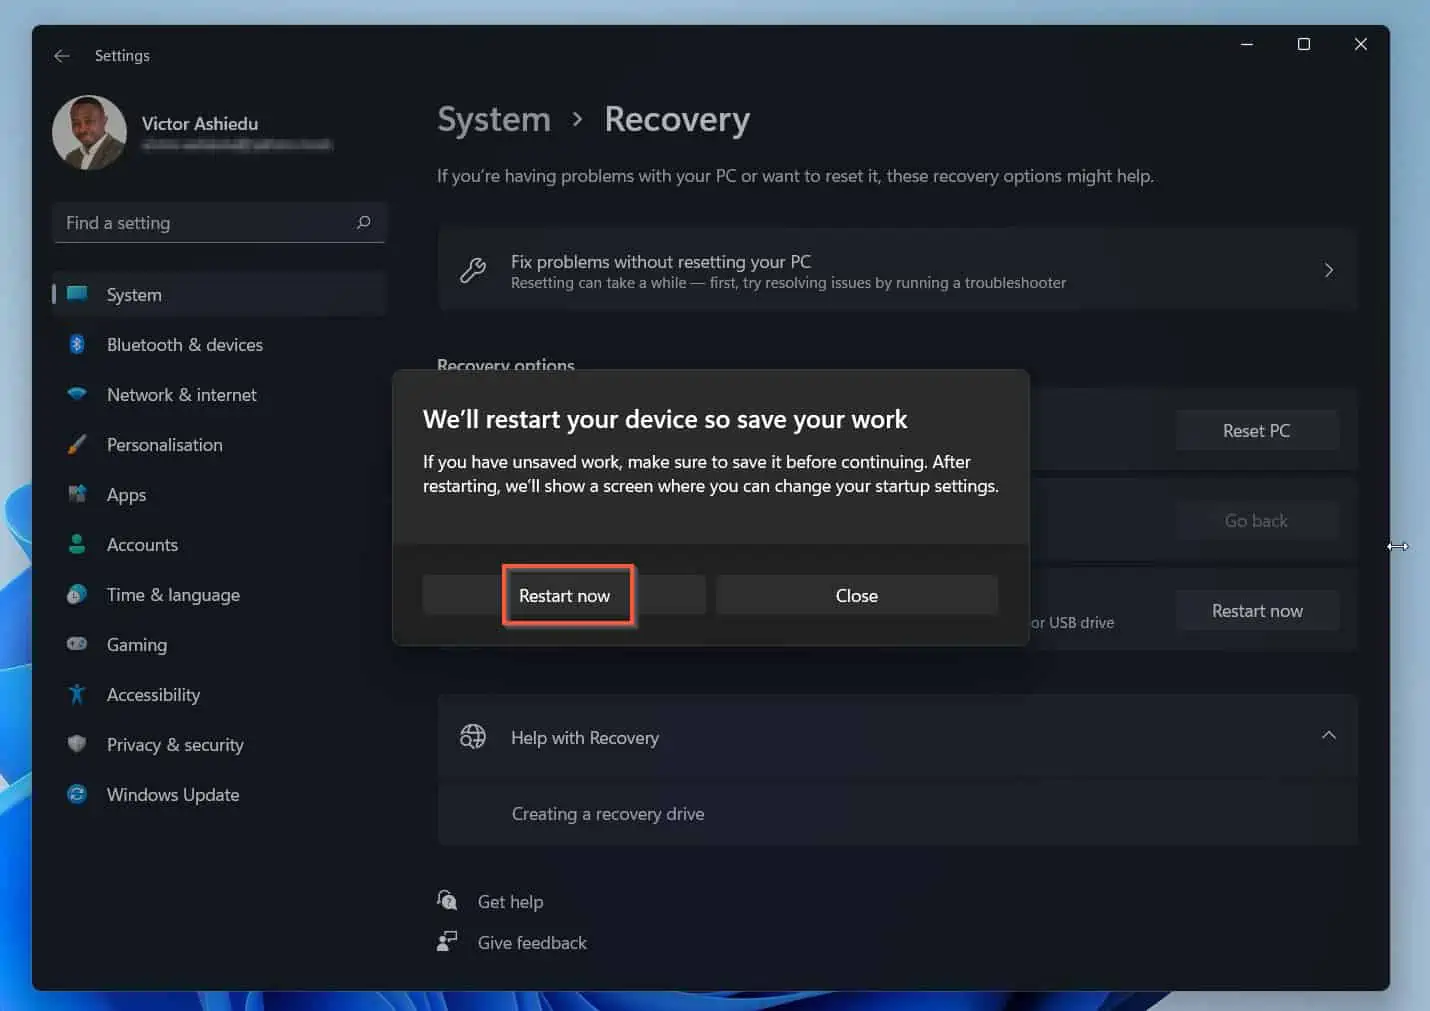
- Finally, on the Advanced startup, click Restart now, then confirm the restart action. To continue, see step 4.
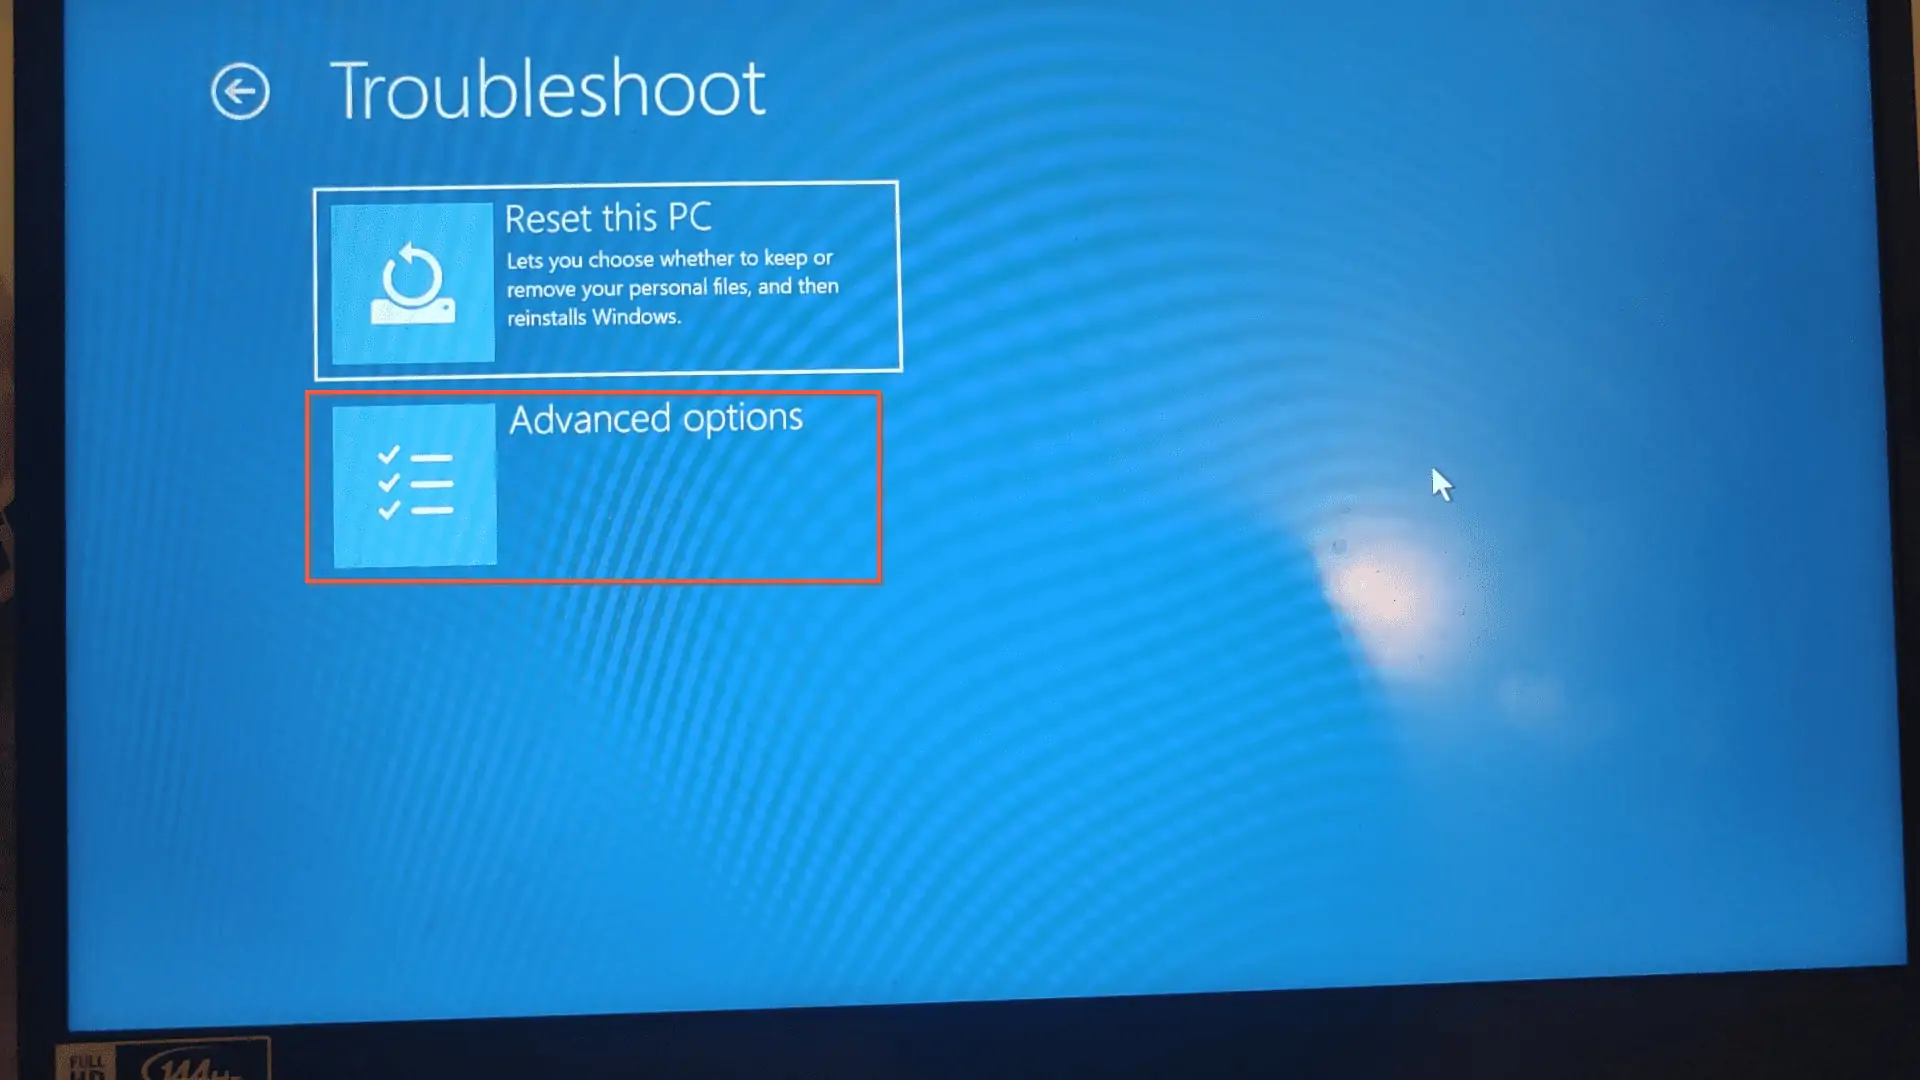
- Wait for your computer to display the screen below. Then, click Troubleshoot.

- Click Advanced options on the Troubleshoot page.
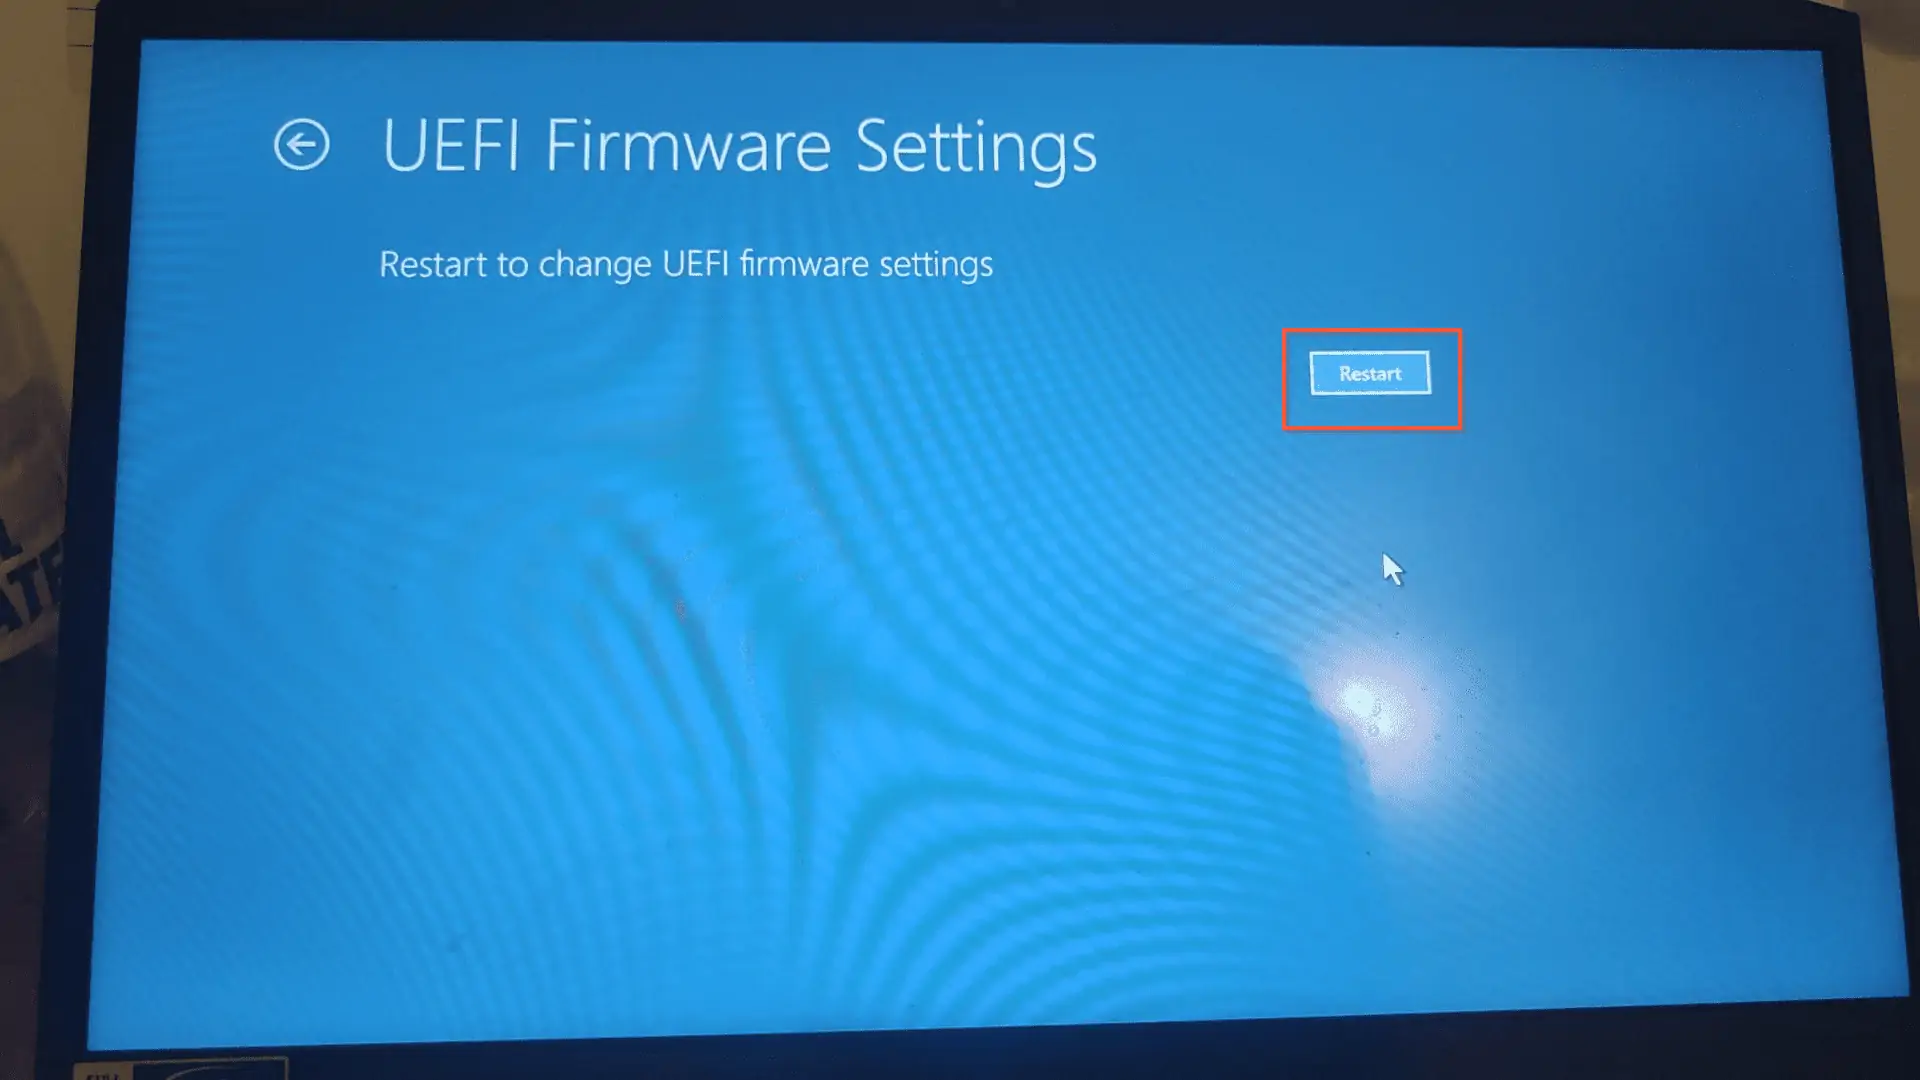
- Then, click UEFI Firmware on the Advanced options page.
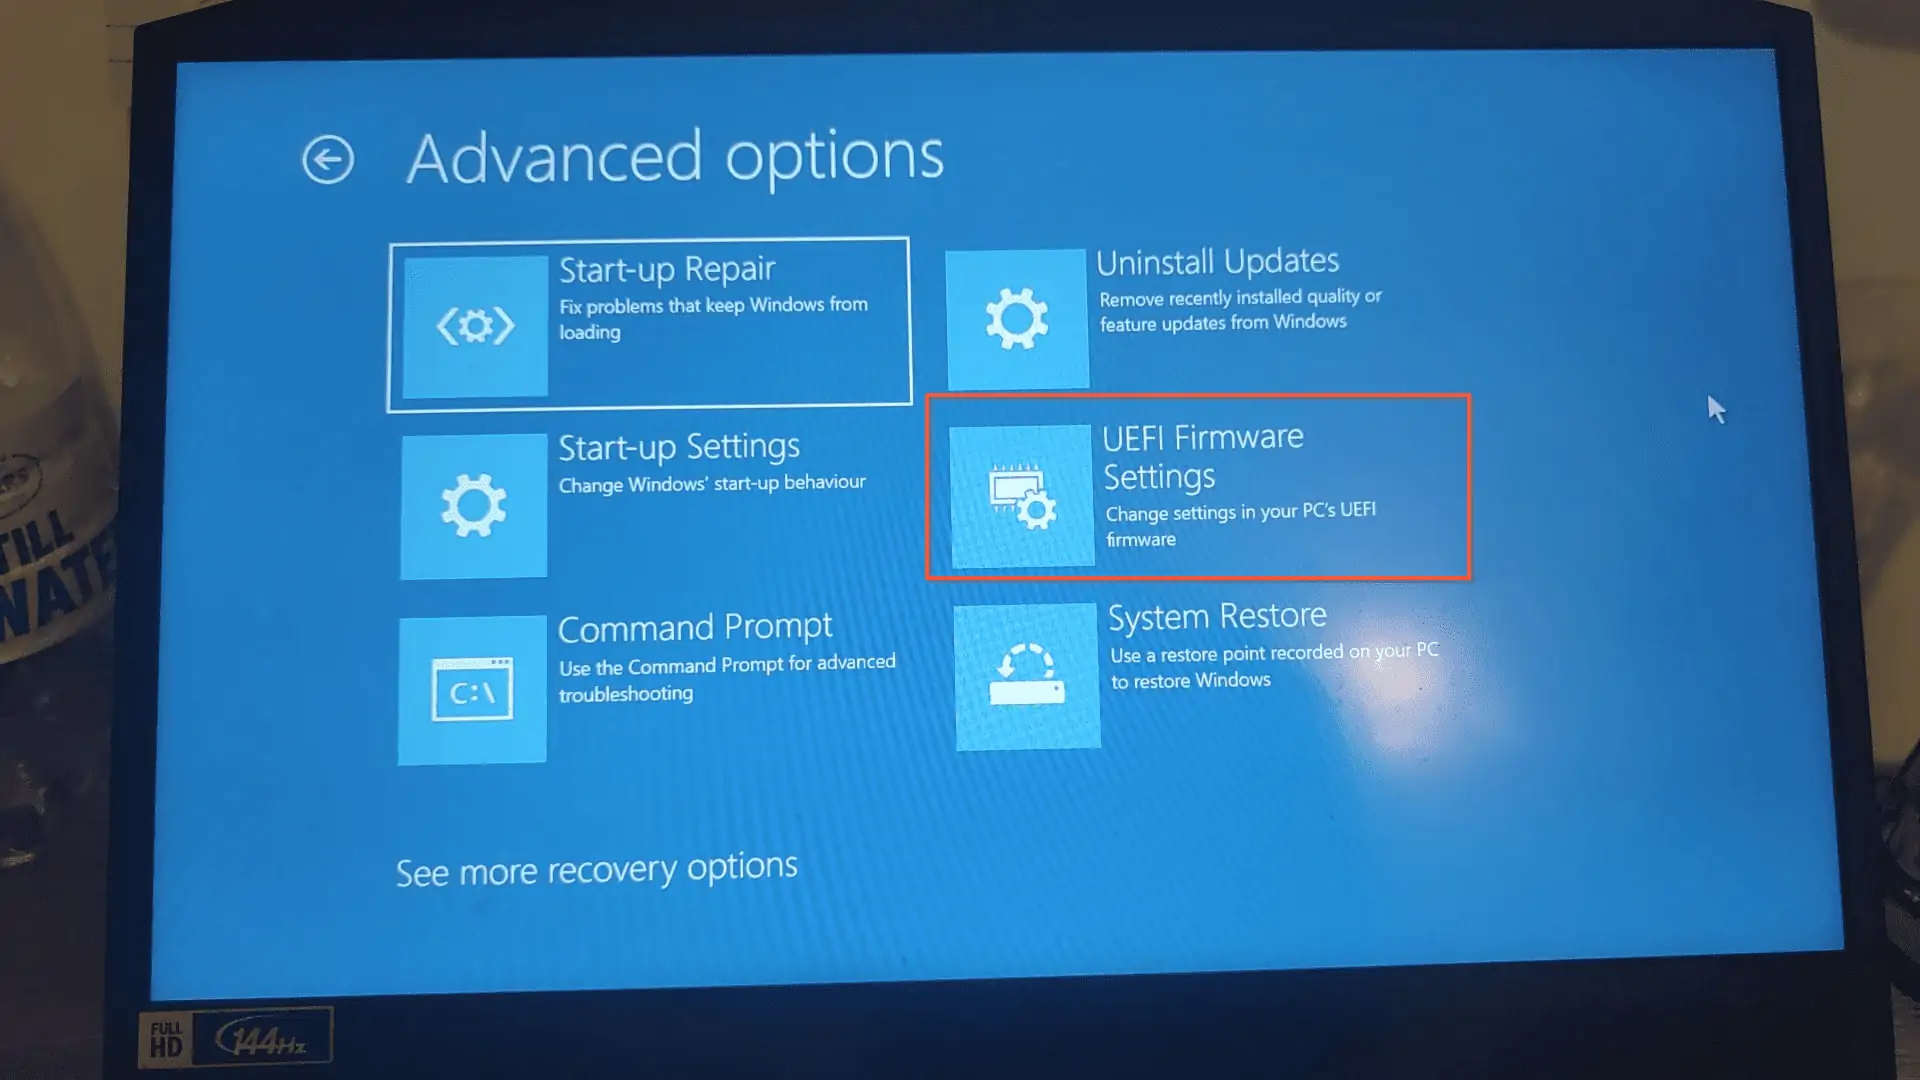
- Finally, click Restart to boot your computer to its UEFI or BIOS.
Step 2: Turn on Intel VT or AMD-V in Your PC’s UEFI or BIOS
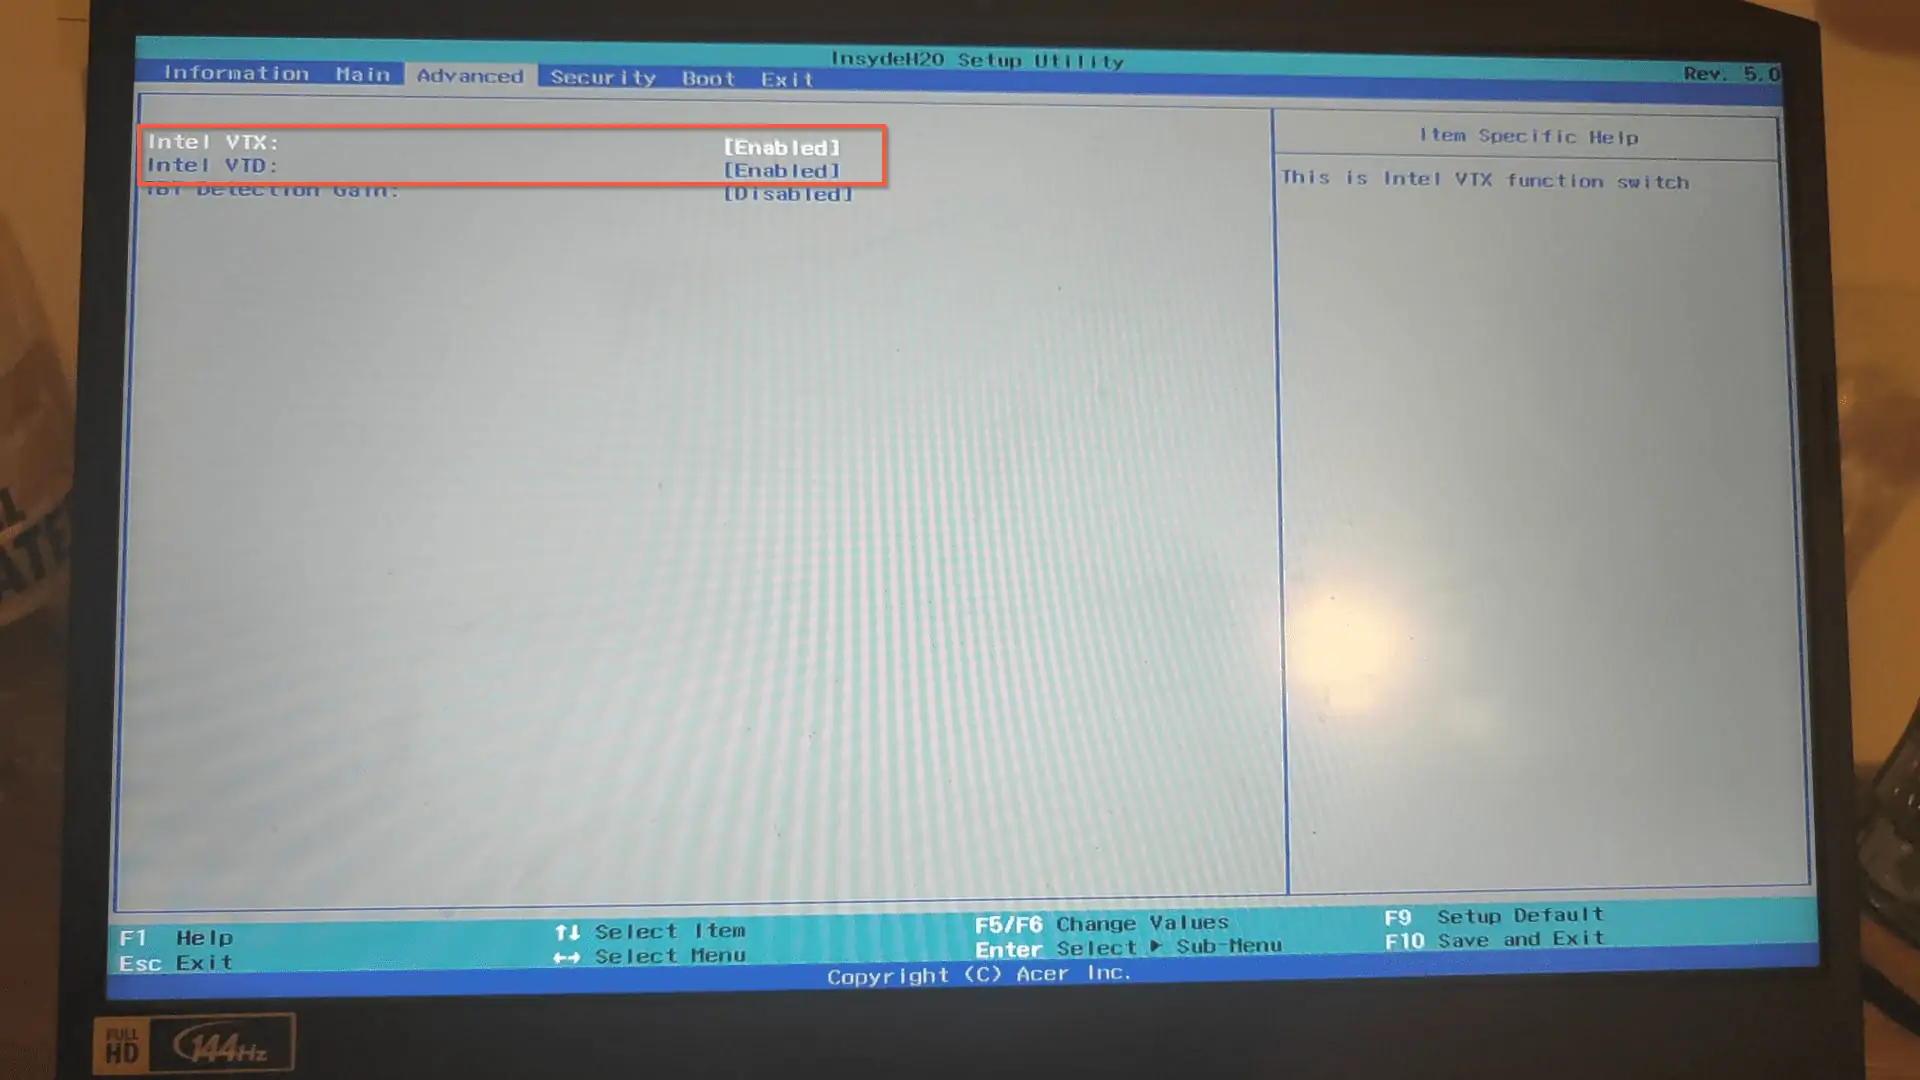
From this point, how you proceed will depend on your PC’s manufacturer. When the BIOS screen loaded for my Acer laptop, I navigated to the Advanced tab.
Then, I confirmed that the Intel VTX and Intel VTD were already enabled. This confirms that virtualization is enabled on my PC.
For links with details for your PC manufacturer, see the table below:
| S/N | PC Manufacturer | Relevant |
|---|---|---|
| 1 | Microsoft Surface | Virtualization is enabled by default on all Surface devices. |
| 2 | HP | HP PCs – Enable Virtualization Technology in the BIOS |
| 3 | Lenovo | How to enable Virtualization Technology on Lenovo PC computers |
| 4 | Dell | How To Enable or Disable Hardware Virtualization on Dell Systems |
| 5 | Acer | How to Enable Virtualization Technology on Acer Products |
| 6 | ASUS | For ASUS PCs with AMD processors: How to enable or disable AMD Virtualization (AMD-V™) technology For ASUS PCs with Intel processors: How to enable Intel(VMX) Virtualization Technology in the BIOS and How to enable or disable Intel® Virtualization Technology (VT-x) |
Step 4: Check that You Have Windows 11 Pro and Above
Before you can finally enable virtualization in your Windows 11 PC, you must confirm that you have Windows 11 Pro and above.
Follow the steps below to check your version of Windows 11:
- Right-click the Windows 11 Start menu and click Settings.

- To display your device’s specs, including the Windows 11 version, scroll down to the bottom of the System settings page and click About.
- Finally, in the Windows Specifications section, check that the Edition is at least Windows 11 Pro and above.

Step 5: Turn on Virtualization in Windows 11 (3 Methods)
As I already hinted earlier in this guide, there are three methods to enable virtualization in Windows 11. You can use any of the methods.
Method 1: Enable Virtualization from Control Panel
How to Enable Virtualization in Windows 11 from Control Panel
How to Enable Virtualization in Windows 11 from Control Panel
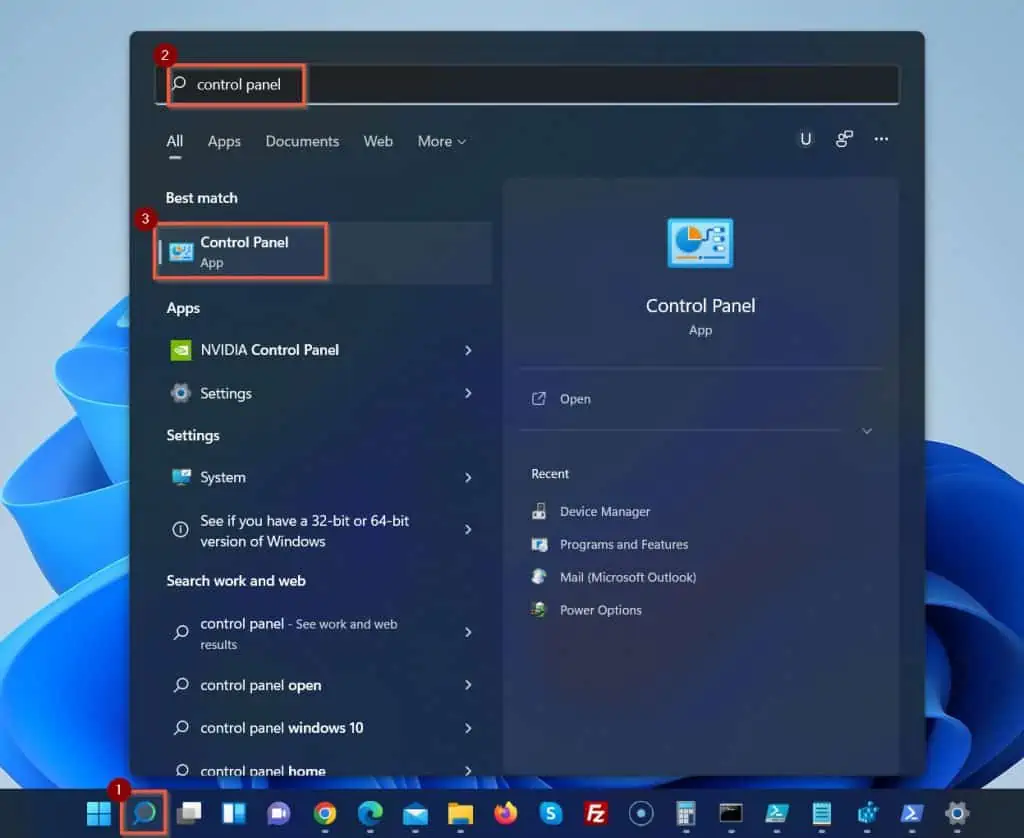
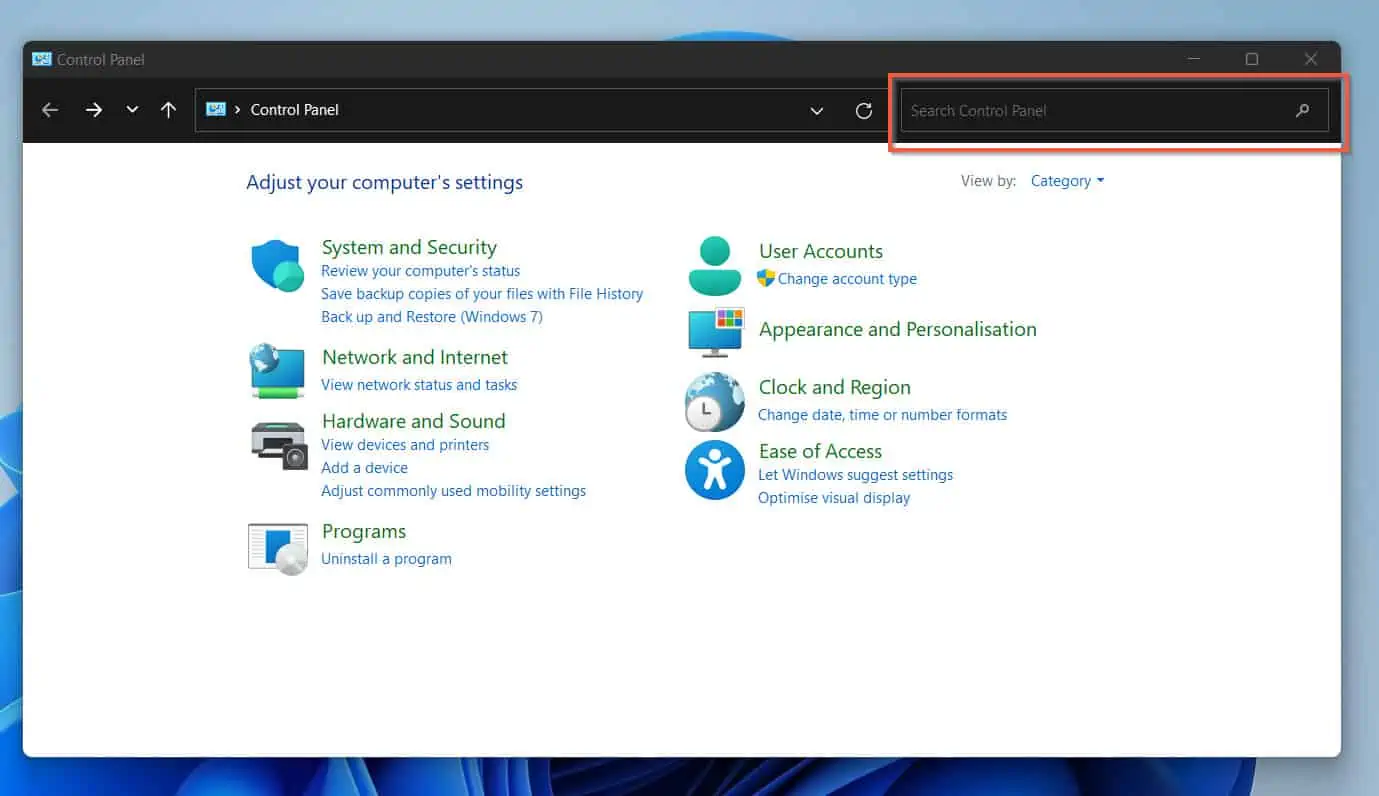
- Open the Windows 11 search tool, and type control panel.
Then, from the search results, click Control Panel.
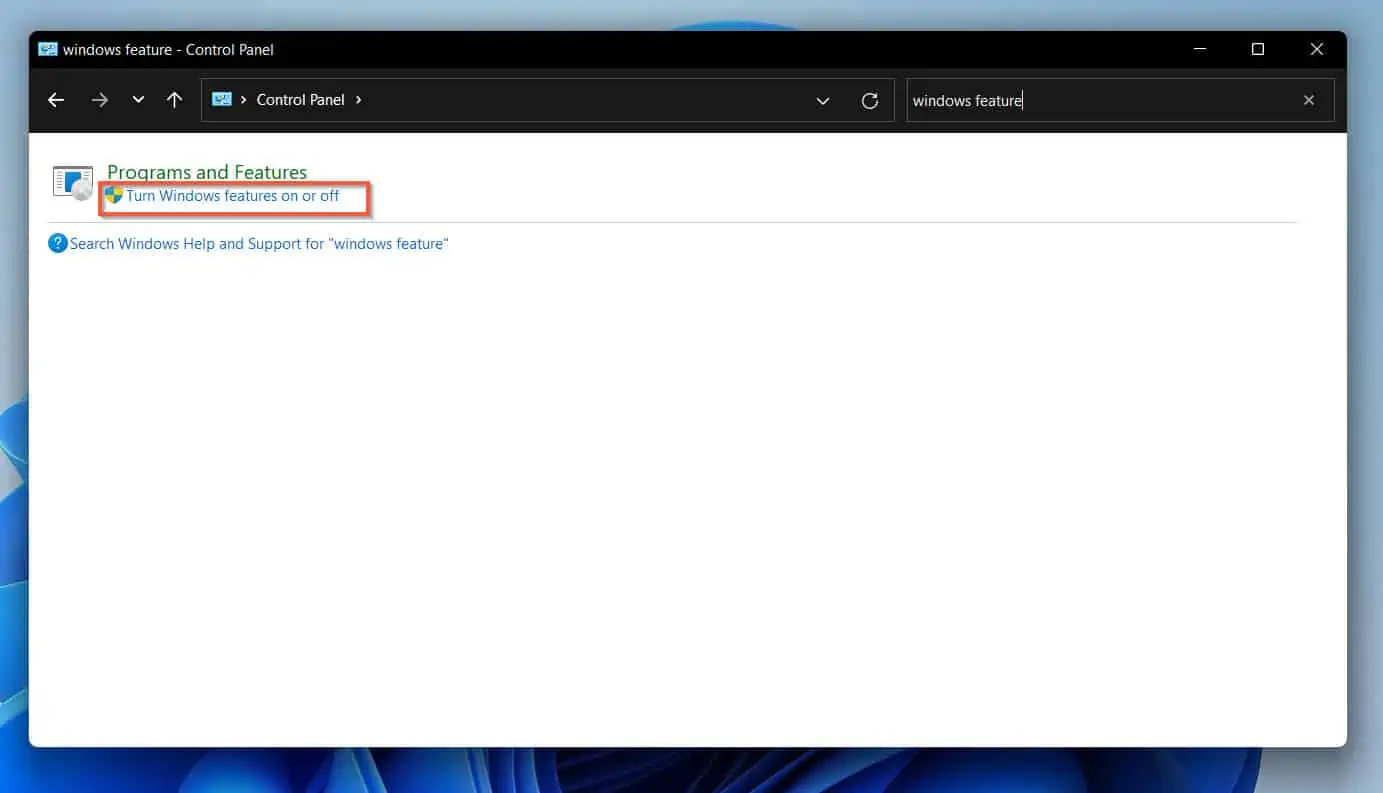
- When Control Panel opens, enter windows features in the search box. Then, click Turn Windows features on or off – see the second screenshot below.
When you click Turn Windows features on or off, a small pop-up window will open.
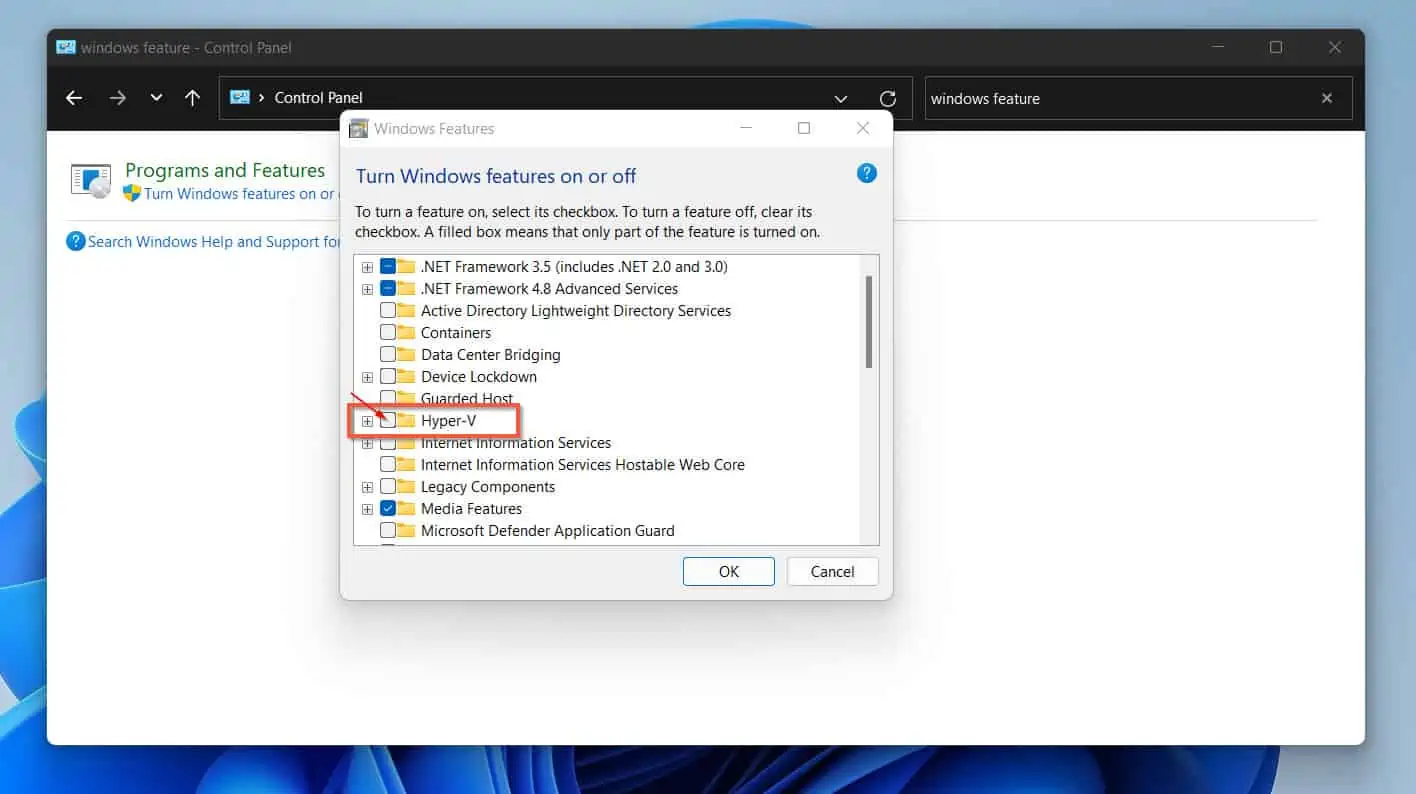
- Finally, check the box beside Hyper-V to enable virtualization in Windows 11 from Control Panel. Then, click OK.
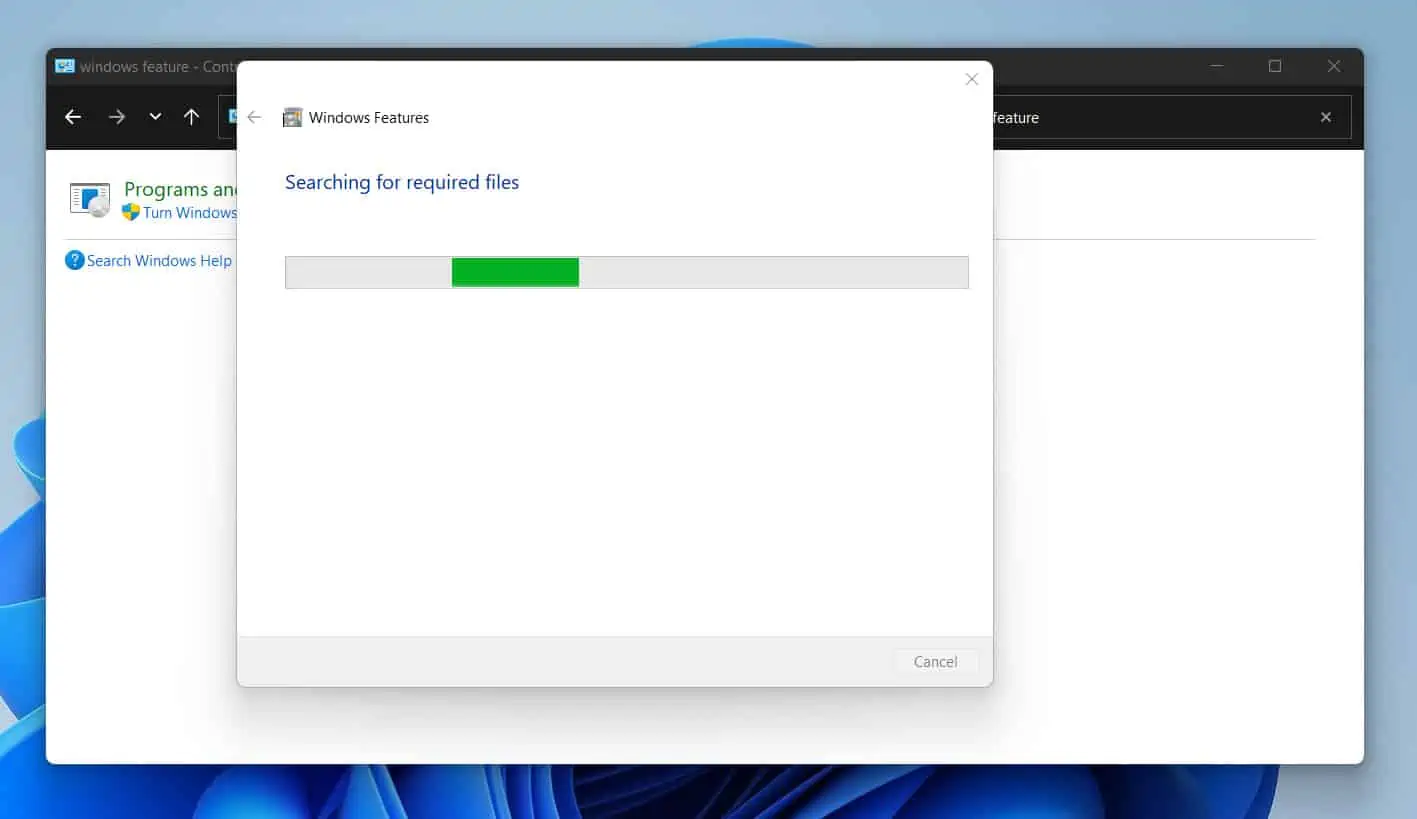
- Windows 11 will install the Hyper-V Windows optional feature. Then, prompt you to restart your computer.
Click the Restart now button to restart your computer – see the second screenshot below.
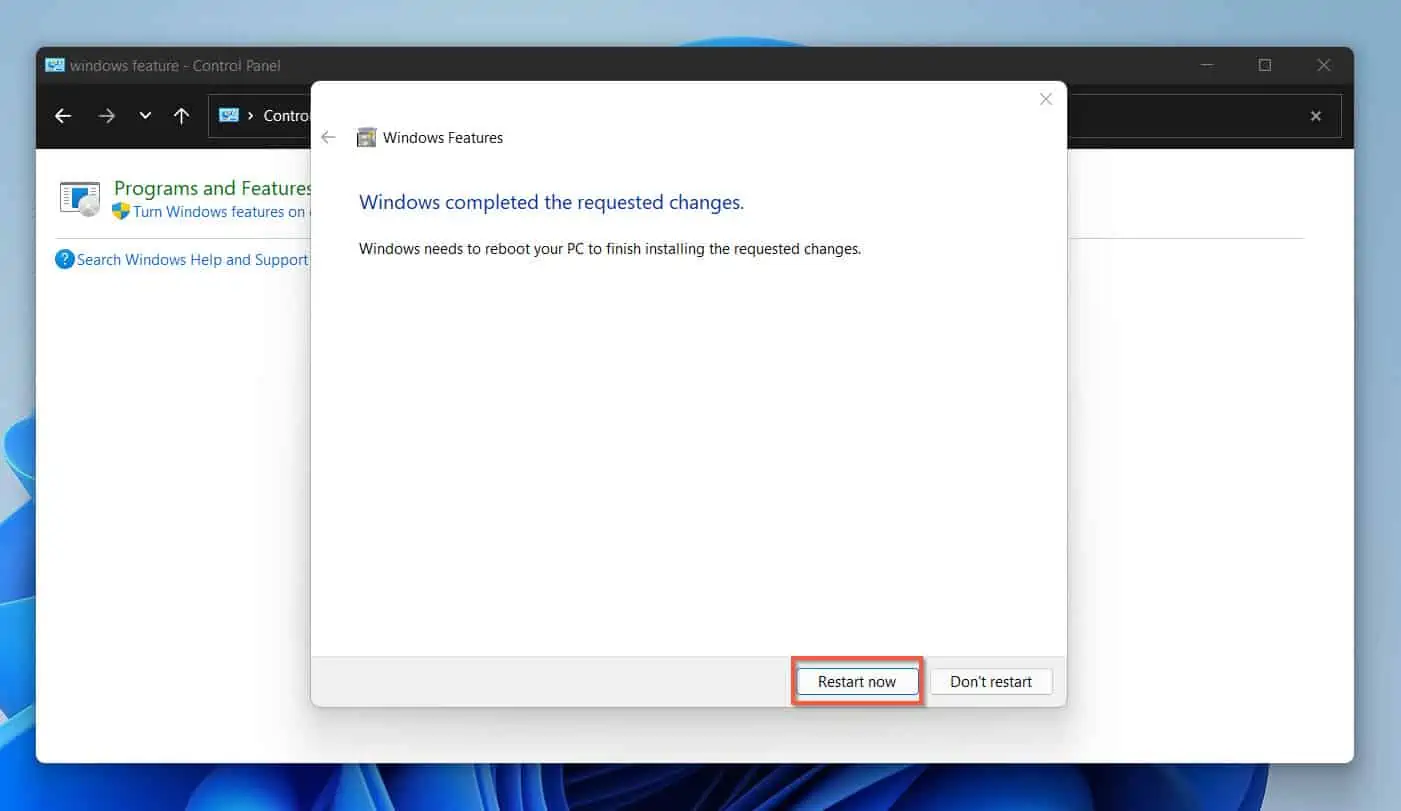
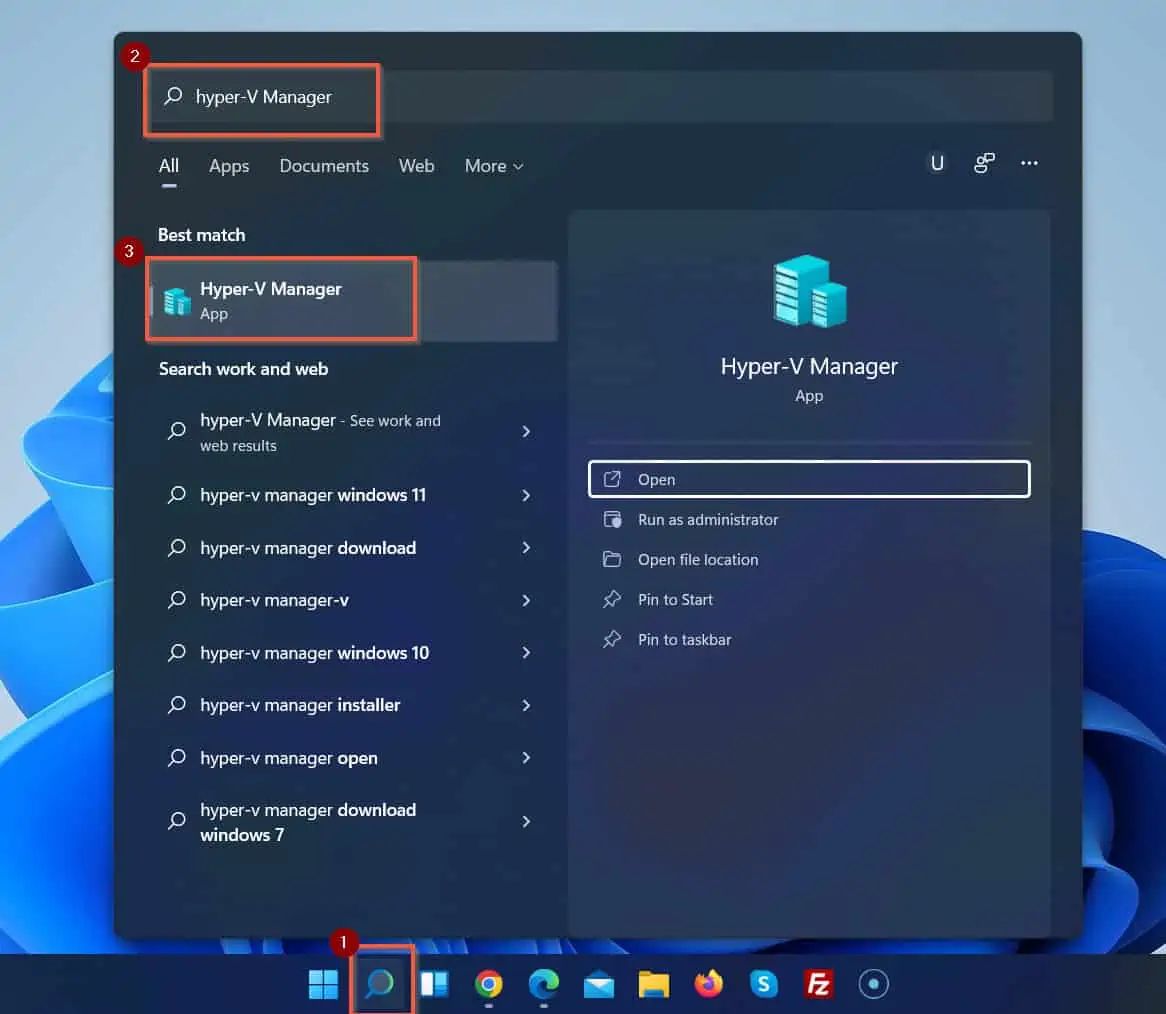
When your PC restarts, search Hyper-V Manager to confirm that you’ve enabled virtualization in Windows 11.
Method 2: Enable Virtualization with DISM Command
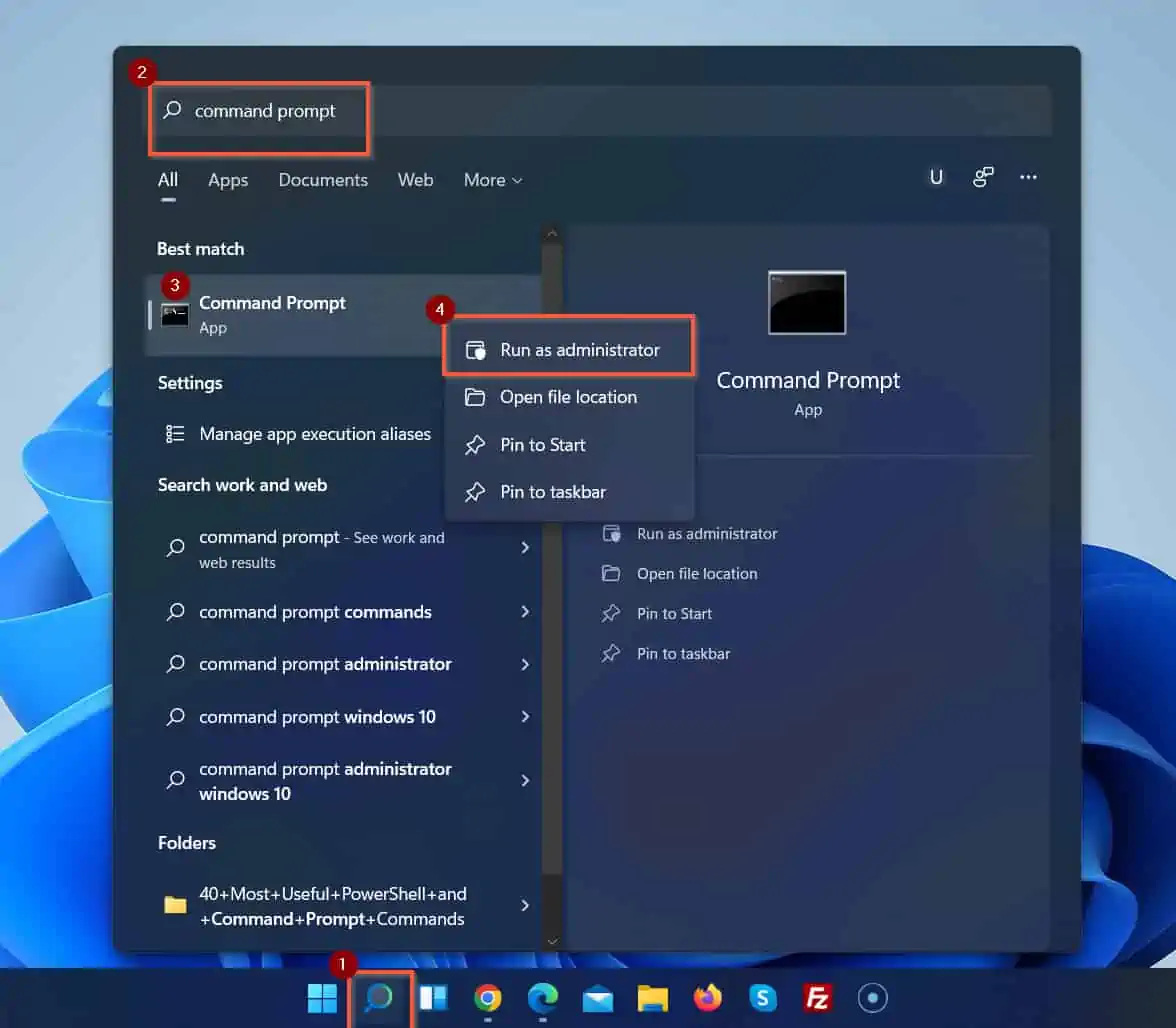
- Open the Windows 11 search box and type command prompt. Then, right-click Command Prompt and select Run as administrator.
Windows 11 will display the User Account Control pop-up window. Click Yes.
Then, the command prompt will open.
Your first task is to check if Hyper-V (enables virtualization) is installed in Windows 11.
- Copy and paste the command below into Command Prompt on the command prompt. Then, to run the command, press Enter key.
Dism /online /Get-Features | find "Microsoft-Hyper-V"
This command displays all available Hyper-V optional features.

In the next step, you will install Microsoft-Hyper-V-All optional feature. This will install Hyper-V and all required features.
- To install Hyper-V and all required features, copy and paste the command below into Command Prompt. Then, press Enter on your keyboard.
Dism /online /Enable-Feature /FeatureName:Microsoft-Hyper-V-All
If your computer is very fast, it should take seconds to complete the installation. Then, DISM will prompt you to restart your computer.
Before you perform step 4 below, ensure that you have saved your work. Windows 11 will not provide additional warnings. When you type Y on your keyboard, it restarts immediately.
- Enter Y on the command prompt to restart your computer.
When your PC restarts, search Hyper-V Manager to confirm that you’ve enabled virtualization in Windows 11.
Method 3: Enable Virtualization with PowerShell
- Open the Windows 11 search box. Then, enter powershell. Under the Best match result, Windows PowerShell will be selected.
On the details pane, click Run as Administrator.
Windows 11 will display the User Account Control pop-up window. Click Yes.
Then, Windows PowerShell will open.
When Windows PowerShell opens, your first task is to run a command that displays all available Hyper-V optional features.
- To display all Hyper-V windows optional features, copy the command below, paste it into PowerShell, and press Enter key.
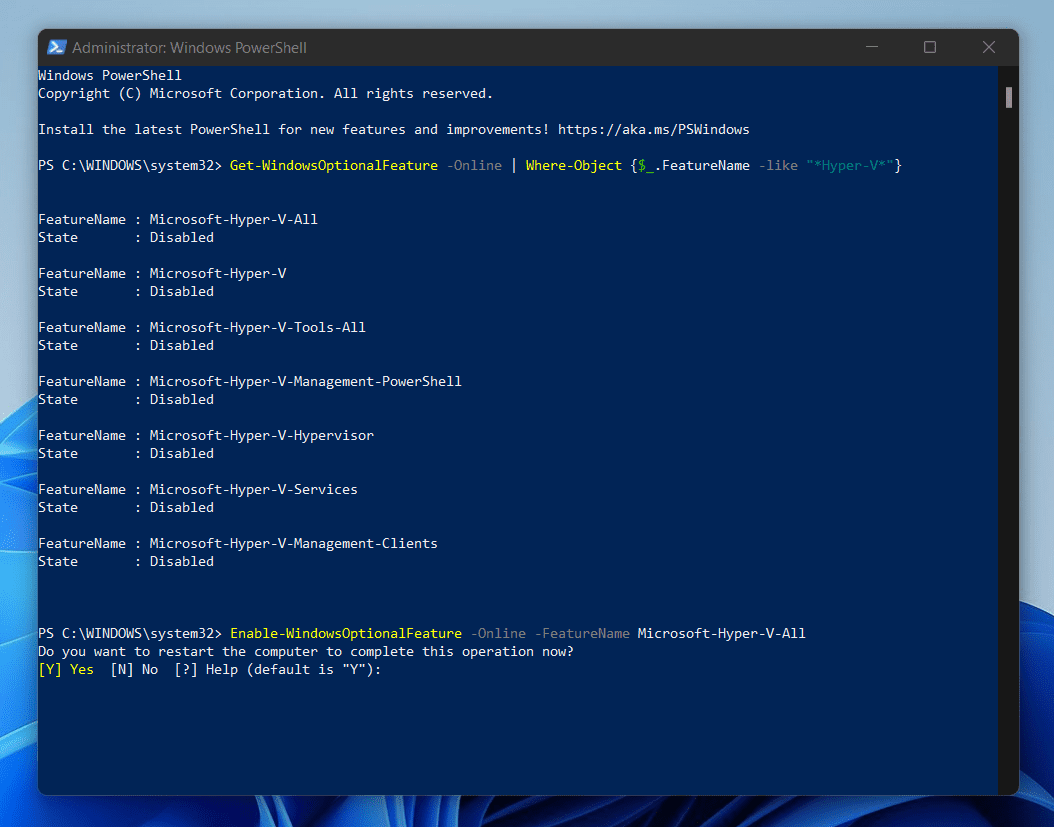
Get-WindowsOptionalFeature -Online | Where-Object {$_.FeatureName -like "*Hyper-V*"}
The last command will not only display the optional Hyper-V optional features, but it will also display their status. This is where PowerShell is better than DISM.
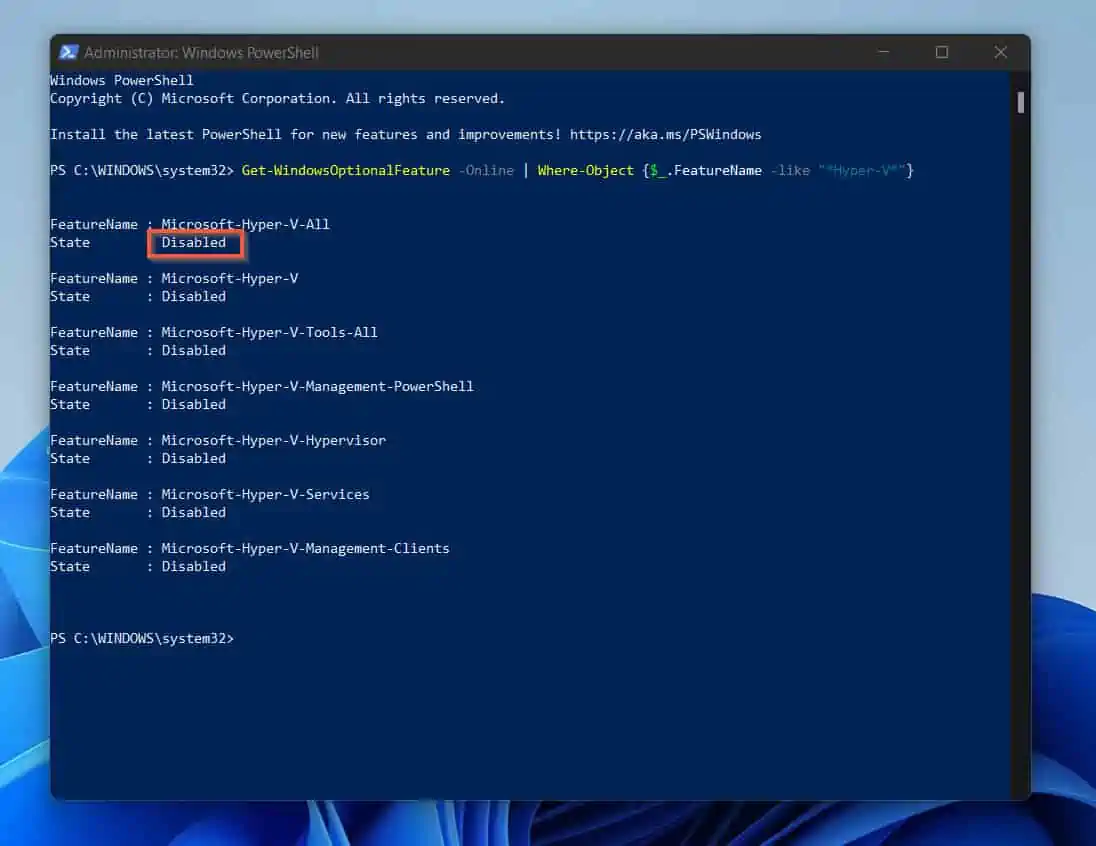
As you can see from the screenshot above, all Hyper-V windows optional features are disabled. This means that virtualization is NOT enabled in Windows 11.
- To enable virtualization In Windows 11 with Windows PowerShell, copy the following command. Then, paste it into PowerShell and press the Enter key.
Enable-WindowsOptionalFeature -Online -FeatureName Microsoft-Hyper-V-All
PowerShell should install the Hyper-V windows optional feature pretty fast. When it finishes, it will prompt you to authorize a restart.
To restart your computer immediately, press the enter key.
When your PC restarts, search Hyper-V Manager to confirm that you’ve enabled virtualization in Windows 11.
Frequently Asked Questions
Definitely, Windows 11 supports virtualization. However, not all Windows 11 versions support virtualization.
To enable virtualization in Windows 11, you must have Windows 11 Pro and above.
The fastest way to find out if virtualization is enabled in Windows 11 is to Run Powershell as administrator. Then, copy and paste the command below and press the enter key on the PowerShell prompt.
Get-WindowsOptionalFeature -Online | Where-Object {$_.FeatureName -like “*Hyper-V*”}
If virtualization is enabled, the command should show Hyper-V status as enabled.
You cannot enable virtualization in Windows 11 without enabling it in BIOS first.
Yes, it is safe to enable Intel VT in BIOS. However, unless you need to use your computer as a virtual machine host, there is no need to enable Intel VT in BIOS.
Virtualization does not affect gaming in any way. Rather, virtualization is a technology that enables you to use your computer to create and host virtual machines.
Conclusion
Enabling virtualization in your Windows 11 PC is a great way to create multiple virtual “computers” on your PC. One benefit of doing this is that it gives you the ability to run tests in a test environment.
Apart from testing programs, different users have different reasons for wanting to enable their Windows 11 PC to host virtual machines.
This is your go-to guide, no matter your reason for wanting to enable virtualization in Windows 11.
I hope you found this Itechguide straightforward and useful. If you found this guide valuable, share your experience with us using the comments form at the bottom of this page.
Alternatively, you can respond to the “Was this page helpful?” question below.
Finally, for more Windows 11 Itechguides, visit our Windows 11 How-To page. You may likewise find our Windows 10 How-To guides valuable.


